Scan to FTP
Scanned documents can be sent to a folder defined on an FTP server.

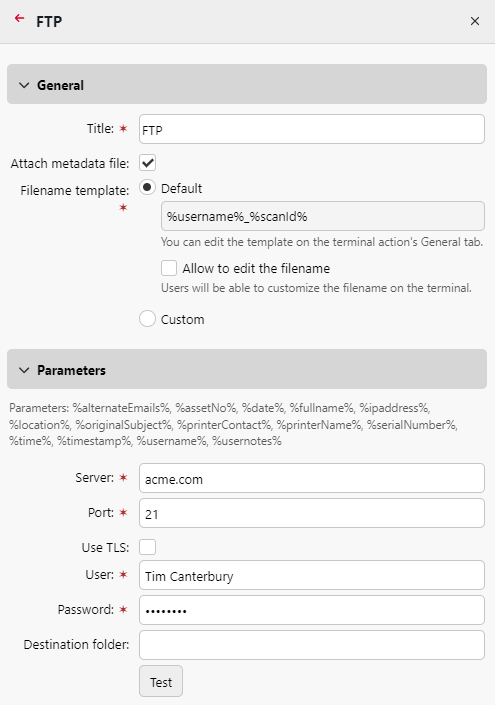
Setting the connection in the Parameters section:
Server: Enter the IP address or hostname of the FTP server
Port: Enter the port used for the FTP protocol, the default port is 21
Use SSL: Select if you want to use secure communication
User: Name of the user with an account on the server
Password: The user's password
Destination folder: You can specify the subfolder where the outgoing scan files will be stored (optional).
You can use the following parameters when defining the destination folder:
%username%: User name of the user session owner
%fullname%: Full name of the user session owner
%date%: Date and time when the scan was taken
%originalSubject%: The default subject set on the printing device
%ipaddress%: IP address of the printing device
%scanId%: Unique scan identification number generated on the MyQ server
After you fill the required parameters, you can click Test to test the FTP connection. MyQ tries to upload a dummy file named rightsCheck.dat to the defined destination folder under the defined user name and password, and informs you about the result.
.png)