.png)
Scan to RightFax
Learn how to integrate RightFax with MyQ, configure code books for contact lookup, and enable users to send a fax to RightFax contacts and contact groups with Easy Scan.
Define a Connection to RightFax
Go to MyQ > Settings > Connections in the MyQ Web Interface.
Click +Add and select RightFax from the menu.
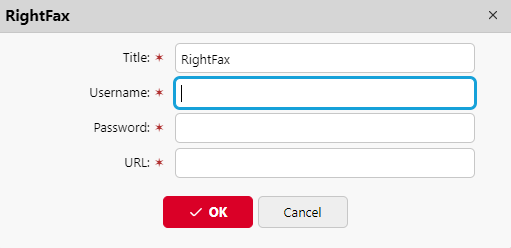
Enter a Title that identifies the connection, and provide your RightFax administrator Username, Password, and URL in the form
<protocol>://<hostname>/rightfax/api.
In most cases, a single RightFax connection is enough. However, you can define more than one, for example for testing purposes.
Customize the RightFax Code Books
For each registered connection to RightFax, two code books are automatically generated:
RightFax Phonebook
RightFax Phonebook Groups
You can create multiple RightFax code books and use them in different terminal actions.
Code Book Parameters
Only Title, Server, and Authorization are used for phonebook groups.
Title
Enter a name to identify the code book.Server
Select the RightFax connection to use.Type
Select whether to include Private or Shared contacts in the phonebook.Name
Control what appears under the Name field on the terminal. Select from:Contact Name (default)
Contact Name (Company)
Description
Control what appears under the Description field on the terminal. Select from:Company Name (default)
Fax Number
Authorization
Specify the user whose contacts you want to provide in the code book.Logged in user (default)
This loads the contacts of the RightFax user who is logged in to the terminal.Custom
Specify a custom user whose phonebook will be used.
Note: If Type is set to Shared, all shared contacts are available, regardless of which authorization method is used.
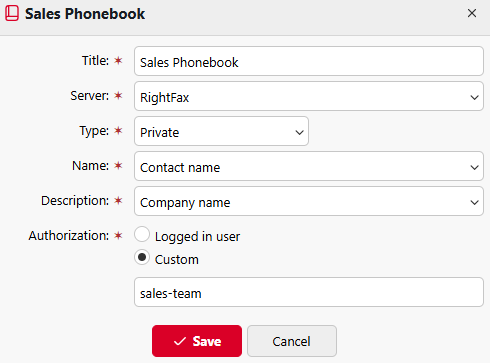
In the example below, sales-team is an account in the connected RightFax instance. When this code book is used as an Easy Scan destination, terminal users can send a fax to contacts of the sales-team only. Also, when selecting contacts, users will see the contact name and company, but not the contact fax number.
Set RightFax as an Easy Scan Destination
After you have created the RightFax connection and customized the code books, you are ready to add RightFax as an Easy Scan destination.
Open the properties panel of an Easy Scan terminal action.
In the Destinations tab, click +Add, and select RightFax.
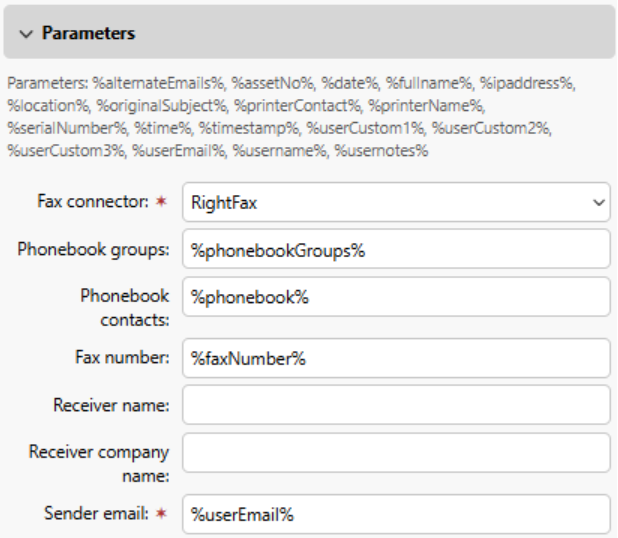
This step automatically adds Fax number, Phone book and Phonebook groups to the terminal action Parameters.Configure the RightFax parameters. You can assign each parameter to a global variable, or define a new parameter and assign it in the Parameters of the terminal action.
Fax number
The receiver fax number. This appears on the fax under To:/Fax:Sender email
The RightFax user email, which appears on fax under From:Receiver name and Receiver company name are not assigned by default. If you map values to these parameters, they appear on the fax under To: and Company:.
Click +Add to save.