.png)
Scan to eGoldFax
To scan to eGoldFax you need to first set up a connection to your eGoldFax service.
Connecting to eGoldFax must be enabled as an extra feature in config.ini. The parameter is eGoldFax. We recommend consulting with MyQ support before editing the config.ini file.
Setup a Connection Between MyQ and eGoldFax
Open the Connections settings tab of the MyQ Web Interface (MyQ, Settings, Connections).
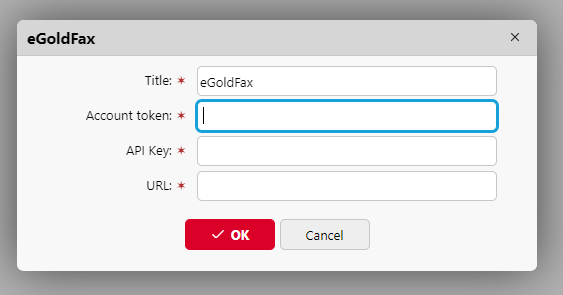
Click +Add and select eGoldFax from the menu.
Add a title identifying the connection, and your Account token, API key, and URL from eGoldFax.
Create and Set the eGoldFax Destination
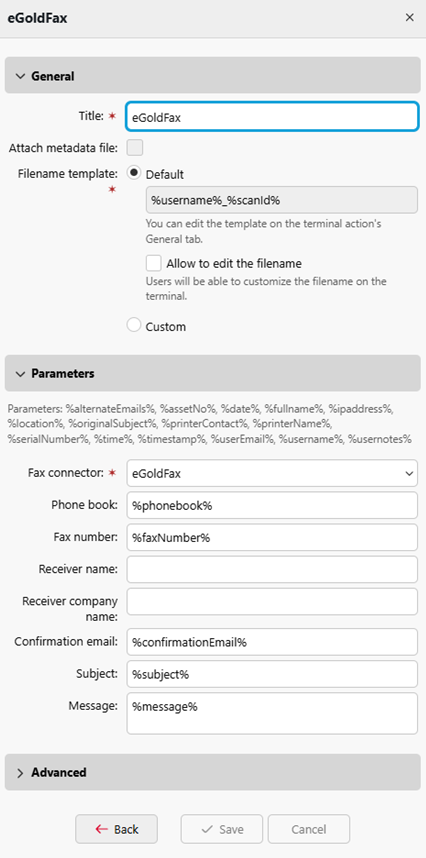
Create a new destination (edit or create an Easy Scan terminal action; on its properties panel, in the Destinations tab, click +Add, select eGoldFax).
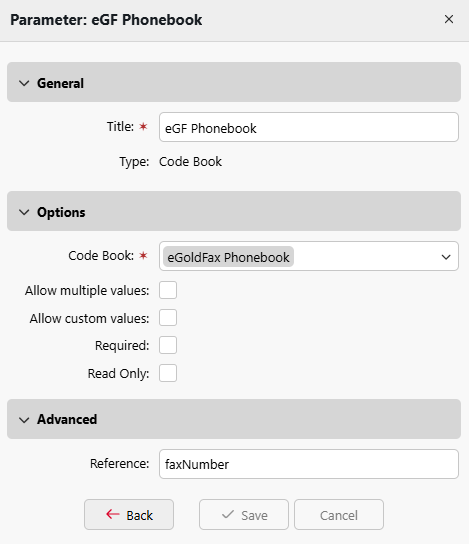
eGoldFax Code Book
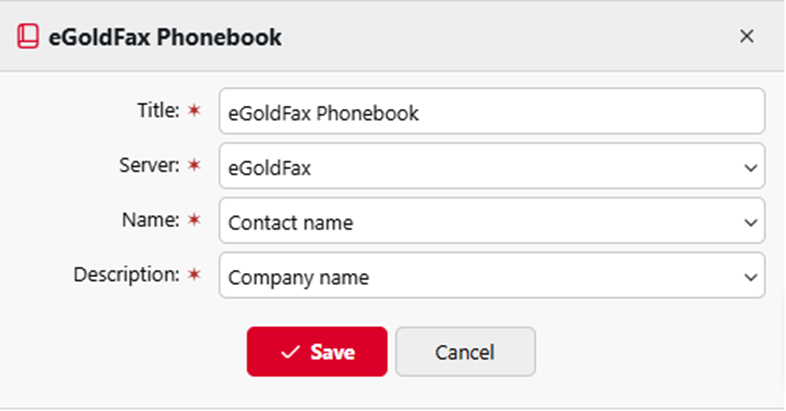
When eGoldFax is connected to MyQ, a Code Book is automatically created called eGoldFax Phonebook. In MyQ>Settings>Code Books you can edit the Code Book Title, and Server (if multiple instances of eGoldFax are connected).
You can set the Name display to Contact name or Contact name (Company name) and the Description to Company name or Fax number, this will be visible on the Embedded Terminal when scanning to a contact from the Code Book.
This Code Book can be added as a Parameter to the eGoldFax Easy Scan destination, allowing users to select contacts from the eGoldFax phonebook at an Embedded Terminal.
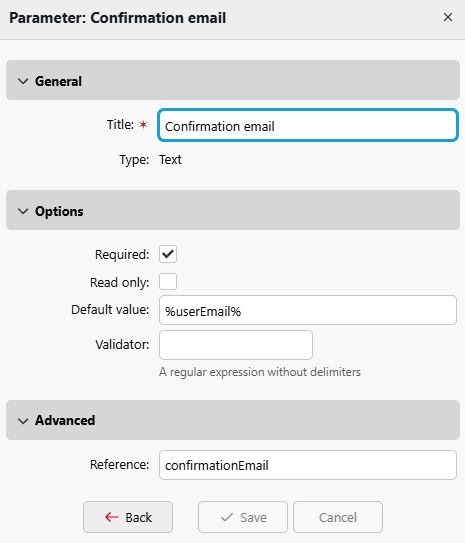
Additionally, Confirmation email is available as a parameter for eGoldFax Easy scan destinations. By default, it is set to %userEmail%, but it can be changed to another user attribute or set as a single constant email destination.