.png)
Scan to OneDrive for Business
This article explains how to configure the Easy Scan terminal action to scan to OneDrive for Business.
Prerequisite
A OneDrive for Business connection is configured. For more information, see OneDrive for Business Setup.
Configure Easy Scan with the destination OneDrive for Business
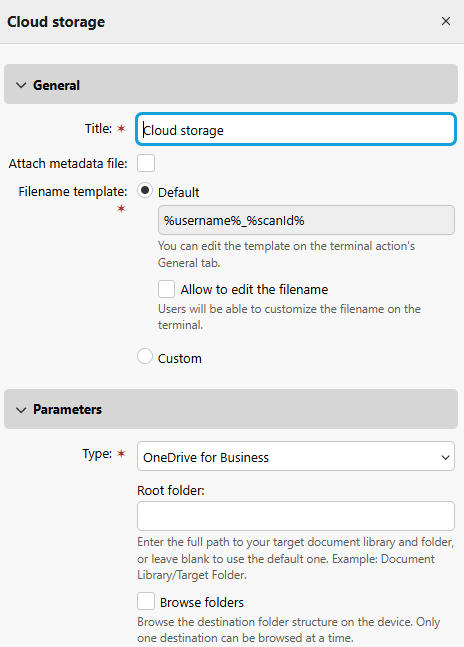
Go to MyQ > Settings > Terminal Actions.
Select Easy Scan and click Edit.
If the action is not visible, to add it go to Add Action > Scan > Easy Scan.On the Destinations tab, click +Add and select Cloud Storage.
Under Parameters, select OneDrive for Business as the Type.
(Optional) Specify the Root folder. The root folder is the highest level directory into which a user can scan documents. If the root folder is not found, it is created automatically.
Examples:finance/expense reports
Delivers scans to the “expense reports” folder in the user’s OneDrive.archive
Delivers scans to the “archive” folder.
(Optional) Enable Browse folders to let users browse the directories of the cloud destination folder on the device.
Click Save.
Pairing users with their OneDrive
When the Automatic mode was used or “Application has access to OneDrive Business of all users” was checked in the manual setup, there is no user interaction needed for the users to use their OneDrive in MyQ. Users are paired with their OneDrive storage via User’s Active Directory Object ID (UUID). These are automatically imported only with the Azure AD user’s synchronization into MyQ. The UUID is synchronized from Central to Sites during user sync when Central users are synchronized with Azure AD. This process enables users at a Site to be automatically connected to their storage.
Users created manually or synchronized from sources other than Azure AD will see this OneDrive Business as “Connected” on their MyQ Web User Interface, but they are not paired with any OneDrive account.
If they opt to scan to their OneDrive account, they will receive an email prompting them to connect (if a user does this before OneDrive Business has been connected by an admin, no email prompt will be sent).
Re-authorizing the OneDrive Business connection
The automatic connection to OneDrive Business can be changed after it has been created. By right-clicking on the connection, the Re-authorize option will be available in the context menu.
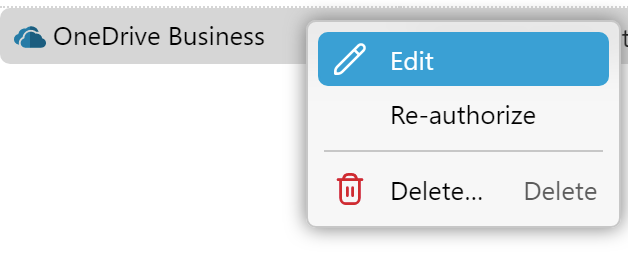
The user will be shown the same dialogue as when the connection was created. The user can repeat all the steps to create a new secret for the existing OneDrive Business connection. Or they can perform step 3 - Administrator’s consent, if it was not completed when the connection was created for any reason, for example, due to insufficient rights of the Azure administrator.
Also, the Re-authorize option allows you to change the type of connection created from automatic to manual, and vice versa.