.png)
Microsoft Exchange Online Setup
It is first needed to set up Microsoft Exchange Online in Microsoft Azure, and then configure it in MyQ.
Microsoft Exchange Online setup in Microsoft Azure
Log in to the Microsoft Azure portal and go to App registrations.

Create a New registration:

Create an Azure application:
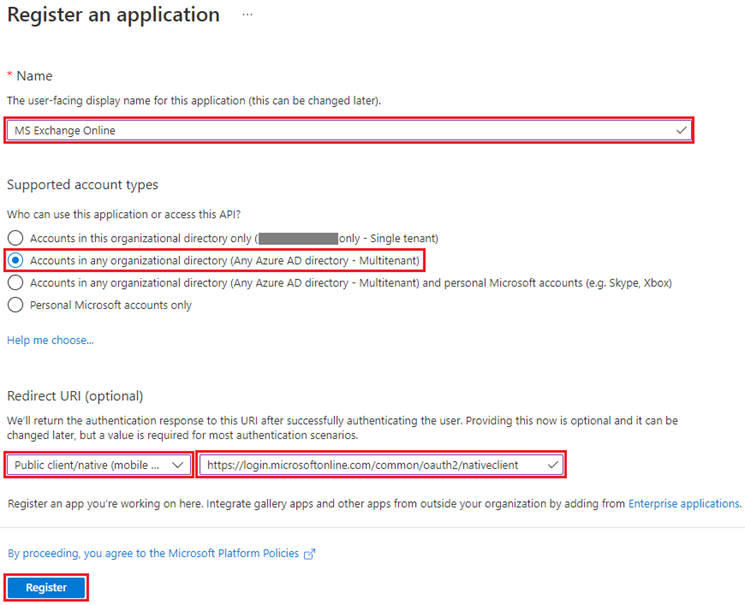
Name - The name for this application (this can be changed later). For example, MS Exchange Online. It is important to use the same name as the one used in MyQ under Connections.
Supported account types - Who can use this application or access this API? Select the Accounts in this organizational directory only ({Tenant name} only - Single tenant) option. Multitenant application can also be used if required, depending on the target audience of the application (what account will be used for authorization in MyQ).
Redirect URI (optional) - The authentication response is returned to this URl after successfully authenticating the user. Select the Public client/native (mobile&desktop) option from the drop-down and fill in https://login.microsoftonline.com/common/oauth2/nativeclient as the redirect URI.
Click Register.
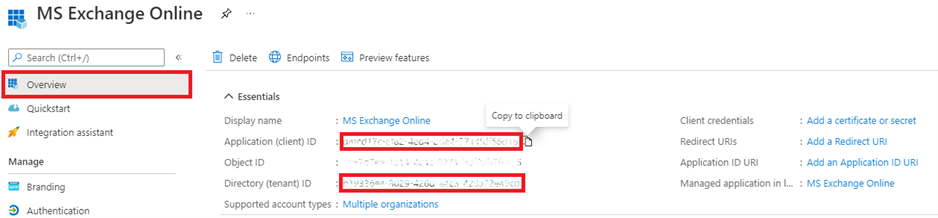
The new app overview page opens. Copy the Application (client) ID and the Directory (tenant) ID, as they are needed for the connection to MyQ.
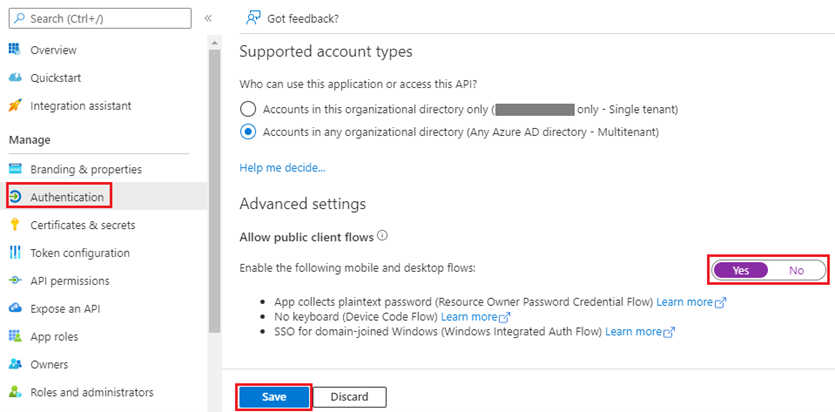
On the left-hand menu, click Authentication. In Advanced settings, under Allow public client flows, select Yes next to Enable the following mobile and desktop flows, and then click Save at the top.
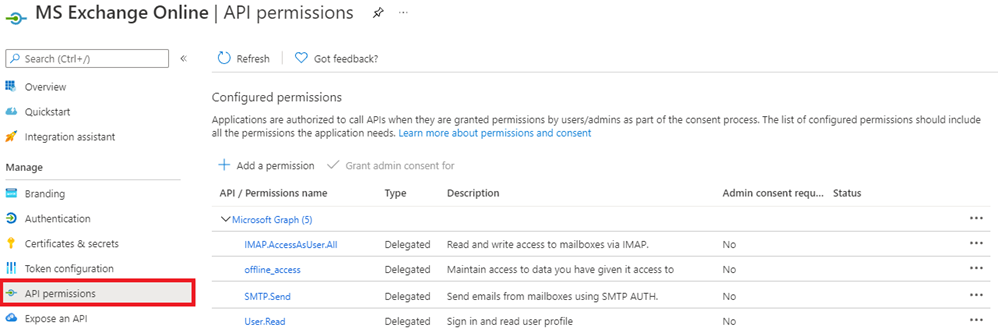
On the left-hand menu, click API permissions and add the additional permissions required for the correct functionality:
Microsoft Graph: offline_access - Allows the app to see and update the data you gave it access to, even when you are not currently using the app. This does not give the app any additional permissions.
Microsoft Graph: User.Read - Sign in and read user profile.
Microsoft Graph: IMAP.AccessAsUser.All - Allows the app to read, update, create and delete email in your mailbox. Does not include permission to send mail.
Microsoft Graph: SMTP.Send - Allows the app to send emails on your behalf from your mailbox.
Microsoft Exchange Online setup in MyQ
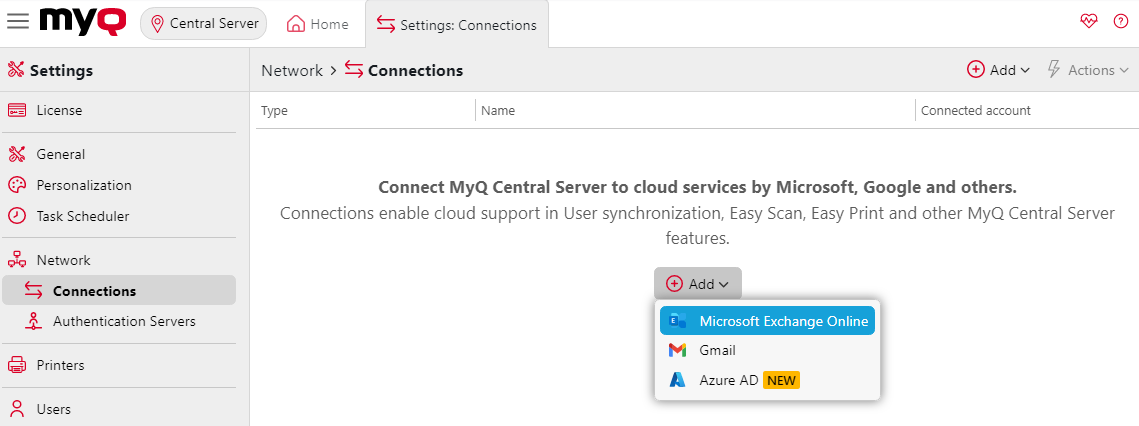
Log in to the MyQ web administrator interface, and go to MyQ, Settings, Connections.
Click +Add and select Microsoft Exchange Online.
In the pop-up window, fill in the required fields:
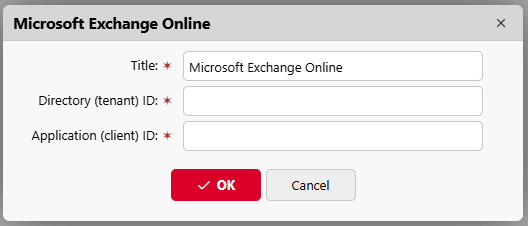
Title - Add the name you chose during App registration in MS Azure; for example, MS Exchange Online.
Directory (tenant) ID - The Directory ID you copied during the MS Azure setup.
Application (client) ID - The Application ID you copied during the MS Azure setup.
Click OK.
After setting up the connection in MyQ, you are requested to confirm a code through the Microsoft website (https://microsoft.com/devicelogin). The code you need to confirm is shown in the pop-up window, just below the link to the Microsoft website. There is timeout for confirming the code (usually it is 15 minutes).
The email functionality will not work until the confirmation is successfully completed.
Confirmation must be completed by the Microsoft account that owns the email box (email address) which is used to connect to the exchange (Sender email in MyQ, Settings, Network tab).
For example, if you use the sender email “print@somedomain.com”, then you need to authenticate on the Microsoft website as this user during this step.
Microsoft Exchange Online is now connected to MyQ and is ready to be used in the Network settings tab as an Outgoing SMTP server.