Gmail with OAuth2 setup
It is first needed to set up Gmail with OAuth2 in Google Cloud Platform, and then configure it in MyQ.
Gmail with OAuth2 setup in Google Cloud Platform
Log in to Google Cloud Platform and click on Select a project to create a new project.

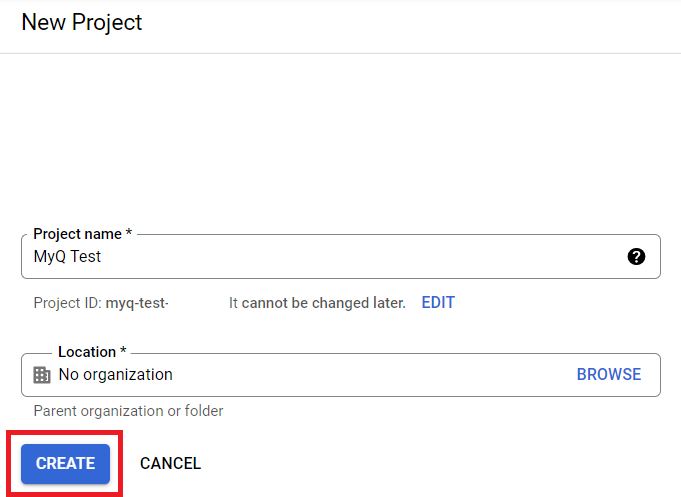
Add Project name, optionally add a location, and click Create.
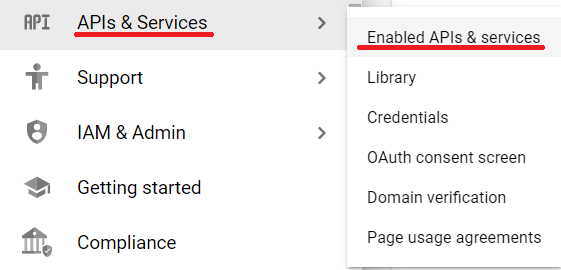
On the left-side menu, hover over APIs & Services and click on Enabled APIs & services.
Click on +ENABLE APIS AND SERVICES to add the Gmail API to your project.

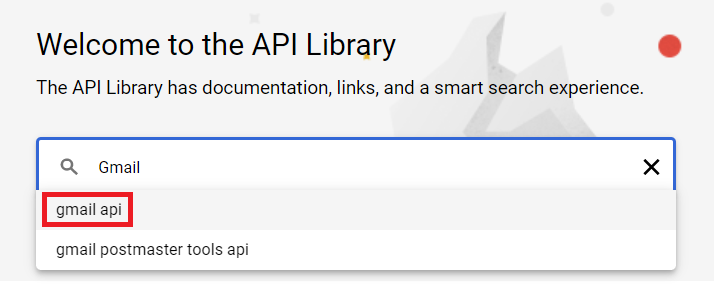
Type Gmail in the search field and click on the Gmail API result.
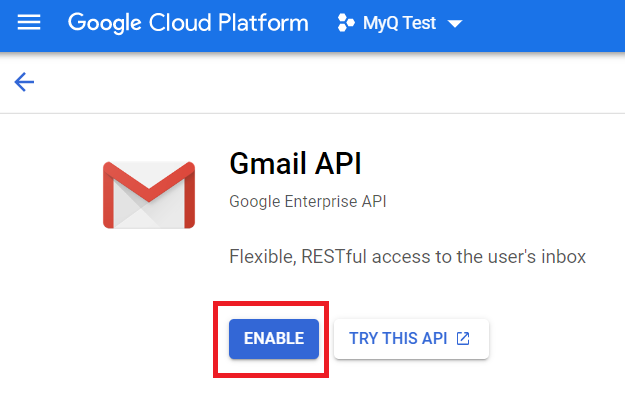
Click Enable under the Gmail API.
Once enabled, you are prompted to create credentials in order to use the Gmail API. Click on Create Credentials to proceed.

In the create credentials window, in the Credential Type section, choose Gmail API in the Select an API field, choose User data, and click Next.
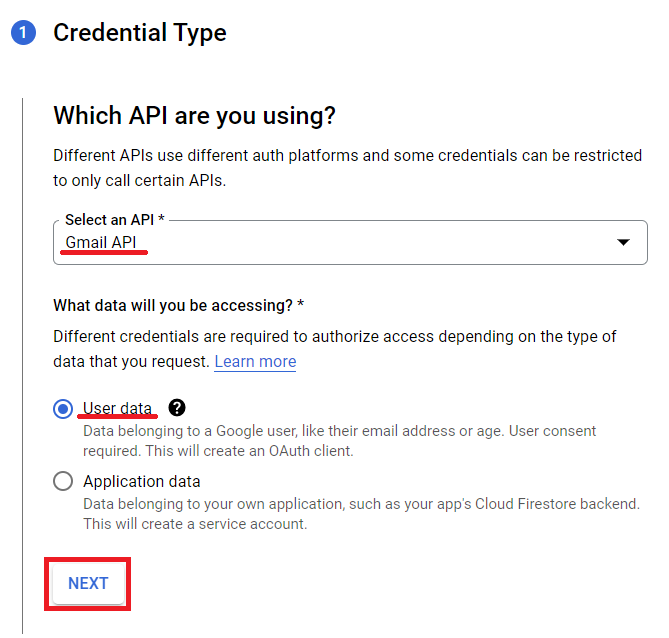
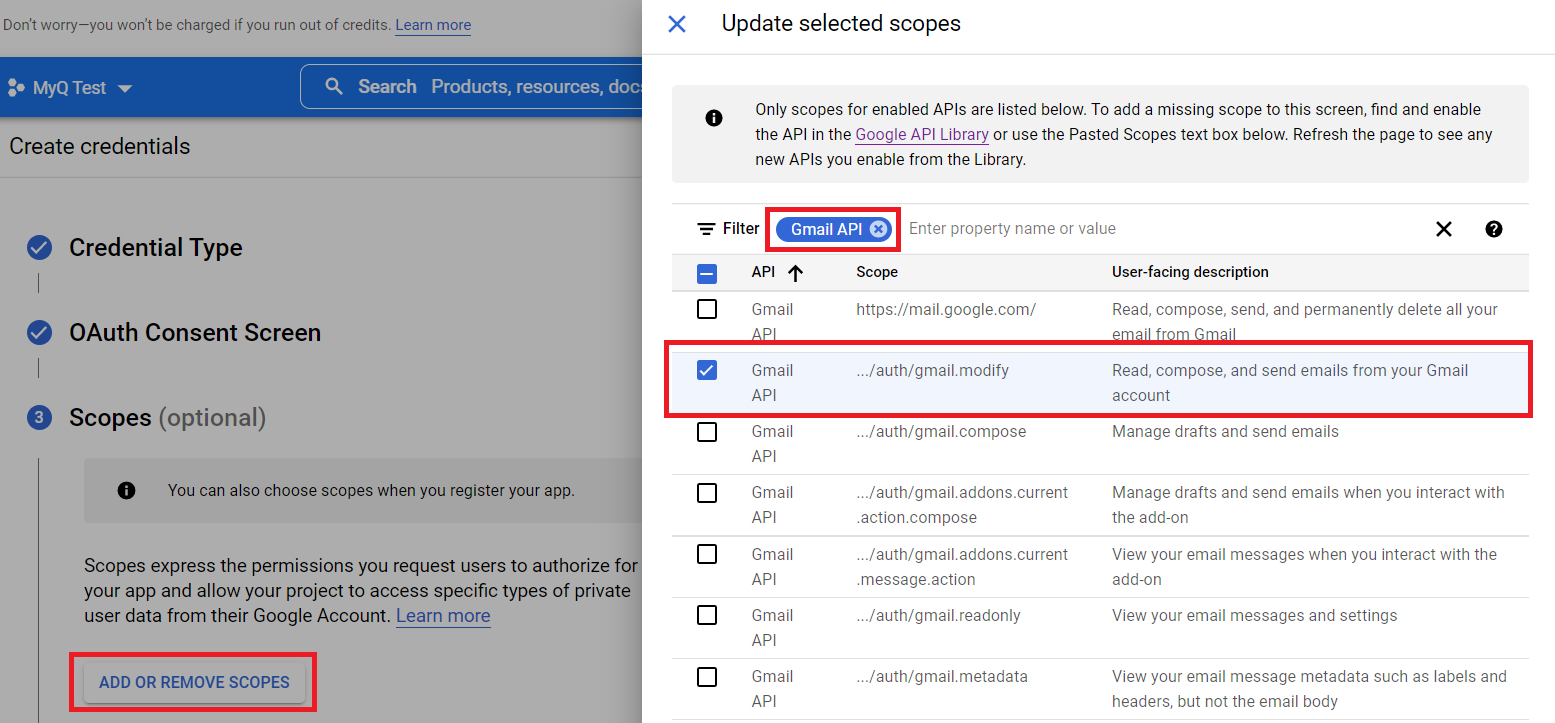
In the Scopes section, click Add or Remove Scopes. In the Update selected scopes windows, type Gmail API in the search field, select the Gmail API …/auth/gmail.modify scope and click Update.
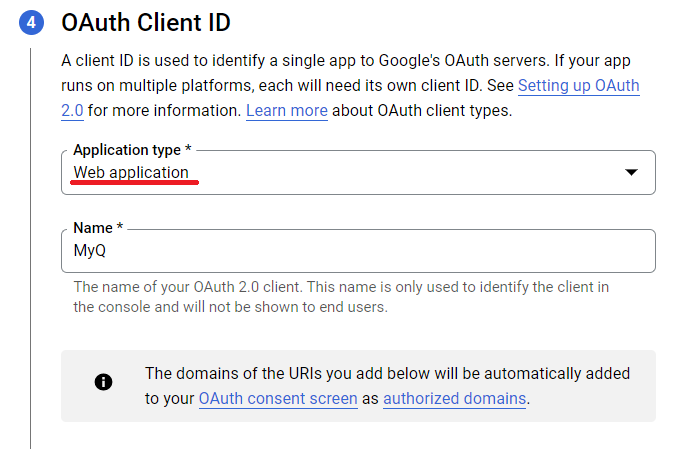
In the OAuth Client ID section, select Web application in the Application type field, and add a Name for your OAuth2 client.
In the OAuth consent screen section, click Add Users and add the users' email addresses used for sending emails and/or receiving print jobs via email.
Once done with all the sections, click Create.
Navigate to APIs & Services, Credentials, to view your Client ID and Client secret that are needed for the setup in MyQ.

Gmail setup in MyQ
Once you are finished in Google Cloud Platform, log in to the MyQ web administrator interface, and go to MyQ, Settings, External Systems.
In the External Systems section, click +Add and select Gmail.
In the pop-up window, fill in the required fields, and click OK:
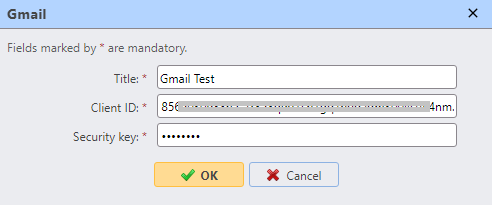
Title - Add a title for your Gmail external system.
Client ID - Add the Client ID from the Google Cloud Platform credentials.
Security key - Add the Client secret from the Google Cloud Platform credentials.
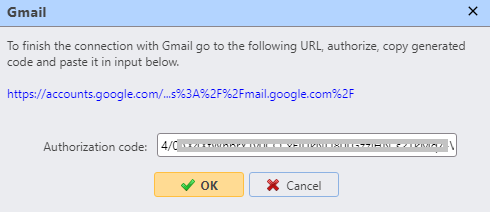
After setting up the external system in MyQ, you are requested to authorize the connection by going to the provided URL, copying the generated code, pasting it in the Authorization code field, and clicking OK.
Gmail is now connected to MyQ and is ready to be used in the Network settings tab as an Outgoing SMTP server.
.png)