
A Release Station is a browser-based kiosk application for secure job release on printers without embedded terminals. It provides a simplified My Jobs experience: users authenticate, view their queued jobs, and release them to a printer.
Release Station supports Pull Print and Delegated Print queues.
Typical deployments range from shared printing rooms to single-device kiosks:
-
Release Station - A printing room with a pool of managed printers where users can select a printer and release their job.
-
Release Kiosk - A single-printer enclosed in a self-service unit with a built-in touchscreen. Users authenticate, release their jobs, and collect the printed documents from the unit's output tray.
A Release Station is accessed via a dedicated URL in the format https://<hostname>:<port>/release-station/<URL name>. Users access the Release Station on a touchscreen device in kiosk mode, running a web application or kiosk Android app. After authenticating with a PIN, ID card, or their MyQ account credentials, users select a printer (if applicable), select their jobs, and release them for printing.
Licensing
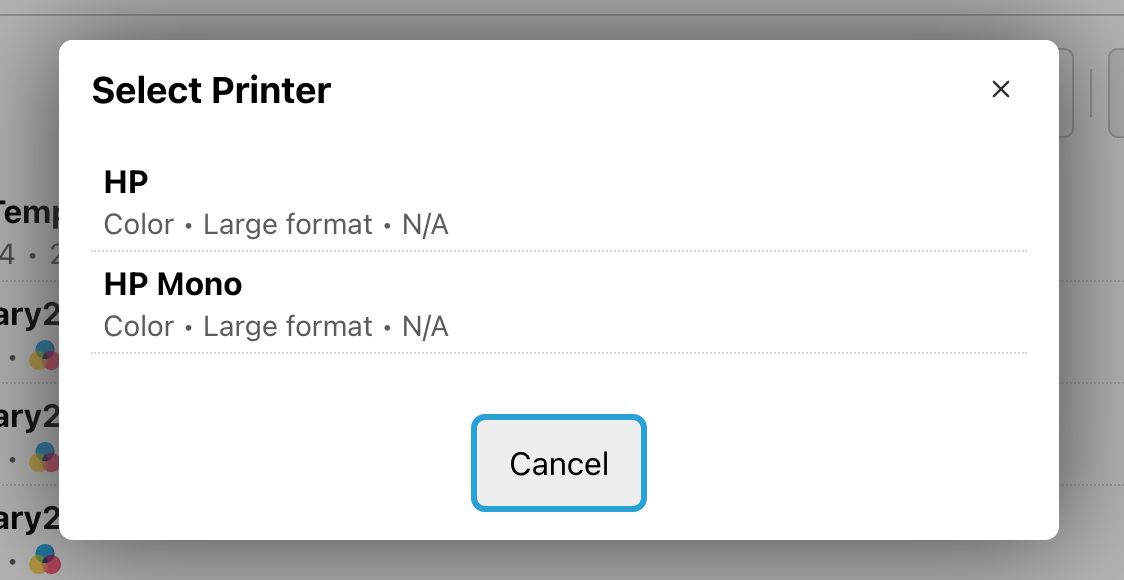
Each printer in a Release Station consumes one Embedded Lite license, which is equivalent to half of one Embedded Terminal license. Only printers with a valid Embedded Lite license assigned are available in the Select Printer dialog in the Release Station app.
Release Stations Settings
To manage Release Stations, make sure that you have Administrator or Manage Settings permissions. Then go to MyQ > Settings > Printers & Terminals > Release Stations.
Administration actions on Release Stations are recorded in the Audit Log.
To create a release station:
-
Click +Add.
-
Fill in the Release Station properties. See below for field descriptions and allowed values.
-
Assign one or more printers.
-
Assign user groups or individual users.
-
Click Save.
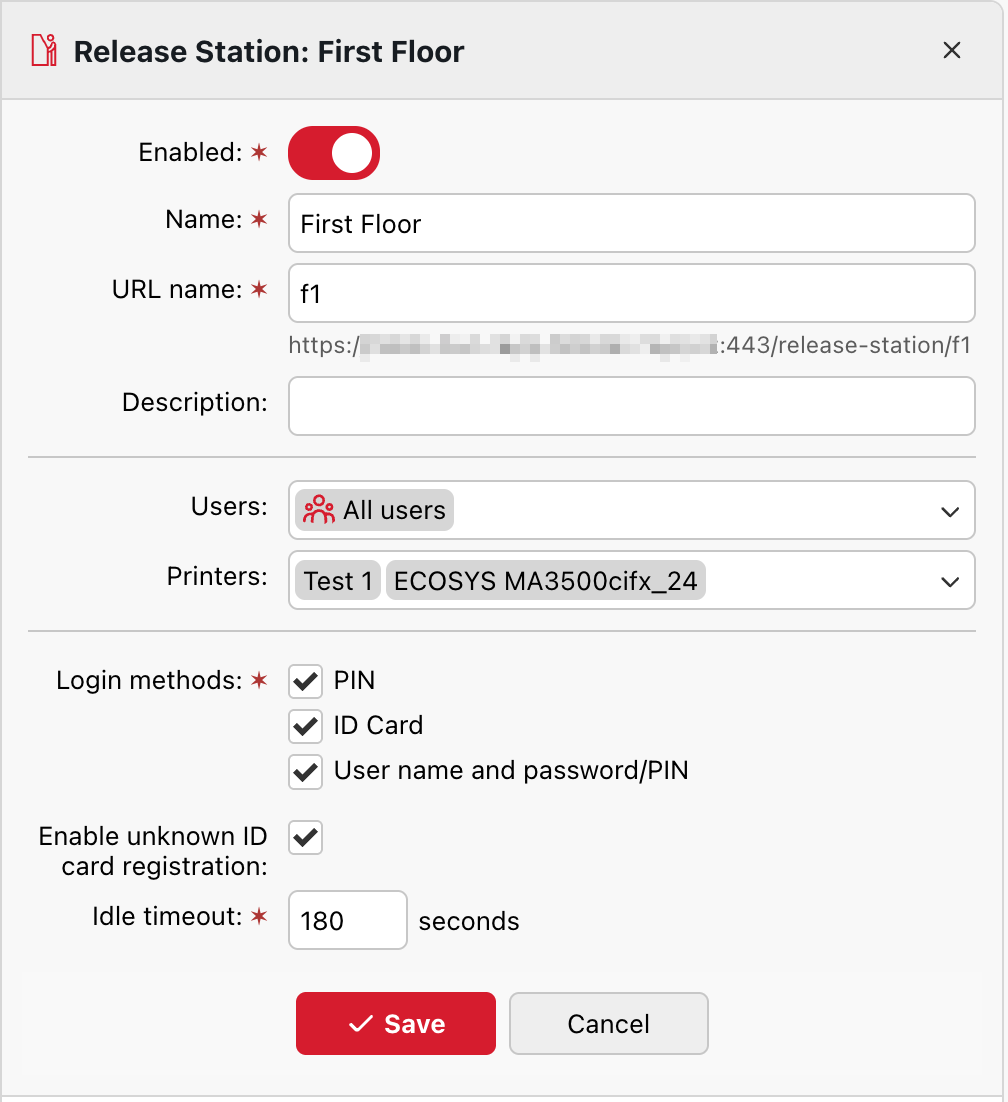
Release Station Properties
-
Enabled: Switches the Release Stations on and off. When disabled, users cannot log in to the Release Station.
-
Name: The name of the Release Station, displayed in the Release Station app.
-
URL name: The name used in the Release Station URL. Defaults to a random string to keep the URL difficult to guess. This can be changed to a human-readable value if required.
-
Description: (Optional) An description displayed only in the Release Stations list in the administrator interface.
-
Users: The users or groups permitted to log in to this Release Station.
-
Printers: The printers controlled by this Release Station. Assign a single printer for release kiosk mode.
-
Login methods: The login methods available to users on this Release Station. Select one or more of the following:
-
PIN: User logs in by entering their PIN only.
-
ID Card: User logs in by swiping their ID card.
-
User name and password/PIN: User logs in by entering their MyQ user name, followed by their password or PIN.
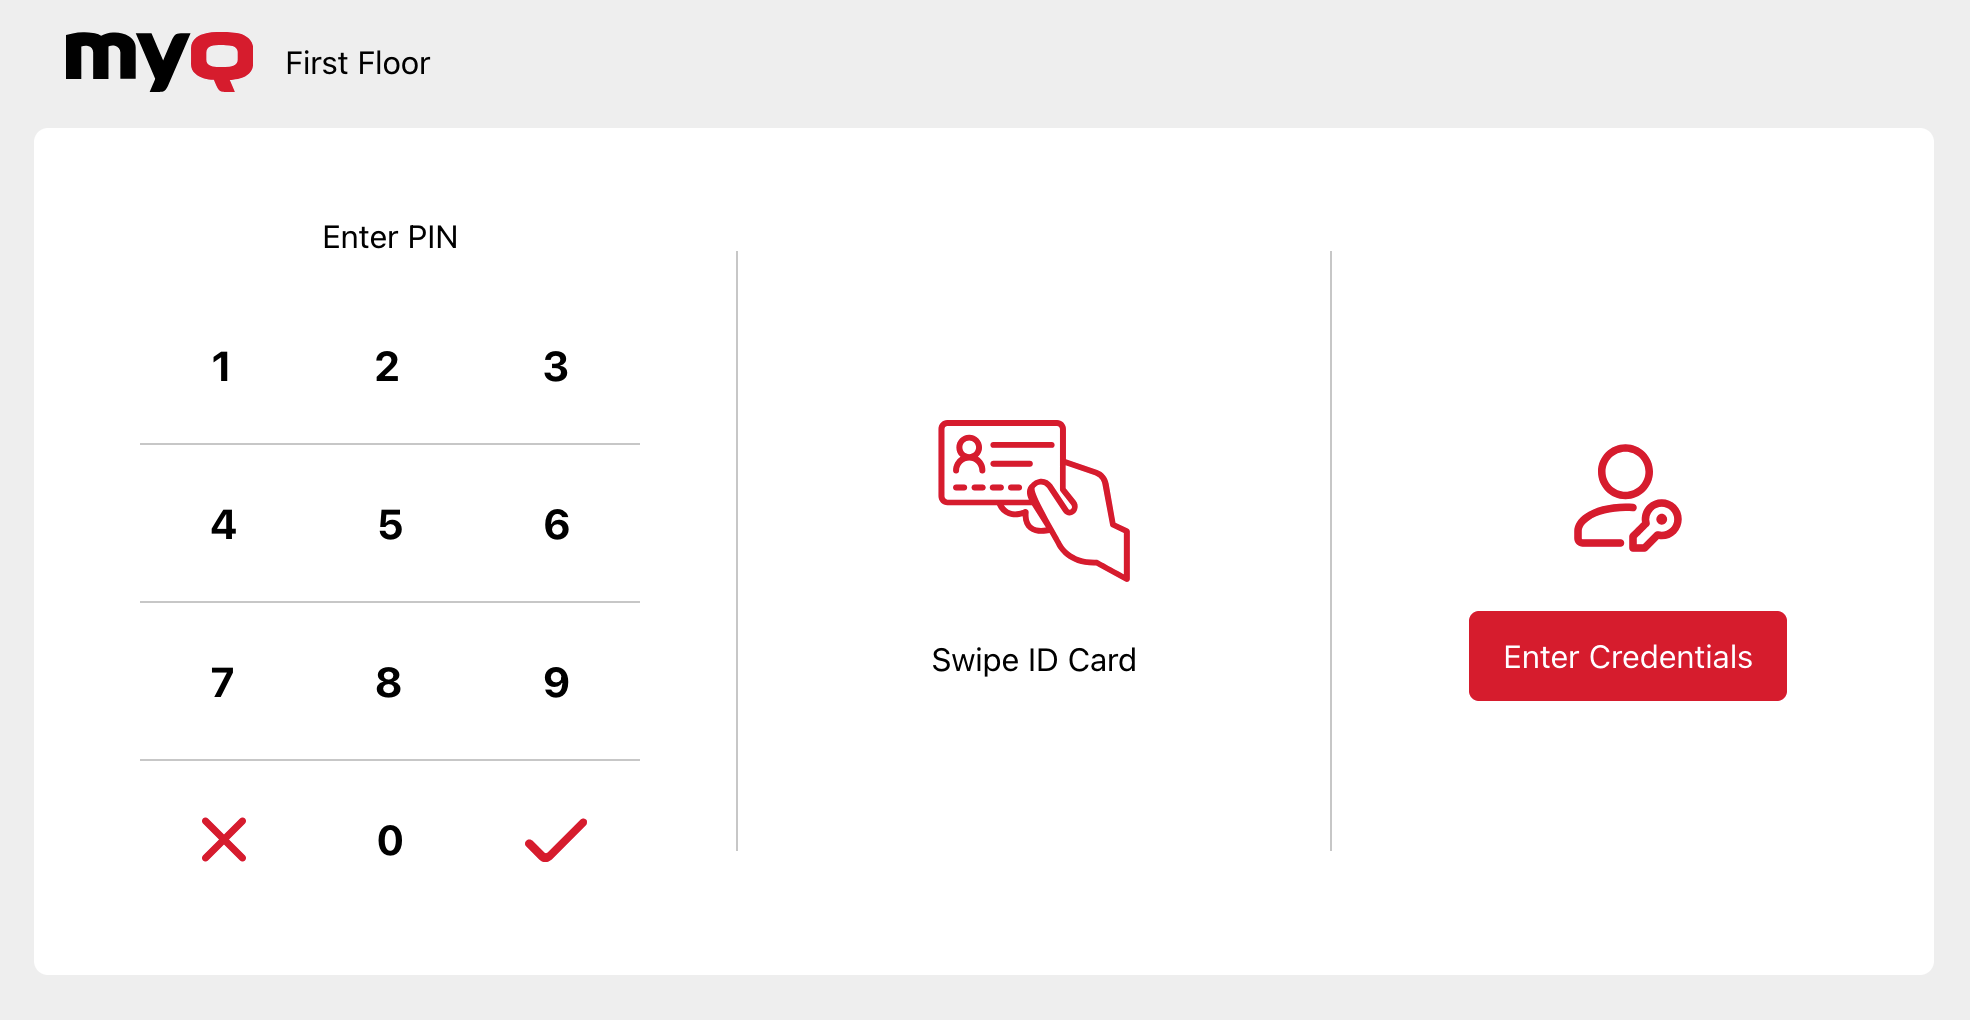
All three methods are enabled by default. At least one method must remain selected. The Release Station login screen adapts its layout to match the enabled methods.
-
-
Enable unknown ID card registration: (Optional) When enabled, users can swipe an unregistered ID card. This prompts the user to log in using their user name with their password or PIN.
-
Idle timeout: The period of inactivity (in seconds) after which the Release Station automatically logs out the current user (default: 180 seconds). A timer appears in the header of the user interface.
Running a Release Station in Kiosk Mode
Release Stations are designed to run in a browser's kiosk mode on a dedicated touchscreen device, in landscape or portrait orientation. Kiosk mode prevents users from navigating away from the application.
Using Microsoft Edge (recommended on Windows):
-
Install Microsoft Edge on the kiosk device.
-
Launch Edge in kiosk mode using the following command, replacing the URL with your Release Station URL:
msedge.exe --kiosk "https://<server-address>:<port>/release-station/<url-name>" --edge-kiosk-type=fullscreen
In full-screen kiosk mode, Edge hides the address bar and browser controls, and the browser automatically restarts if it crashes. For details on configuring Microsoft Edge kiosk mode, see the Microsoft Edge kiosk mode documentation.
Releasing Jobs
To send print jobs to a Release Station, print to any Pull Print or Delegated Print queue whose printers are assigned to the Release Station.
To release print jobs at a Release Station, follow these steps:
-
Log in using one of the available methods:
-
PIN: Enter your PIN on the keypad.
-
ID Card: Swipe your ID card.
-
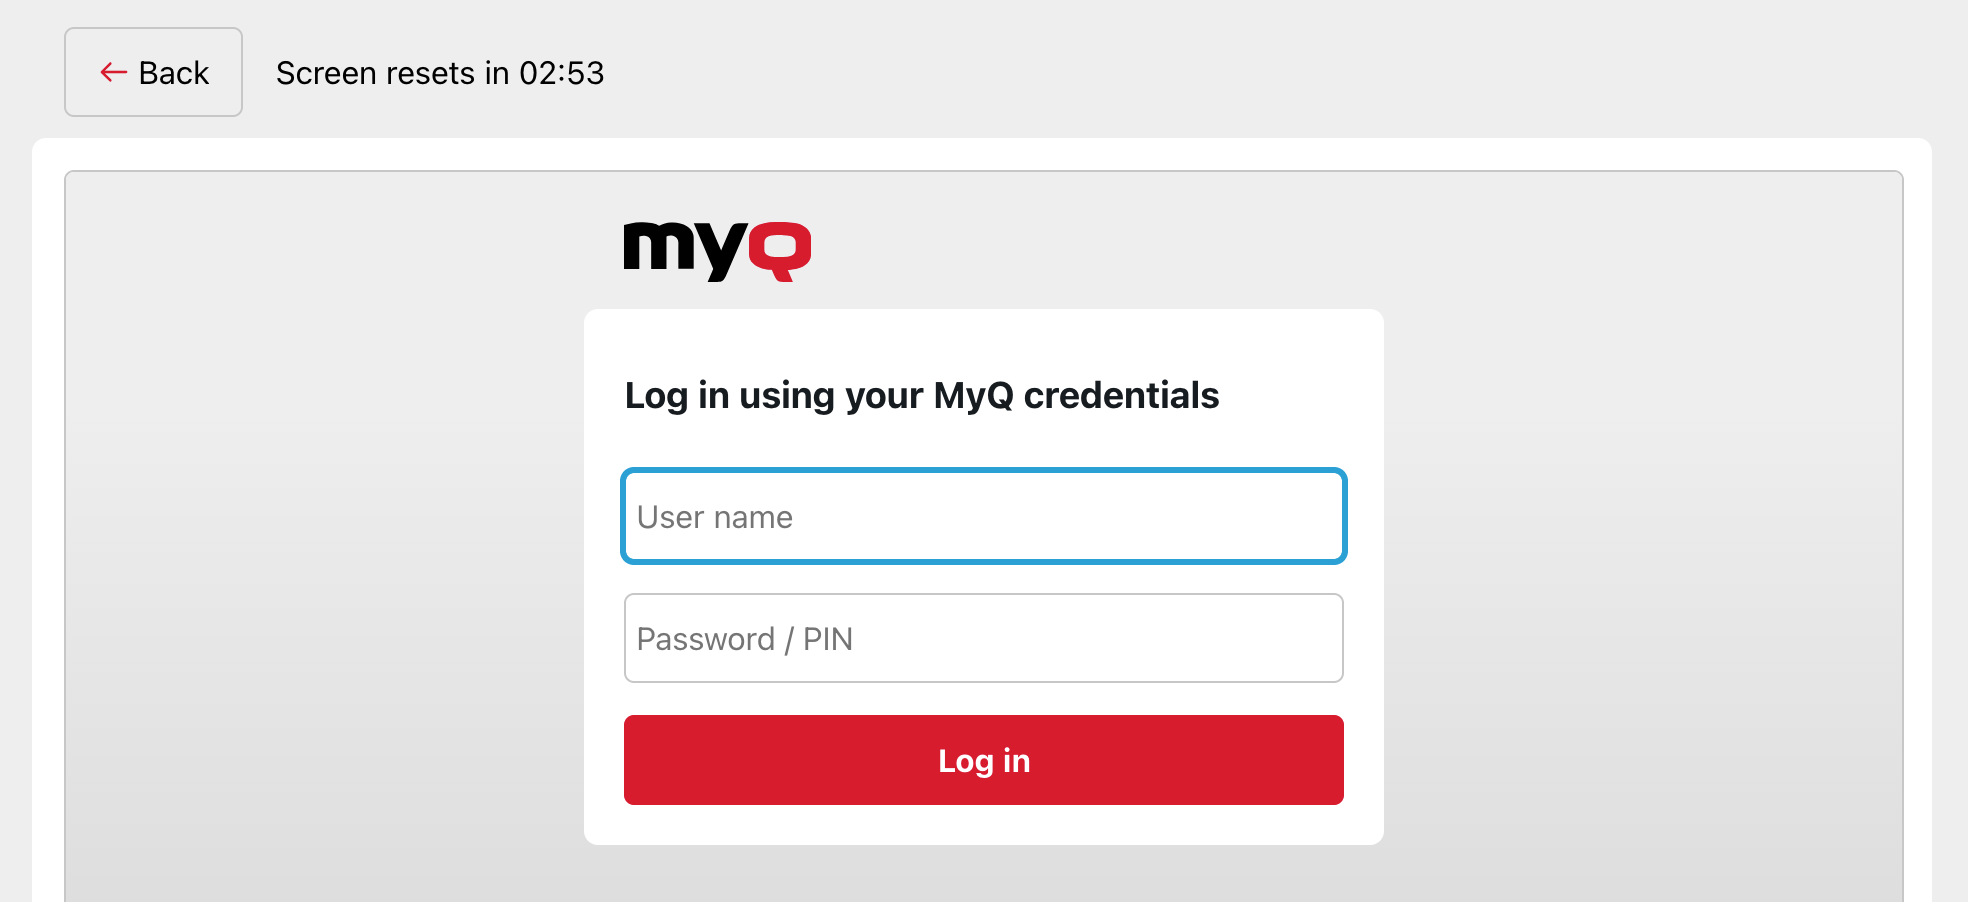
Enter Credentials: Tap and log in with your MyQ username and password.
-
-
Select a printer from the list. If the Release Station has only one printer assigned, this step is skipped automatically.
-
Select jobs from your job list.
-
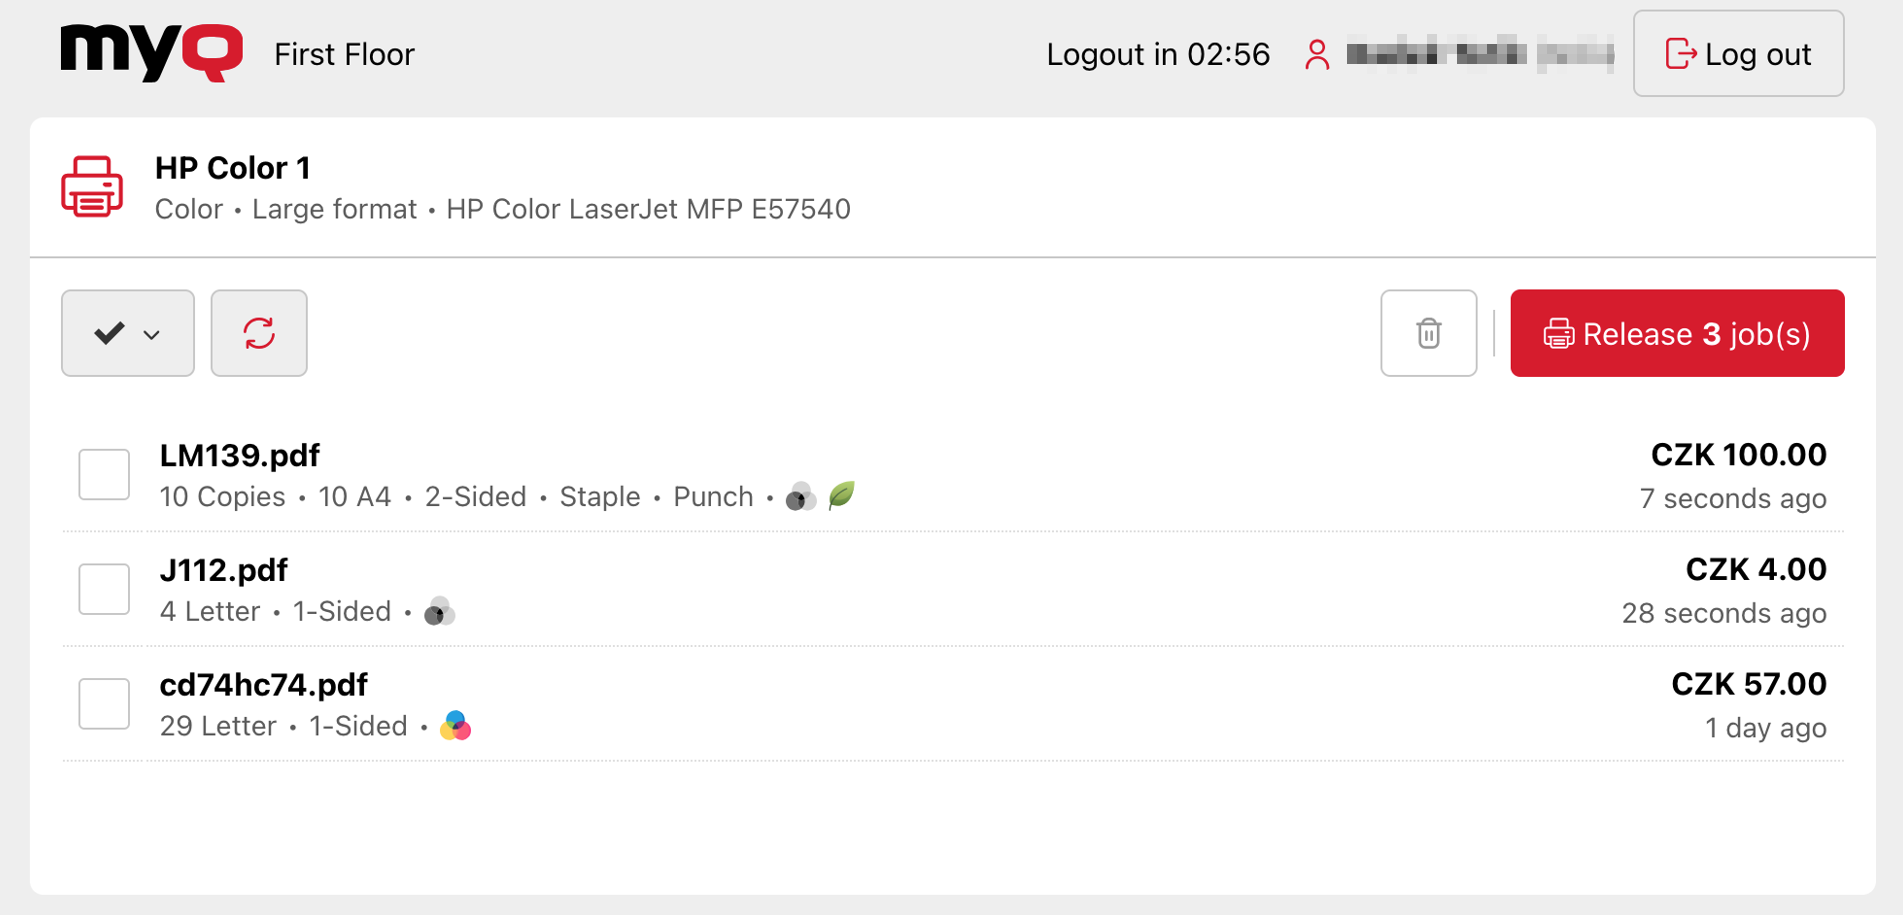
Select the Release button to print the selected jobs. The job list displays available jobs, and shows the following information for each job, where available:
-
Job name
-
Copy count
-
Page count and paper size
-
1-sided or 2-sided
-
Staple flag
-
Punch flag
-
Color or monochrome
-
Eco print
-
Spooling time/date (relative)
-
Price (displayed if a pricelist is assigned to the No Terminal configuration)
-
-
Select Log out to end your session, or wait for the logout timer to expire.
Toolbar Actions
The job list toolbar provides the following actions:
-
Selection drop-down: Commands to select or deselect jobs.
-
Refresh: Reloads the job list.
-
Delete: Deletes the selected jobs.
-
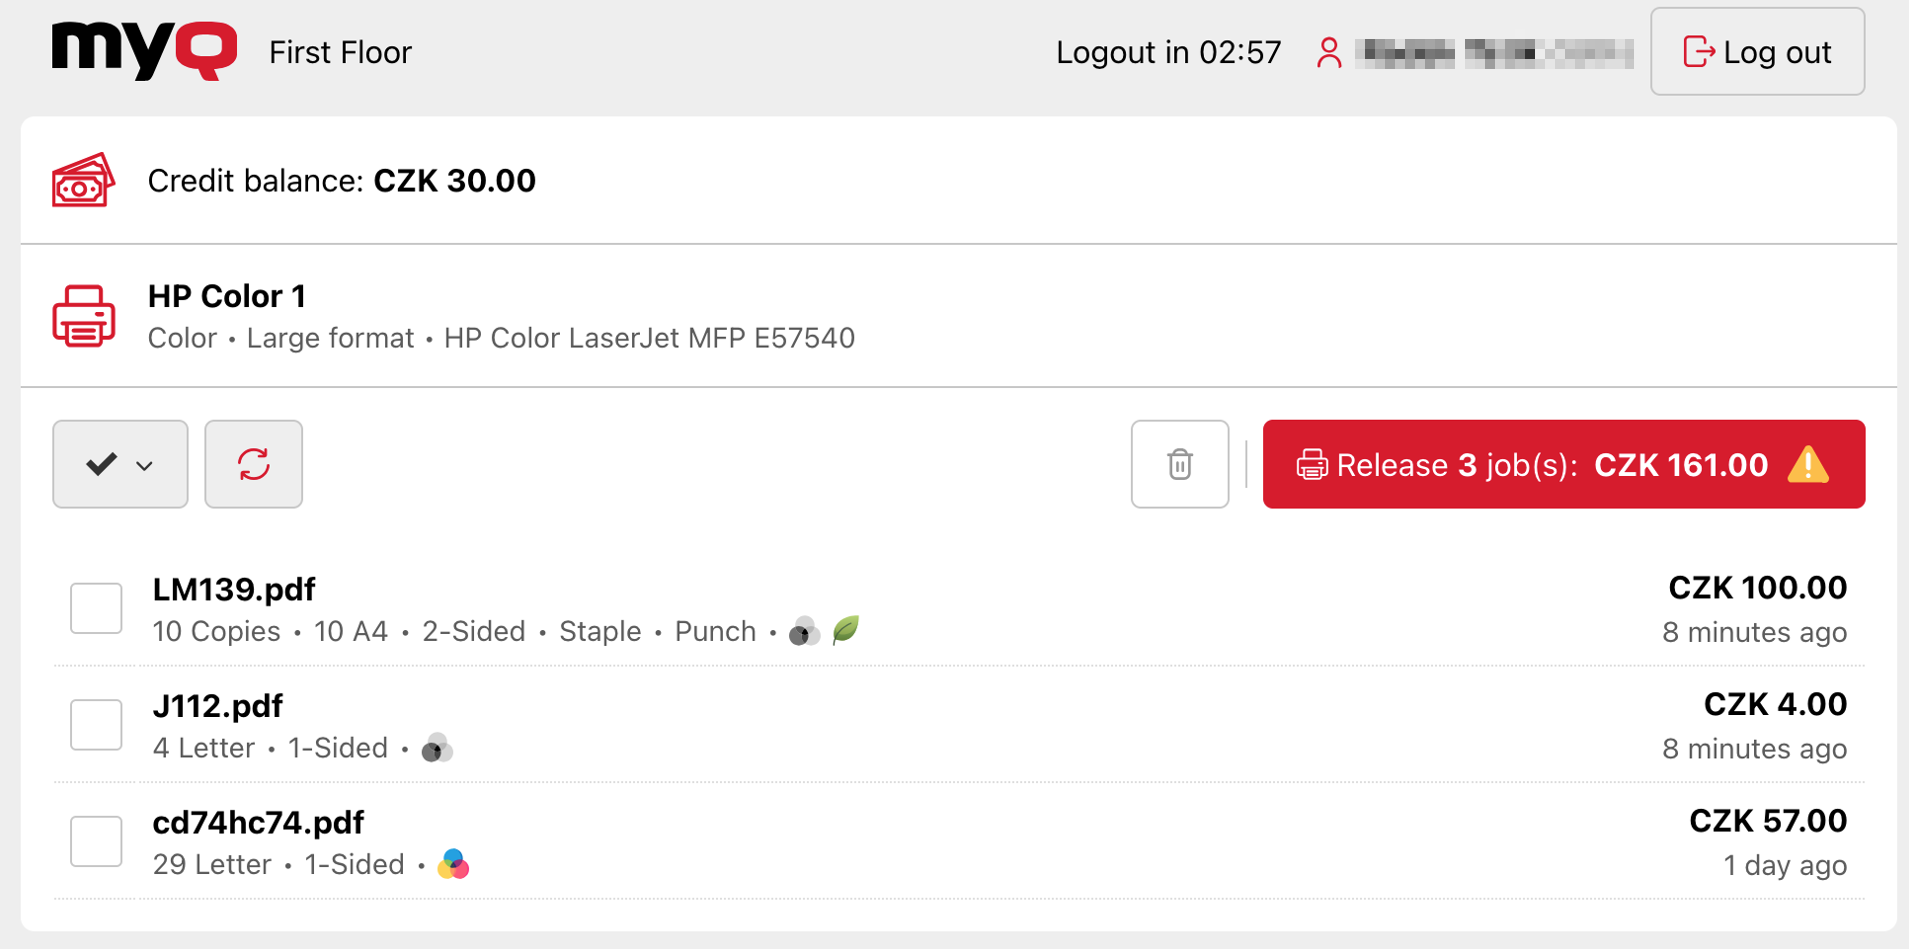
Release: Releases the selected jobs to the chosen printer. Displays the count of jobs and total price if the user has a credit account.
Unknown ID Card Registration
If Enable unknown ID card registration is turned on for a Release Station and a user swipes an ID card that is not registered to any account, a prompt appears offering to add the ID card to their account.
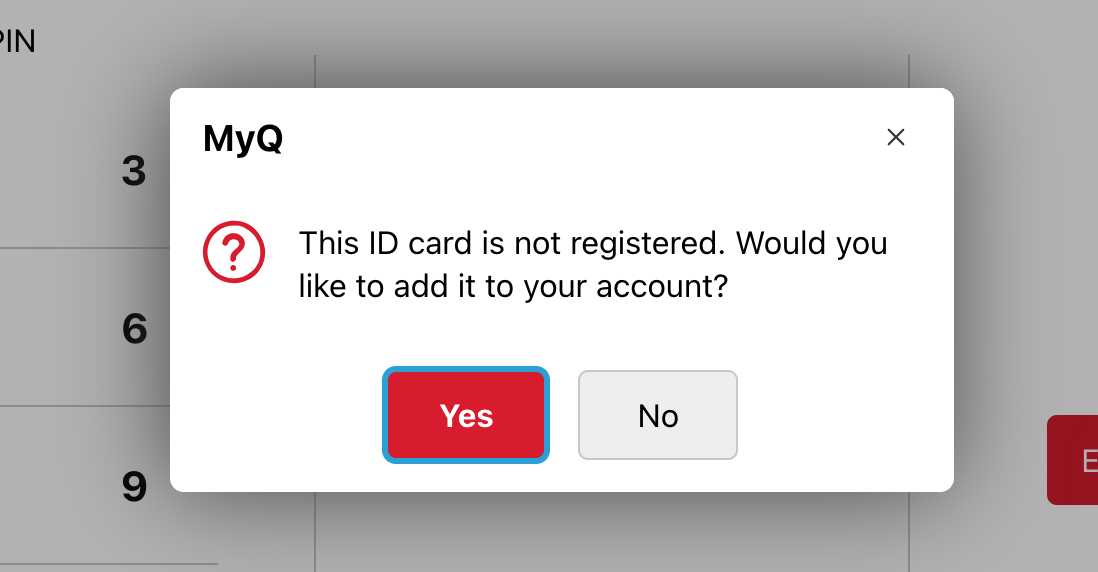
If the user taps Yes to register the card, they are prompted to enter their username, followed by their password or PIN. After a successful login, the card is added to the user's account. If the ID Card login method is enabled, the user can now log in by swiping their ID card.
Credit and Quotas
If the user account has credit or quota enabled, the current balance or quota status is displayed on the Jobs page after login.
With Credit Enabled
If credit is enabled, the current credit balance is displayed on the Jobs page. The Release button displays the total price of all selected jobs. If the total price exceeds the current balance, a warning icon is displayed. If the user taps Release anyway, an "Insufficient credit balance" error message is displayed.
With Quotas Enabled
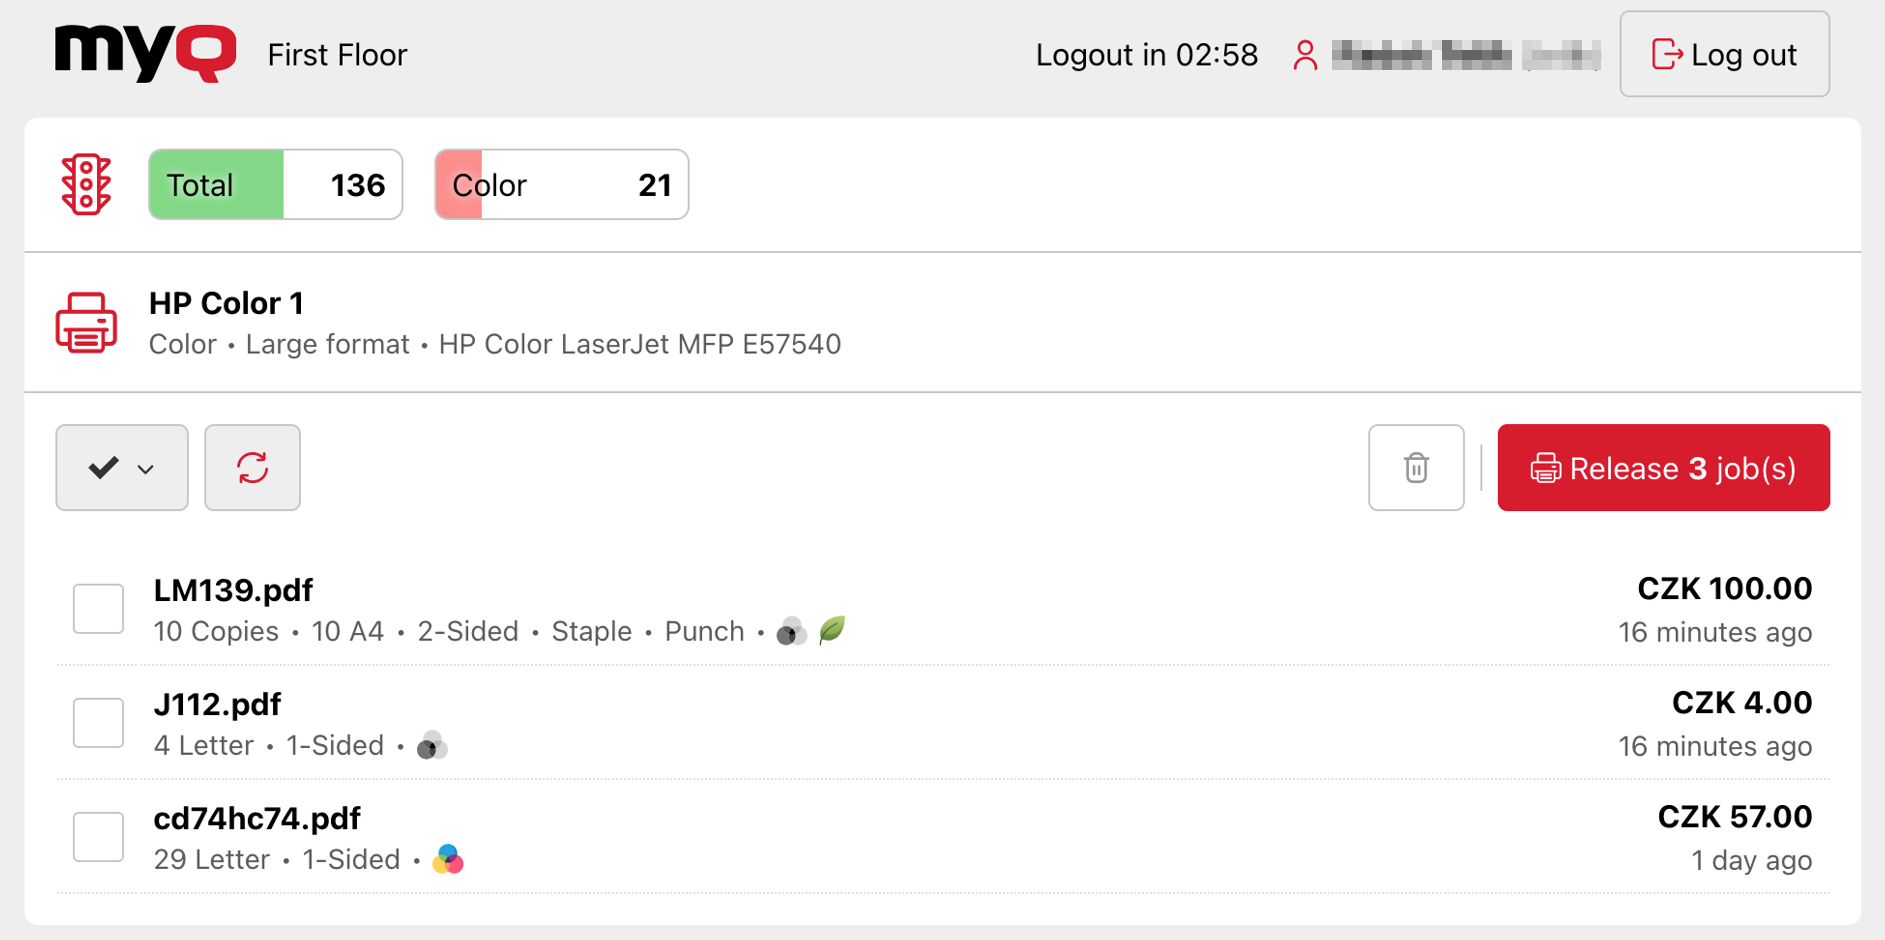
If quota is enabled, the current quota status is displayed on the Jobs page. Each quota is displayed as a progress bar showing the quota type (total, color, mono, or cost) and the remaining count. The progress bar shows what percentage of the quota remains. When the remaining count reaches the warning threshold, the bar turns red.
If the user has multiple quotas, the quota with the smallest remaining count is displayed for each quota type.
With Both Credit and Quota Enabled
If the user account has both credit and quota enabled, the Release Station displays credit or quota information based on the Payment account priority setting configured in MyQ > Settings > Accounting.
Limitations
-
Cost Centers: Release Stations do not support Cost Centers accounting mode.
-
Quotas: If the user’s quota sufficient to start a job, the job is released. Release Station cannot interrupt a job if it exhausts the user quota mid-way through the job.
-
Projects: When enabled, only jobs with a preassigned project can be released. Jobs without an assigned project are displayed but cannot be selected for release.
-
ID card readers must be in keyboard emulation mode.
-
Personalization features, such a custom logo, are not currently supported by Release Station.