If you encounter a problem that requires help from the MyQ support team, providing detailed information about your MyQ system configuration, licenses, printer devices, terminals, etc., can be helpful in resolving your issue. You can generate a MyQ-helpdesk_%datetime%.zip file and send it to the MyQ support team.
Support ZIP File Contents
The .zip file contains:
-
MyQ log file
log_%datetime%.xlsx -
MyQ-helpdesk.xml
This XML file contains necessary information about the MyQ configuration. -
myq.exedump files -
Logs and PM Server directories from the MyQ data folder
-
Windows Event Logs, including the Application and System channels only. The included events are of Critical, Error, and Warning severity.
-
The files
statsData.xml,config.ini, andtraefik.custom.rules.yaml -
Printers directory containing logs from supported devices
The MyQ log file corresponds to the MyQ log that can be displayed on the MyQ Web Interface or in the MyQ Easy Config application.
How to Generate Support Data
Generate Support Data in the Web UI
-
Click Generate Support Data at the top of the Home dashboard.
-
Specify the Date range of the MyQ events to include in the MyQ-helpdesk file, and click OK.
-
(Optional, Print Server only) Select up to 5 printers from which to include device logs.
-
Click Export. The .ZIP file is generated and saved to your Downloads folder.
Export Logs from Printers
When generating support data on Print Server, you can optionally include device logs from up to 5 printers. In the Generate Support Data dialog, select the printers whose device logs you want to include in the export.
Device logs are available from Kyocera, Canon, Ricoh and Lexmark devices, with an embedded terminal installed.
Notes:
-
The date range filter does not apply to printer device logs – the full device log is included.
-
Exporting printer logs is only available from the MyQ Web Interface. This option is not available in Easy Config.
Generate Support Data with Easy Config
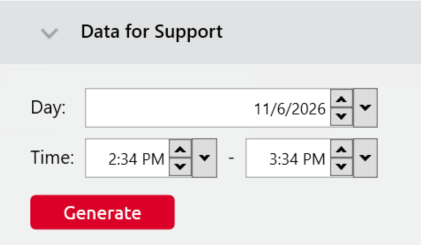
You can use Easy Config to generate data to share with support when troubleshooting issues. On the Home tab, under the Data for Support section, set the Date and Time for the data, and click Generate. The file is generated and you can select where to save it.