MS SQL Server Setup Example
This is an example of an installation of a Microsoft SQL server and the setup necessary for its connection to the MyQ Central server.
To install and set up the MS SQL server:
Install the MS SQL Server and the MS SQL Server Management Studio application.
Open the SQL Server Management Studio app (Windows Apps menu).
Change the Server authentication setting of the MS SQL Server from the Windows Authentication mode to SQL Server and Windows Authentication mode (Server Properties, Security).

Provide any user account (existing or new) with the Database Creator role. This account will be used to access the MS SQL server and manage the MyQ database there, which means that the MyQ administrator needs to know its credentials. The default language of the user who creates the database must be set to English (US).
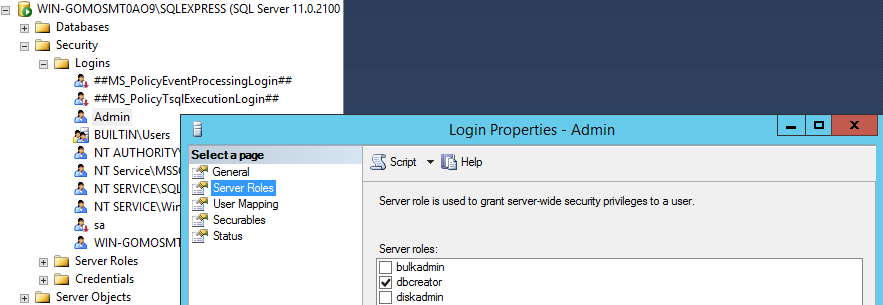
On MS SQL Server 2016 and older, you need to enable the common language runtime (CLR) integration feature. If you are using the MS SQL Server 2017 or newer, you can continue to the next step.
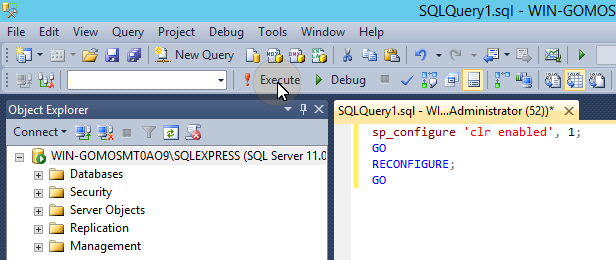
To enable the CLR, use the following script:
SQLsp_configure 'clr enabled', 1; GO RECONFIGURE; GOLeave the MS SQL Server Management Studio and open the SQL Server Configuration Manager app.
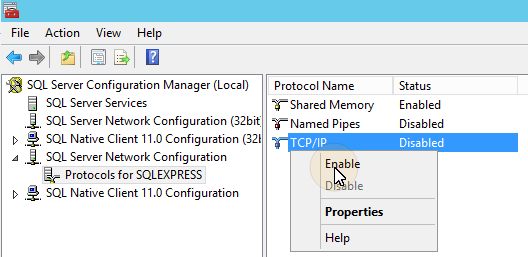
Enable the TCP/IP protocol.
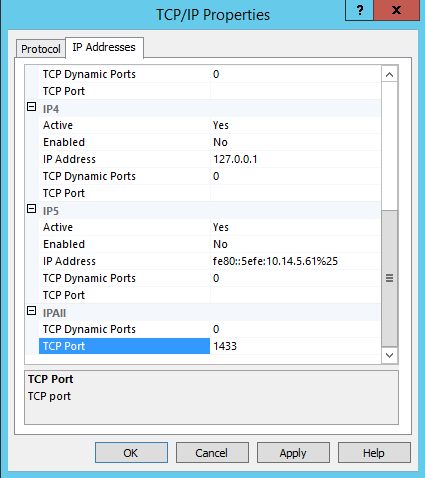
Open the TCP/IP properties and set the IPAll TCP Port to 1433.
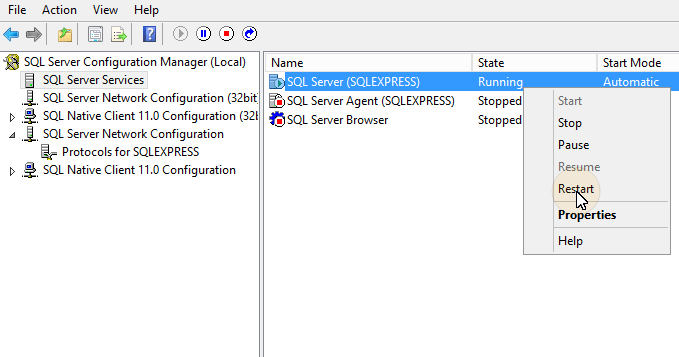
Restart the SQL Server service.
Leave the SQL Server Configuration Manager.
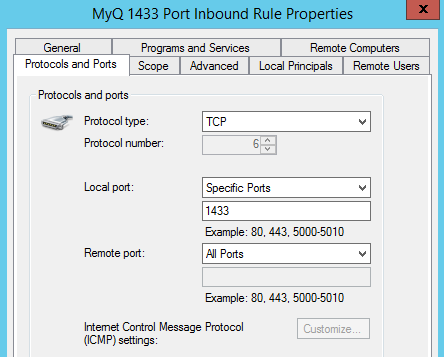
Create a TCP 1433 port inbound rule in Windows Firewall.
Exit the setup.
.png)