
Register an application in Microsoft Entra ID when you want to configure a Microsoft Entra ID, OneDrive for Business, or SharePoint Online connection in MyQ X manually.
You can use one application registration for multiple MyQ integrations, or create separate application registrations for each integration. Configure only the redirect URIs and permissions required for the integrations that you plan to use.
This procedure does not apply to Microsoft Exchange Online or Universal Print. These integrations use different application configurations.
Before you begin
Decide which MyQ integrations the application will support:
-
Microsoft Entra ID / Microsoft Graph
-
OneDrive for Business
-
SharePoint Online
You also need the following information:
-
the Microsoft tenant where the application will be registered
-
the MyQ server hostname and HTTPS port, if the application will be used for Microsoft Entra ID authentication
-
whether the deployment uses single-tenant or multitenant authentication
-
whether MyQ Desktop Client Seamless SSO will be used
For the required redirect URIs, credentials, and permissions, see:
-
Microsoft Entra application requirements for MyQ X
Register the application in Microsoft Entra ID
-
Sign in to the Microsoft Entra admin center.
-
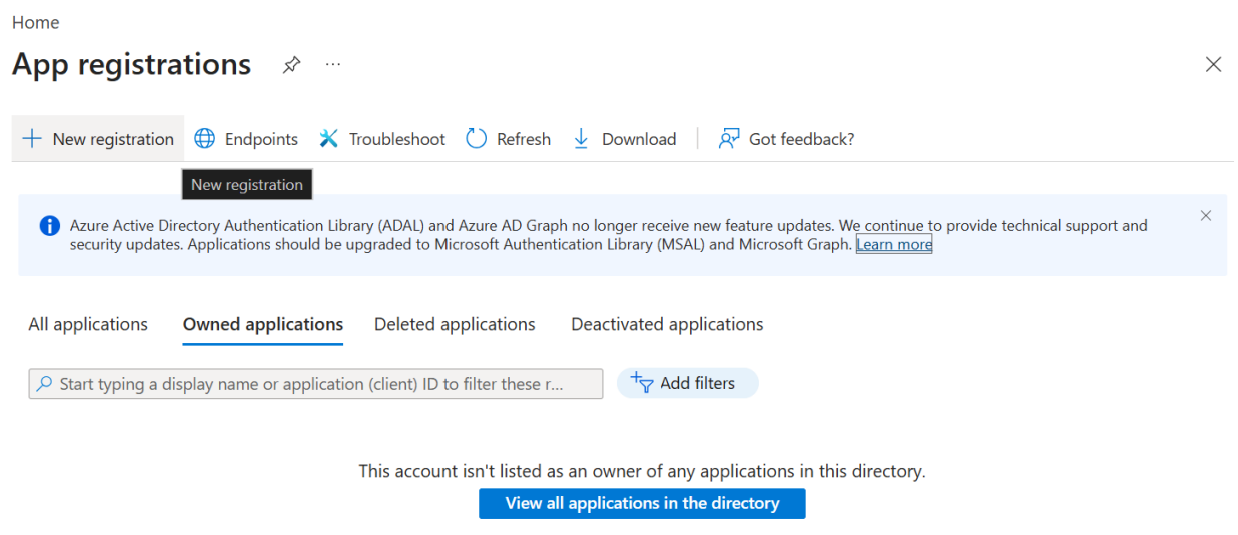
Go to Identity > Applications > App registrations.
-
Select New registration.
-
In Name, enter a name for the application.
Example:
MyQ X Connector,MyQ Universal Print,MyQ Sharepoint -
In Supported account types, select the account type required for your deployment.
-
Leave Redirect URI empty.
You add the required redirect URIs later in this procedure.
-
Select Register.
The application is created.
In the Overview page of the application registration, copy and save the values:
-
Application (client) ID
-
Directory (tenant) ID
You enter these values when configuring the connection in MyQ.
Add redirect URIs
Add the platform configurations and redirect URIs required by the integrations that will use this application.
-
In the application registration, go to Manage > Authentication.
-
Select Add a platform.
-
Select the required platform type.
-
Enter the redirect URI.
-
Select Configure.
-
Repeat these steps for each additional platform or redirect URI required by the MyQ integrations that will use this application.
Use the following common redirect URI patterns:
|
Integration or feature |
Setup method |
Platform |
Redirect URI |
|---|---|---|---|
|
Microsoft Entra ID / Microsoft Graph |
Manual |
Web |
|
|
Microsoft Entra ID SSO helper |
Manual |
Single-page application |
|
|
MyQ Desktop Client Seamless SSO |
Manual, when used |
Mobile and desktop applications |
|
|
OneDrive for Business |
Manual |
Web |
|
|
SharePoint Online |
Manual |
Web |
|
|
Microsoft Exchange Online |
Manual |
Mobile and desktop applications |
|
|
Universal Print |
Manual |
Mobile and desktop applications |
Select the mobile and desktop redirect URI in Microsoft Entra ID. |
Replace:
-
{hostname:port}with the hostname and HTTPS port of the MyQ server. -
{Application-client-ID}with the Application client ID of the application registration.
Create a Client Secret
Create a client secret for the application. MyQ uses this secret to authenticate to Microsoft Entra ID.
-
Go to Manage > Certificates & secrets.
-
Select Client secrets.
-
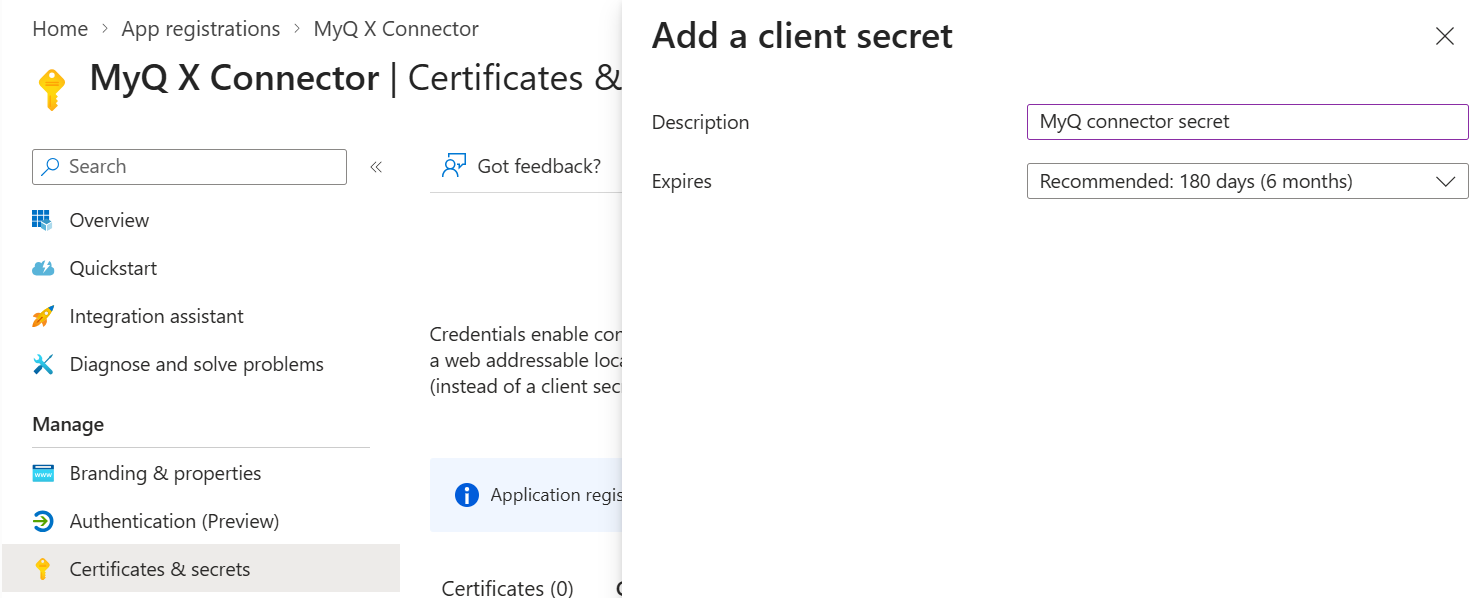
Select New client secret.
Add a client secret -
Enter a description.
Examples:
MyQ X Connector,MyQ X OneDrive,MyQ X SharePoint -
Select an expiration.
-
Select Add.
-
Copy and save the client secret Value.
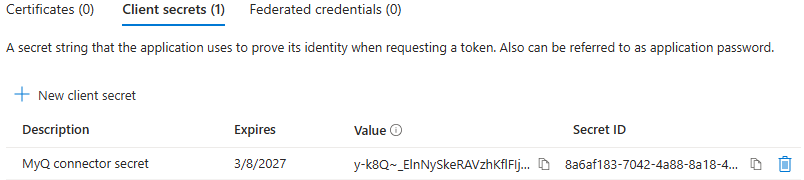
Secret table with expiry, value and secret ID Important: Copy the secret Value, not the Secret ID. The secret value is shown only when the secret is created.
You enter the secret value in MyQ as the security key or client secret.
Add API permissions
Add only the permissions required by the MyQ integrations that will use this application.
-
Go to Manage > API permissions.
-
Select Add a permission.
-
Select Microsoft Graph.
-
Select the correct permission type for each permission, according to the table below:
-
Delegated permissions
-
Application permissions
-
-
Repeat these steps until all required permissions are added.
-
If administrator consent is required, select Grant admin consent.
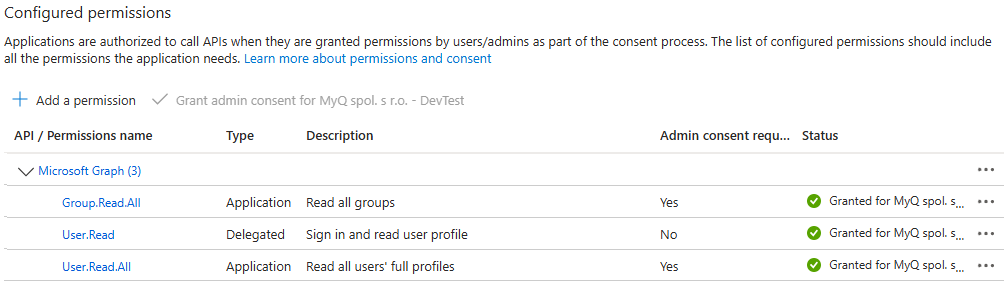
Permissions granted Permission
API
Type
Purpose
Group.Read.AllMicrosoft Graph
Application
Read groups and group membership.
User.Read.AllMicrosoft Graph
Application
Read users.
User.ReadMicrosoft Graph
Delegated
Sign in and read the signed-in user's profile.
Next steps
Continue with the MyQ configuration for the integration that you want to use. Keep the following values available:
-
Directory (tenant) ID
-
Application (client) ID
-
Client secret value