
Register a Microsoft Entra application for MyQ email services through Exchange Online. MyQ can use the connection to send system and scanned-document email and to receive print jobs through Jobs via Email.
Important!
MyQ X sends email using SMTP with OAuth. SMTP AUTH must be enabled in Exchange Online for the tenant or mailbox used as the sender. If SMTP AUTH is disabled, MyQ cannot send email through Exchange Online.
Prerequisites
-
you can register applications in Microsoft Entra ID
-
you can add Microsoft Graph API permissions
-
SMTP AUTH is enabled for the Exchange Online tenant or sender mailbox
-
you know which mailbox will be used as the sender address in MyQ
The mailbox user must complete Microsoft device-code authorization after the connection is added in MyQ.
Register the Application in Microsoft Entra ID
-
Sign in to the Microsoft Entra admin center at https://entra.microsoft.com/
-
Go to Identity > Applications > App registrations.
-
Select New registration.
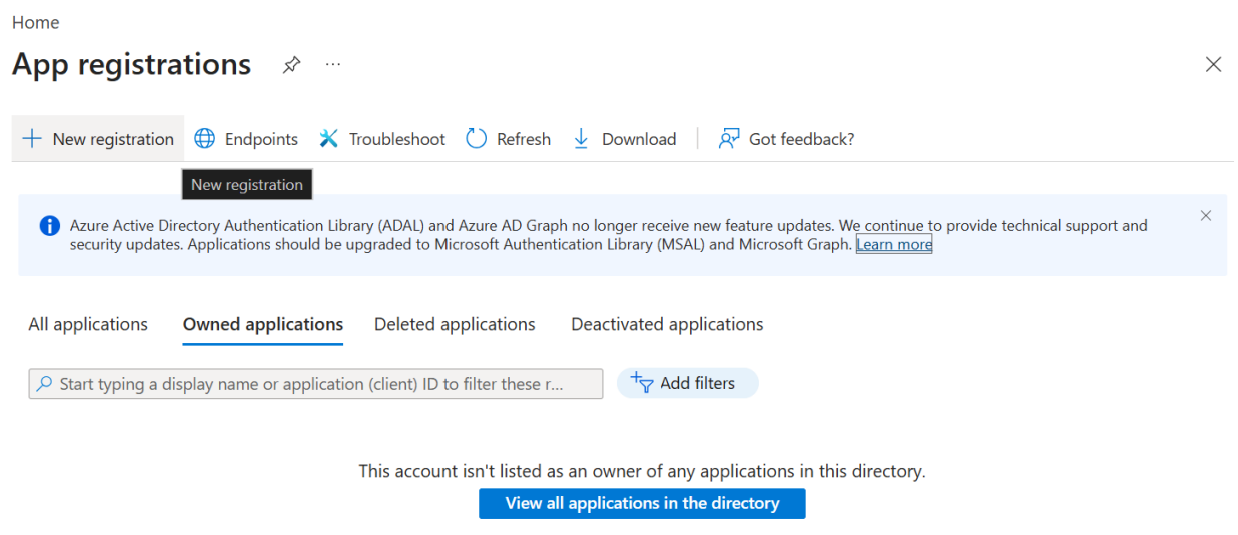
-
In Name, enter a name for the application.
Examples:
MyQ Connector,MyQ Universal Print,MyQ SharePoint,MyQ OneDrive,MyQ Exchange -
In Supported account types, select the account type required for your deployment.
-
Leave Redirect URI empty.
You add the required redirect URIs later in this procedure.
-
Select Register.
The application is created.
In the Overview page of the application registration, copy and save the values:
-
Application (client) ID
-
Directory (tenant) ID
You enter these values when configuring the connection in MyQ.
Configure Authentication
Configure the application as a public client. No client secret is required.
-
In the application registration, go to Manage > Authentication.
-
Select Add a platform.
-
Select Mobile and desktop applications.
-
Select the following redirect URI:
https://login.microsoftonline.com/common/oauth2/nativeclient -
Select Configure.
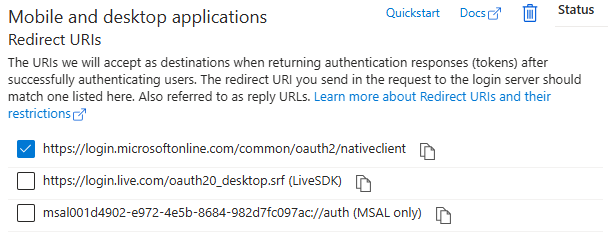
-
In Advanced settings, enable Allow public client flows.
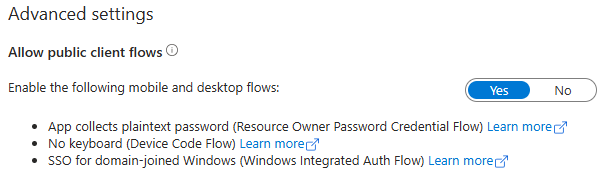
-
Save the changes.
API Permissions
Add the permissions required by MyQ.
-
Go to Manage > API permissions.
-
Select Add a permission.
-
Select Microsoft Graph.
-
Add the permissions/scopes according to the tables below.
Permissions
Microsoft Exchange Online requires the following runtime permissions:
|
Permission |
API |
Type |
Purpose |
|---|---|---|---|
|
|
Microsoft Graph |
Delegated |
Sign in and read the mailbox user's profile. Required for authentication. |
|
|
Microsoft Graph |
Delegated |
Read, update, create, and delete email in the user's mailbox. Required for Jobs via Email using IMAP. Does not include sending email. |
|
|
Microsoft Graph |
Delegated |
Send email from the user's mailbox. Required for outgoing mail. |
Microsoft Exchange Online requires the following authentication scope:
|
Integration |
Scope |
Purpose |
|---|---|---|
|
Microsoft Exchange Online |
|
Allow MyQ to renew access without requiring the mailbox user to authenticate every time. Required for continued access. |
Now you are ready to set up Exchange Online in MyQ. See Connect to Microsoft Exchange Online.