Now that your print server is set up, let’s set up the simplest printing method, with a Direct Print queue.
A direct queue can have only one printing device assigned to it, and this makes it a suitable solution a small team that shares a printing device in a trusted environment.
With Direct Print, documents are printed immediately, without user authentication on the device. Use direct queue printing only in trusted environments. For secure printing, use another queue type, such as a Pull Print queue.
Create a Direct Print Queue
In this example, we create a direct queue that prints to the Kyocera device that we added during Quick Setup, and we will configure this queue to only print in monochrome.
-
Log in to the Web Interface, and go to Queues.
The Queues tab opens, showing several queues that are created by default. -
Click Add Queue.
-
Define a name for your queue. In our example, we call the queue Shared_Direct.
-
In Type select Direct.
-
Go to Policies and set Color to Force Mono, and click Save.
-
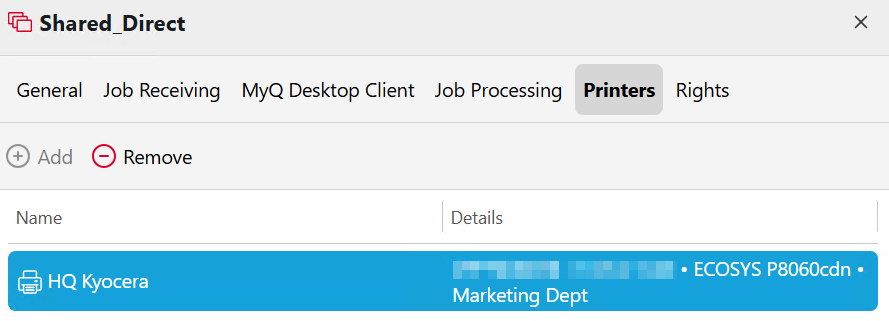
Go to the Printers tab and click +Add.
-
Select a printer from the list and click Save.
-
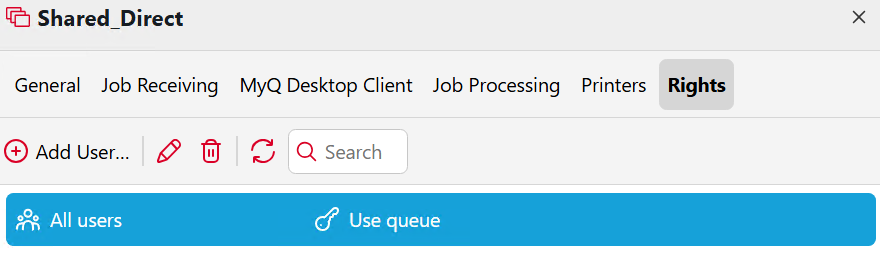
(Optional) To view which users and groups can use this queue, click Rights.
The All Users group is assigned to a new Direct Queue by default.

The direct queue is now set up on the server. For information about how to print to a queue from a client computer, see User Basics: Print and Copy.