A successful installation of the print server involves these main steps:
-
Install the Print Server
-
Run Easy Config
Install the MyQ Print Server
While you typically install Print Server on a virtual Windows Server, you can run it on a Windows personal computer.
-
Click LTS, and download the latest version of MyQ Print Server.
-
Run the executable file. The Select Setup Language dialog box appears.
-
Select your language and click OK. The License Agreement page appears.
-
Accept the terms of the License Agreement, and click Next. The Select Destination Location dialog box appears.
-
Select the folder where you wish to install MyQ. The default path is:
C:\Program Files\MyQ\ -
Click Install. MyQ is installed on the server.
-
Click Finish, and restart your system, as required.
Run Easy Config
The Easy Config utility helps you manage your server settings, including ports, database backup and restore, administrator credentials management, and more. After installation, Easy Config opens automatically the next time your Windows server starts. You can also launch it on demand from the Windows Start menu.
Use Easy Config to complete the initial server setup in just a few steps.
1. Set your Admin Credentials
On the Home tab:
-
Set a password for the Server Administrator Account (*admin). The *admin account uses this password to log in to the web interface.
-
(Recommended) Change the default password for the Database Administrator Account.
Later you can modify these passwords from the Security tab.
Use the *admin account for your initial setup. Later, when you have assigned administrator privileges to one or more individual users, we recommend that you disable the *admin account in Easy Config > Security.
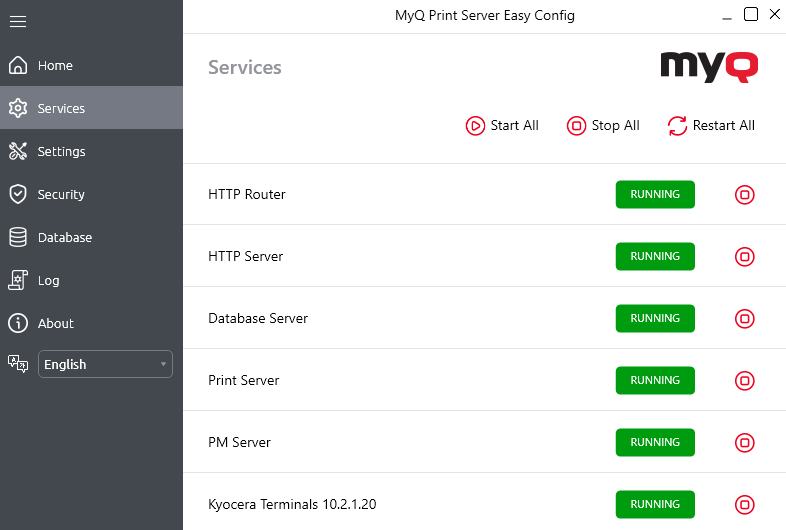
2. Verify Services
On the Services tab:
-
Verify that all services are running.
-
If any are stopped, click Start All.
3. Check Basic Settings
On the Settings tab:
-
Confirm the default file paths for system data and jobs, or change the location if necessary.
-
Modify the port configuration if required (the default incoming port for the web interface is 443).
4. Finish Setup
Some changes may require MyQ services to restart. When all services are running, return to the Home tab and click MyQ Web Administrator to open the web interface.
For more information, see Access the Web Interface.