To enable secure pull printing, custom actions, scan workflows, and much more, use a MyQ Embedded Terminal.
These features are available for the MyQ X Enterprise license plan and higher.
First, download a terminal package file from the MyQ Community portal. In this example, we use the package MyQ Epson Terminal 10.2.0.342.pkg.
Next we create a configuration profile and associate it with the HQ Epson printer that we added during Quick Setup, and re-activate the printer to apply the new configuration.
Create a Configuration Profile
A configuration profile defines the available MyQ software, features, and parameters on the device. Configuration profiles let you specify a range of settings including a price list, terminal type, panel idle timeout, login methods, and more. In this example, we simply configure the embedded terminal package and enable simple PIN login.
-
Go to MyQ > Settings > Configuration Profiles.
-
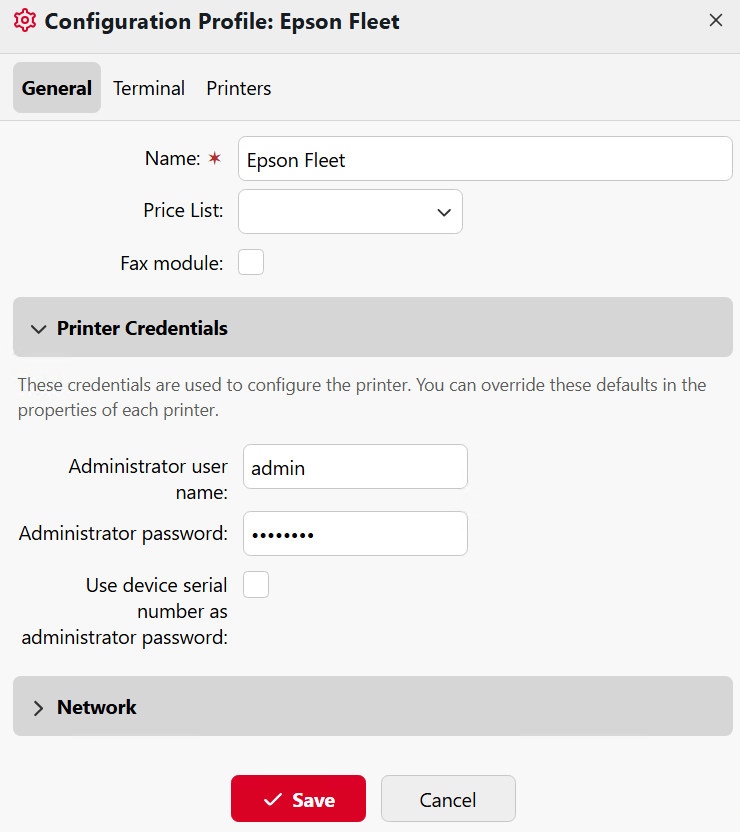
Click +Add to create a new profile, and specify a name. For this example, we use Epson Fleet, but you can use any name you want – configuration profiles are flexible and vendor agnostic.
-
Under Printer Credentials, type the administrator username and password for the device. Click +Add to save the profile.
-
On the Terminal tab, set the Terminal Type to Embedded.
-
Click Install Terminal Package, browse to the
.pkgfile that you downloaded and click OK. The terminal package is installed in the background.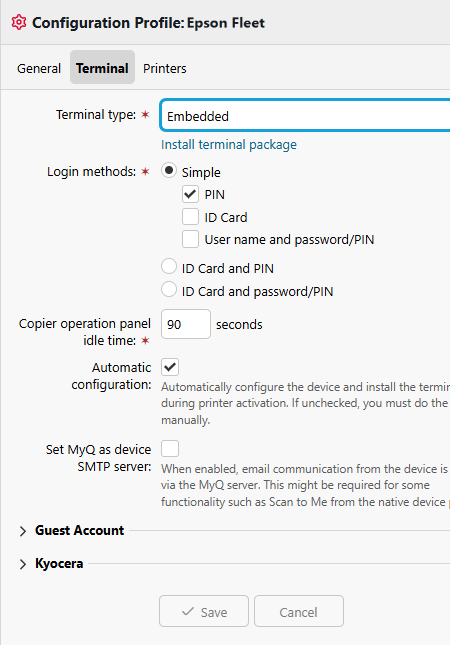
-
On the Printers tab, click Add and select a printer to add to the profile. In this example, we use the Epson device that we added in Quick Setup.
-
Click Save.
-
Because the printer was already activated without a terminal, we now need to re-activate it. Click OK to confirm the re-activation.
Customize a Terminal Action
When the embedded terminal is activated, new features become available on the device through terminal actions. Here are a few of the actions that are available.
-
Print All – release all print jobs in ready or paused state.
-
My Jobs – view and manage ready, favorite, and printed jobs.
-
Easy Print – print files without sending them first to MyQ, from sources such as cloud storage, network or local drives, and the user's default storage.
-
Easy Scan – one-tap scanning to send to destinations such as cloud storage, email, and network or local drives.
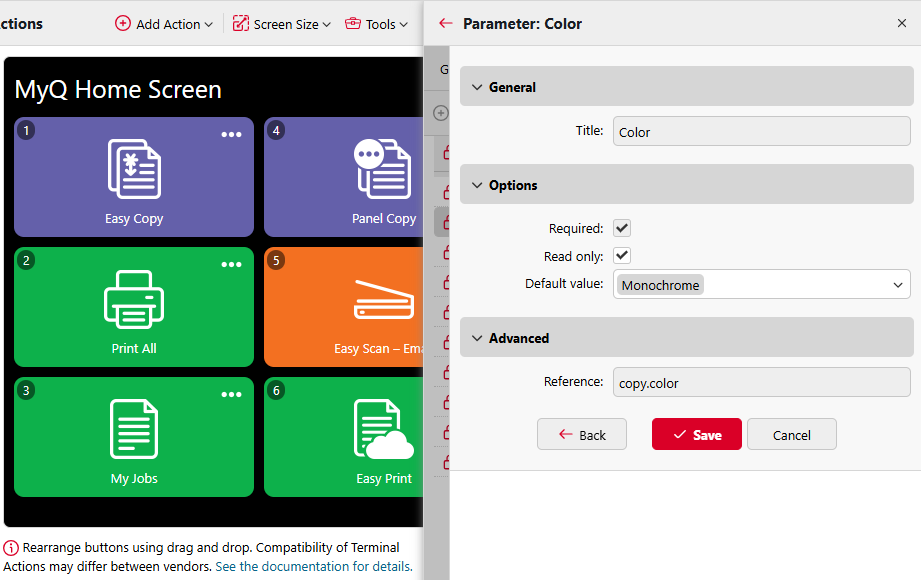
As an example, let’s customize the Easy Copy action so that only monochrome copying is allowed.
-
Go to MyQ > Settings > Terminal Actions.
-
Right-click on the Easy Copy action, and select Edit.
If the Easy Copy action is not present, you can add it by going to Add Action > Copy > Easy Copy. -
On the Parameters tab, select the Color parameter and click Edit.
-
Under Options, verify that Read only is enabled, and set the Default value to Monochrome.
-
Click Save.
The new action appears immediately on the terminal preview.