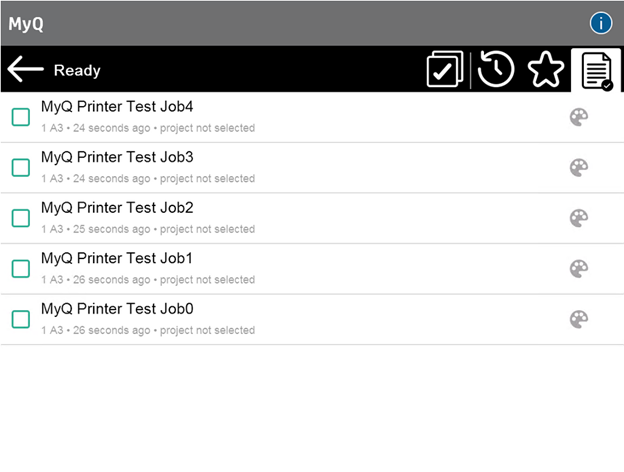
This terminal action shows all the jobs that can be printed on the printing device. Users can manage their ready, favorite, and printed jobs here.
-
Ready jobs: This is the initial tab of the My Jobs screen. It can be reopened by tapping the page icon at the upper-left corner of the screen. It contains jobs waiting in queue, ready to be printed.
-
Favorite jobs: Favorite jobs can be displayed by tapping the star icon at the upper-left corner of the screen. It contains a list of jobs you have marked as favorites.
-
Printed jobs: Printed jobs can be displayed by tapping the clock icon at the upper-left corner of the screen. It contains a history of your printed jobs.
Job Filters
In the MyQ Web administrator interface, in MyQ, Settings, Printers & Terminals , under the General section, it is possible to Allow a color job on a B&W printer, but the job is accounted as B&W. This option is disabled by default.
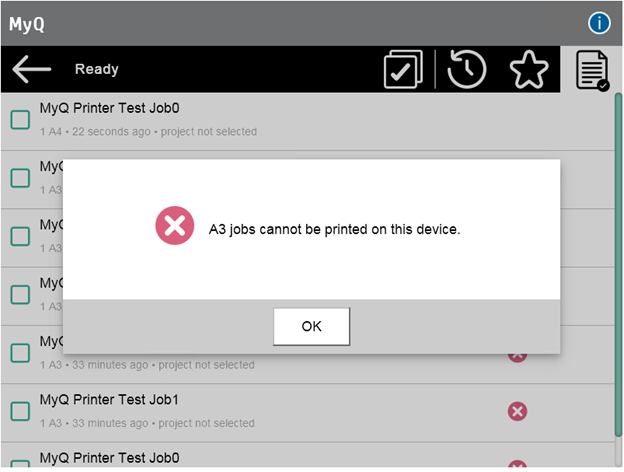
If a job is not allowed to be printed because the selected format/color is not supported by the device, there will be a red X icon next to the job. Clicking the icon displays the reason for the error:
-
Color jobs cannot be printed on this device, when a color job is spooled to a B&W printer.
-
A3 jobs cannot be printed on this device, when an A3 job is spooled to an A4 printer.
-
Neither color nor jobs in this format can be printed on this device, when an A3 and color job is spooled to an A4 and B&W printer.
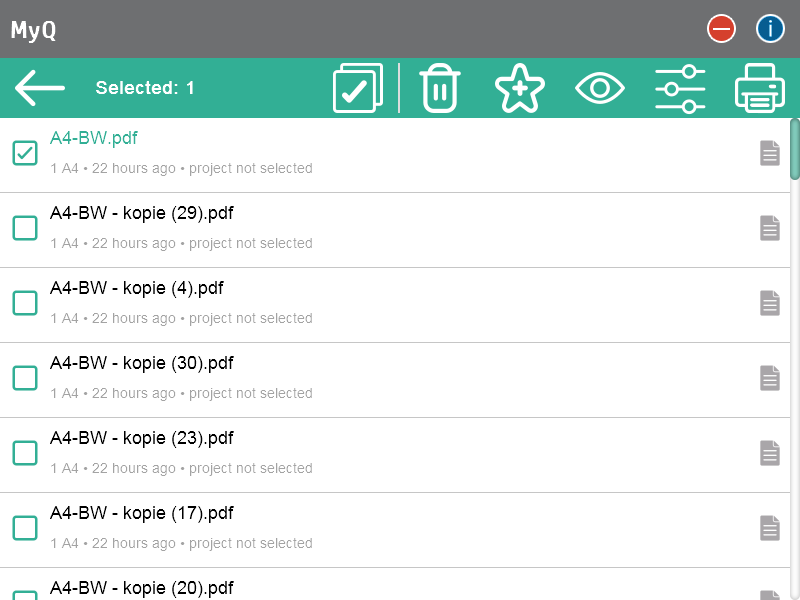
Managing jobs on the My Jobs screen
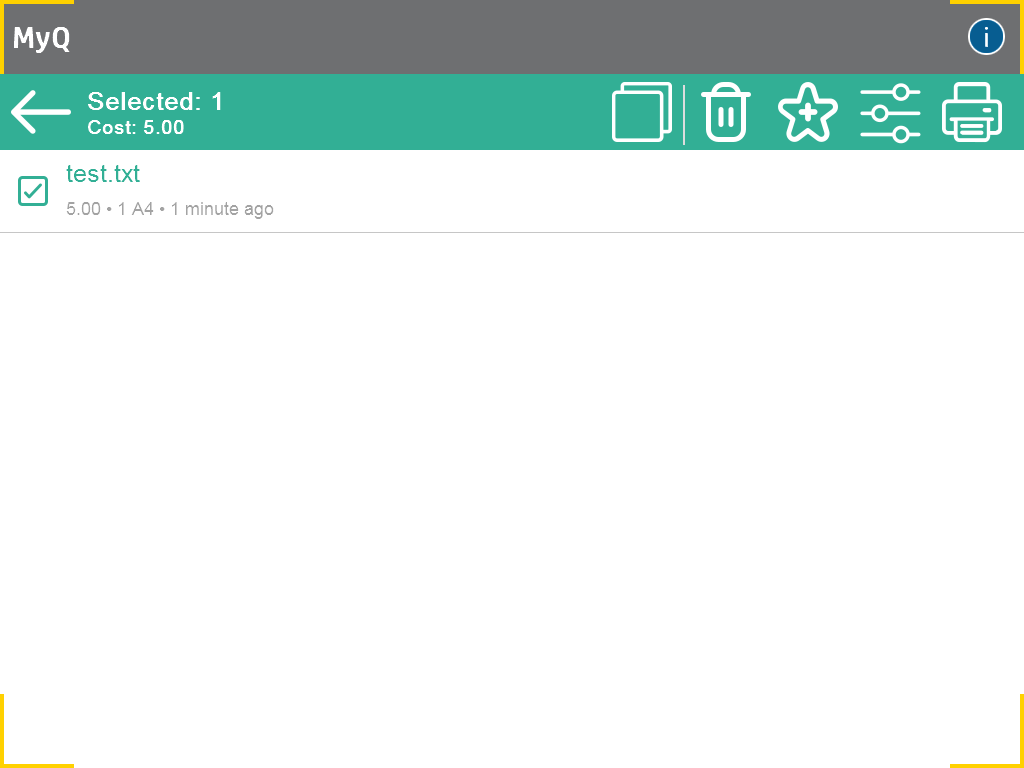
To display the available job management options, select the job from the list. The selected print jobs management bar opens at the top of the screen.
On the bar, you can select from the following options:
-
Print: Tap the printer icon to print the selected jobs.
-
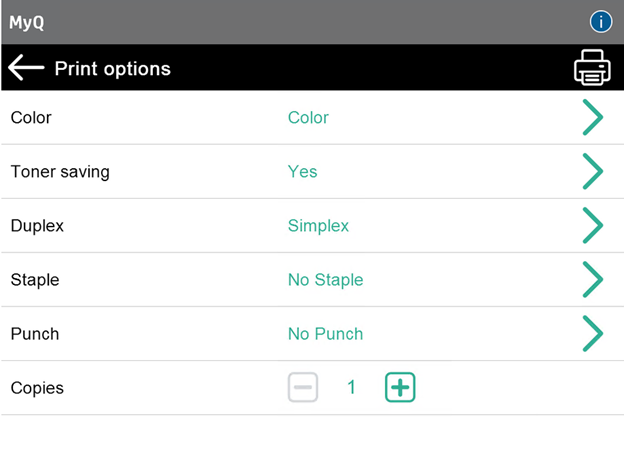
Edit: Tap the edit icon to edit the print options of the selected jobs. In the Print options dialog box, depending on the permissions given by the administrator, the user can select between color or B/W, toner saving options, simplex/duplex options, and change the number of copies. limitation : Since version 8.2 patch 10, Staple and Punch are shown on all devices regardless of the device being able to perform the actions.
After changing the print options, the user can tap PRINT to print the jobs.
In certain cases, you may see listed some print options that are not applicable due to the queue or printer being used. For example, you may see Staple options despite printing on a terminal with no stapling feature. In cases such as these, this command will be ignored.
-
-
Job Preview: Tap the eye icon to preview the selected jobs.
-
Add to favorites: Tap the star-plus icon to add the selected jobs to your favorites (Visible on the Ready jobs tab and on the Printed jobs tab).
-
Delete from favorites: Tap the star-minus icon to delete the selected jobs from your favorites (Visible on the Favorite jobs tab).
-
Delete: Tap the bin icon to delete the selected jobs.
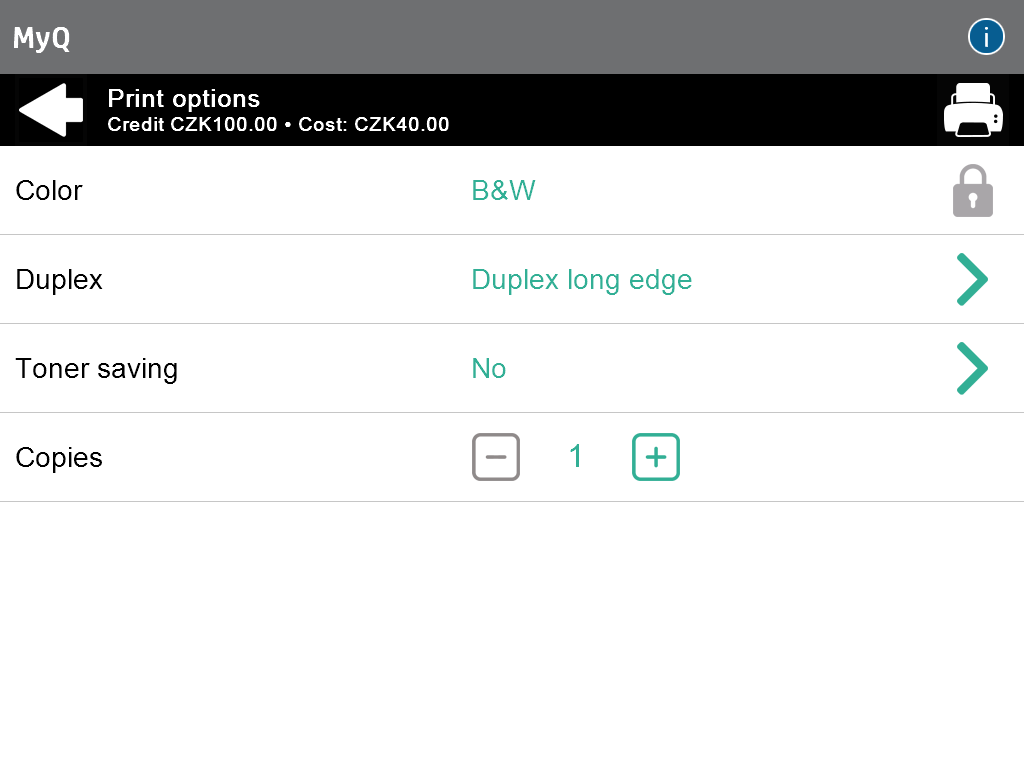
Job cost in Print options
This feature allows to view the cost of a job changing dynamically in the Print options screen, depending on the new job settings set.
-
When the job’s cost is lower than the user's credit:
-
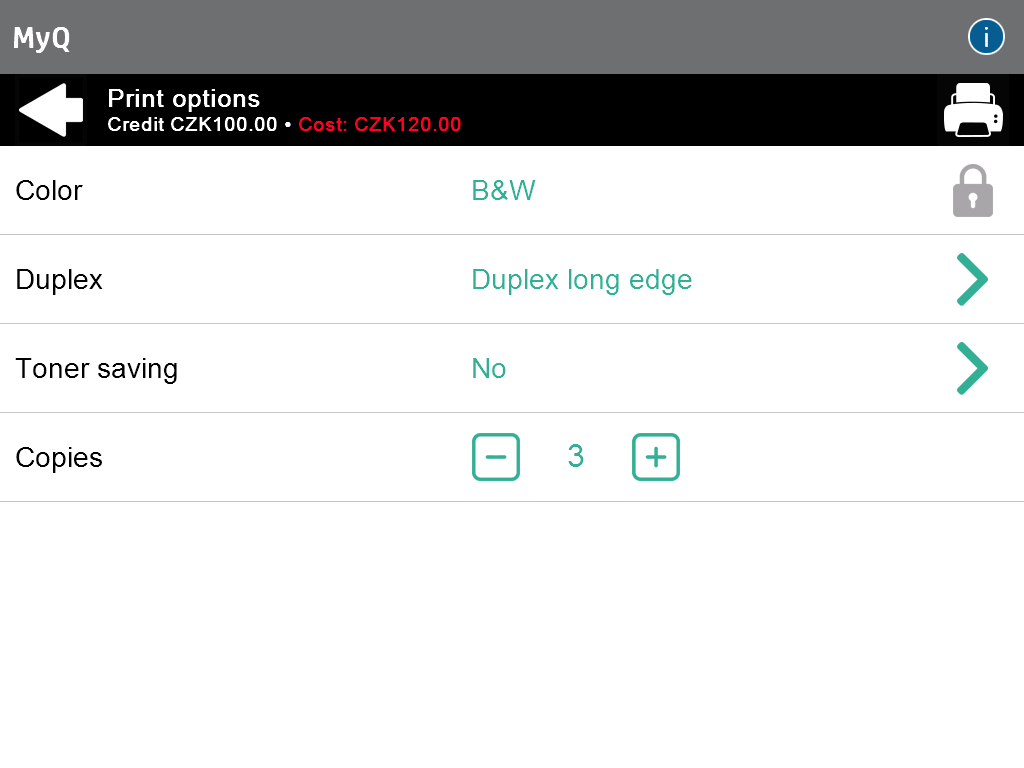
The job’s cost and the current available user's Credit are displayed in the header of the Print options screen. The job cost changes itself dynamically according to options selected in each chargeable print option, using prices set in the price list (including number of copies). The cost updating happens after a change of each value; afterwards, the user is redirected to the Print options screen (except for "Copies". In this case, the price updating happens after each increase/decrease in the number of copies).
-
If the Print button is pressed, the print job is executed with the finally set up job's cost in the Print options screen and the user's Credit is updated accordingly.
-
If the Back button is pressed, a warning pop-up is displayed. If "No" is pressed, the user stays on the Print options screen. If the user pressed "Yes", the user is moved to the My Jobs screen, the new setup of the print jobs is not kept, and the selected-to-be-modified job displays the original cost, not the one calculated in Print options screen after modifying job settings.
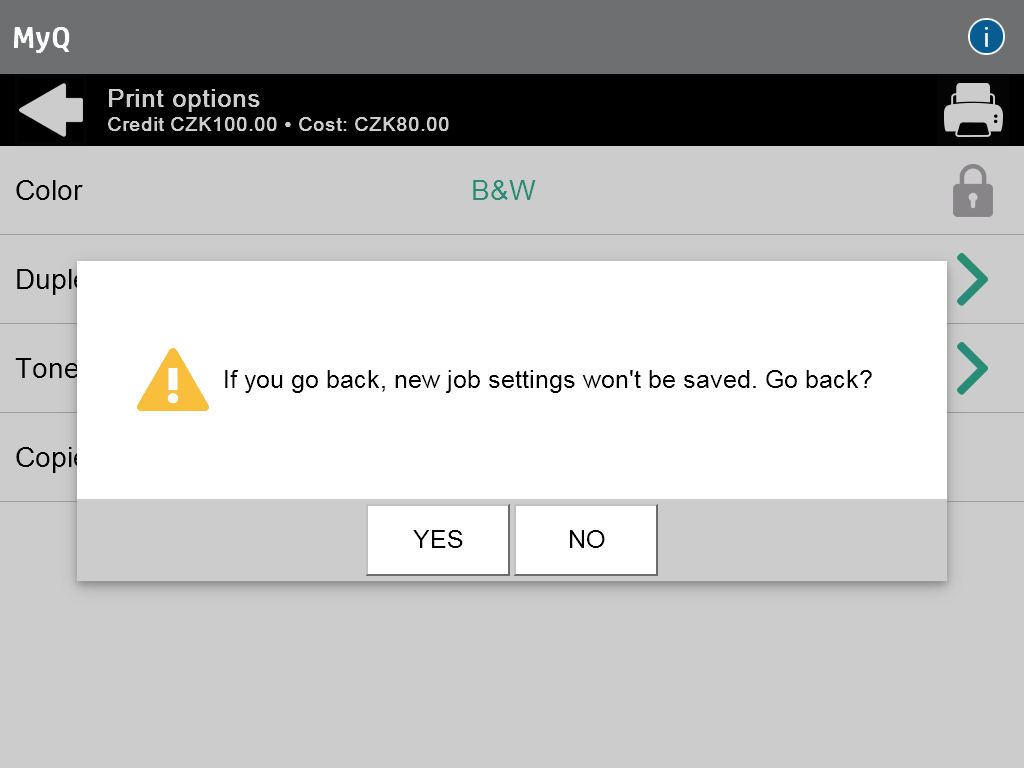
In case nothing was changed, no pop-up is shown and the user is redirected to the previous screen directly. A pop-up is shown only when the user has changed any setting in the Print options screen.
-
-
When the job’s cost is higher than the user's credit:
-
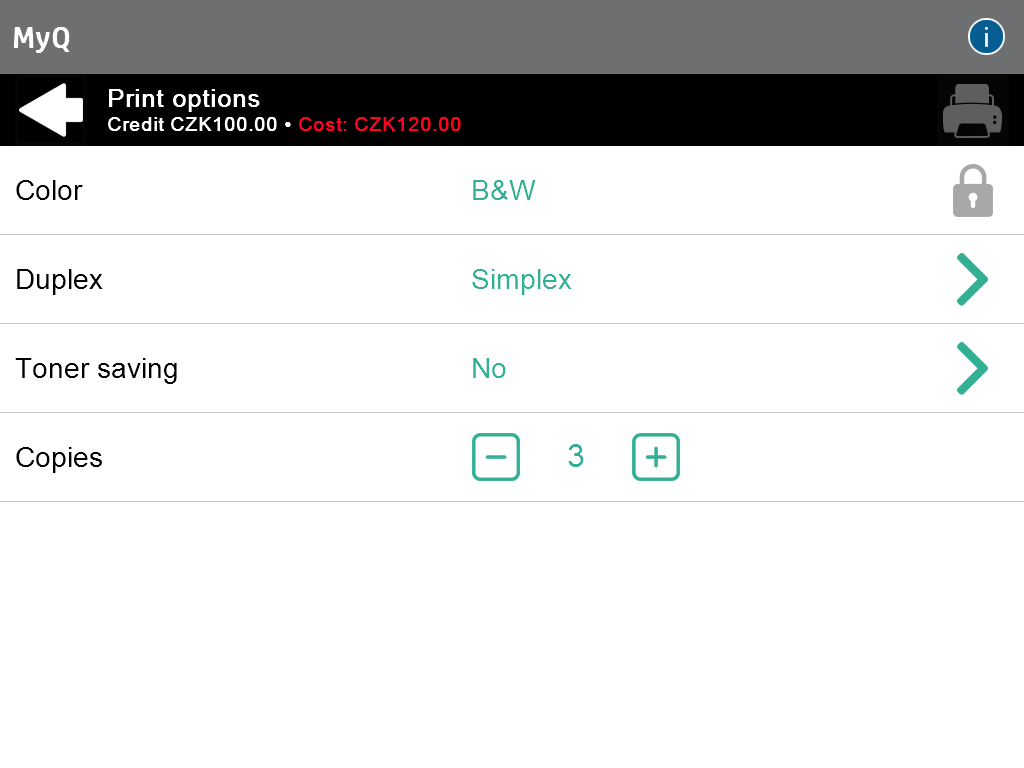
If Recharge credit is off and the modified job's cost is higher than the available credit, the Print button becomes greyed out. If the modified job's cost is lower than the available credit, the Print button is enabled. The cost label is in red.
-
If Recharge credit is on and the modified job's cost is higher than the available credit, the user is redirected to the Recharge Credit screen after pressing the Print button. If the recharge is successful and the user's credit is enough to execute the job, the job is executed. If the user presses the Back button in the recharge screen, the user is redirected to the Print options screen.
-
-
Always display job price:
-
When the “Always display job price” setting is enabled and the price list is connected to a terminal, the Cost part will be displayed and dynamically updated. A pop-up about saving settings is shown only when Credit is enabled.
-
Job Preview
The Job Preview feature is used to generate previews of jobs. To enable it, go to MyQ, Settings, Jobs, Job Preview. It is possible to limit the Number of pages to be generated (1 by default) in the preview. To include all the pages, set the value to 0.
Once enabled, the Job Preview (eye) button is visible on the terminal.
Tapping on it redirects to the Job Preview screen. The first page of the document is displayed by default in a thumbnail view, as the first page of the job preview. Besides the document’s preview, you can also see the document’s name in the lower-left corner, the number of pages in the lower-right corner, and the navigation menu to the right side.
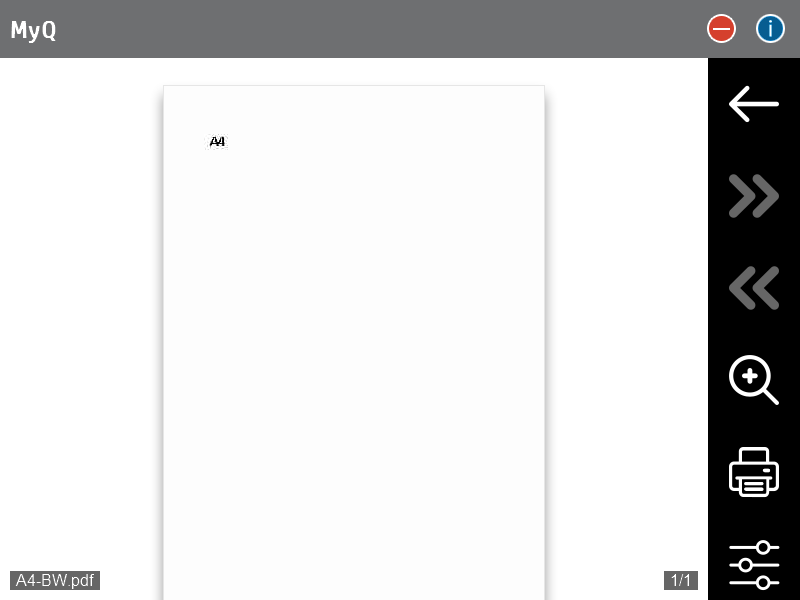
In the navigation menu, you can use the back button to return to My Jobs, the forward and backwards buttons to preview more pages, the magnifying glass button to zoom in and out of the previewed page, open the job’s print options, and print the job.
Job Roaming
The Job Roaming feature enables users to transfer their jobs from one location to another: jobs sent to one Site can be printed on printing devices at any other Site.
The administrator can choose between a Separate and a Shared job list for the remote jobs, by going to MyQ, Settings, Jobs in the Job Roaming section. A MyQ Central server with Site servers is required for this feature.
To print the jobs, the user has to take the following steps:
-
Log in to the embedded terminal.
-
Tap My Jobs. The My Jobs screen opens.
-
The remote jobs are automatically downloaded and are marked with the source server's IP address or hostname. Select them and tap Print.
If a Shared job list is used and the Print remote jobs within Print All is selected, the user can tap the Print All terminal action and all the jobs, remote and local, are printed.