MyQ is able to automatically send scanned documents to a specified folder or email of the user, with the Scan to Me feature.
With the feature enabled, MyQ serves as an email server - it receives a scanned job from printing devices via SMTP protocol, detects the device that the job is sent from, finds the user that is currently logged in on the device, and sends the job to their folder or email (depending on the user's settings).
To use Scan to Me you need to set up the feature on the MyQ server and on the printing device to enable the MyQ users to use all of the scanning options. After that, you need to provide the users with receiver email addresses, where they can direct the scanned documents.
The device must have the correct date and time set. Note that the date and time are not configured during automatic remote setup.
Setting up Scan to Me
The setup of the Scan to Me feature consists of the following consecutive steps:
-
Enable and set up scanning on the MyQ server.
-
Configuration on the printing device.
-
Set the destinations for the MyQ users on the MyQ server.
To enable the scanning function:
-
Enable and set up scanning on the MyQ server.
-
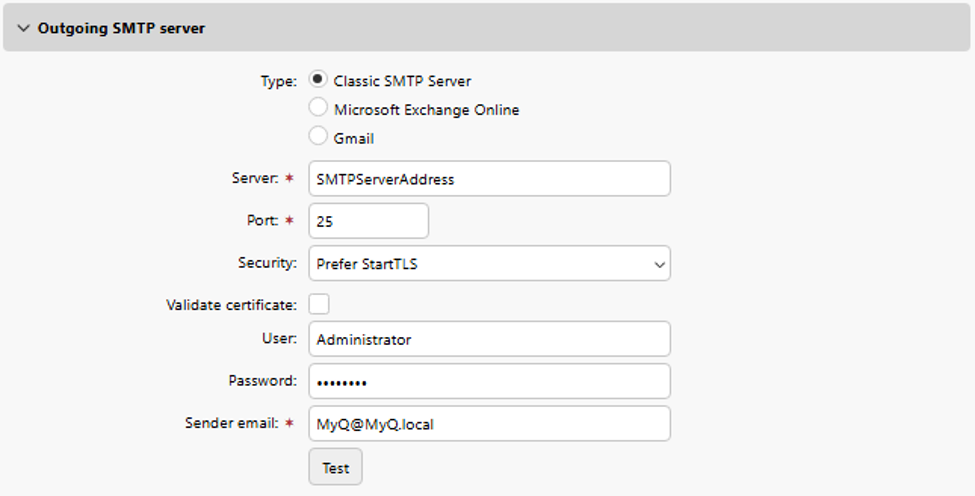
Set Server to hostname or IP address of the SMTP server.
-
Set Port to port of the SMTP server.
-
Set User and Password to credentials for the SMTP server if it is required.
-
Set Sender email.
-
-
Configure settings on the device:
-
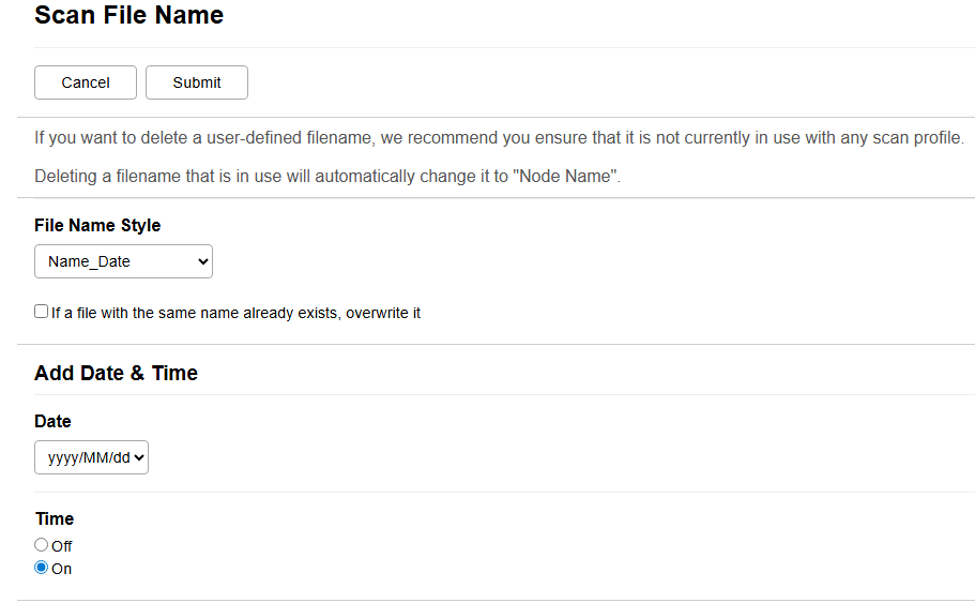
Go to Scan > Scan File Name.
-
Set File Name Style to Name_Date.
-
Set Date to yyyy/MM/dd.
-
Set Time to On.
-
-
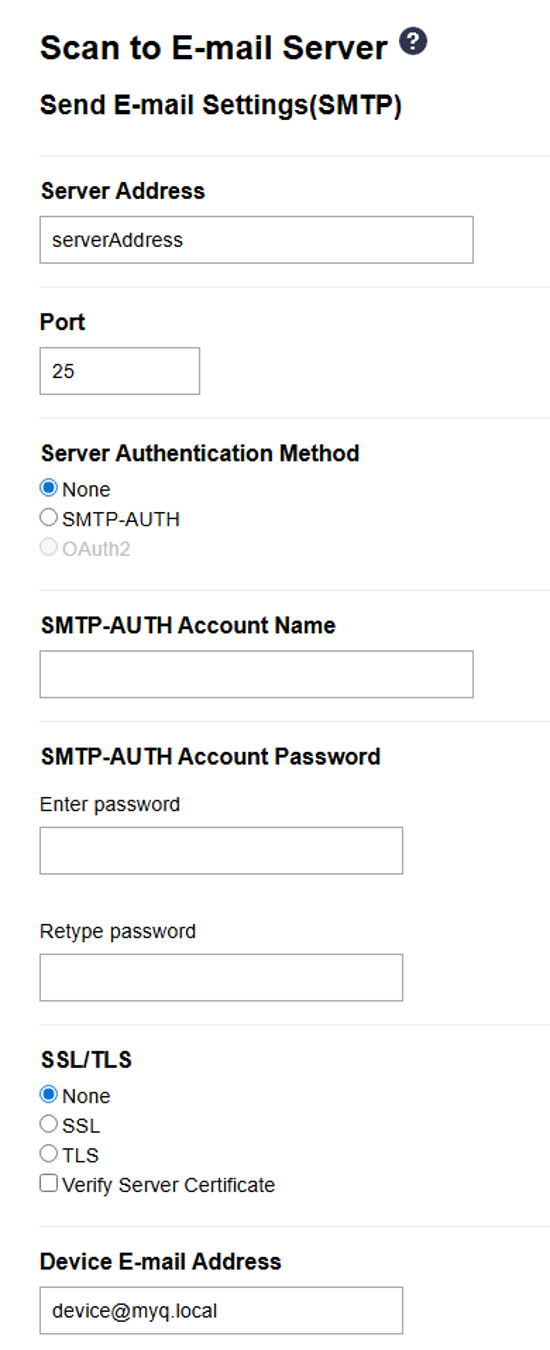
Go to Scan > Scan to E-mail Server.
-
Set Server address to hostname or IP address of MyQ server.
-
Set Port to MyQ SMTP server port.
-
Set Device E-mail Address to device@myq.local.
-
-
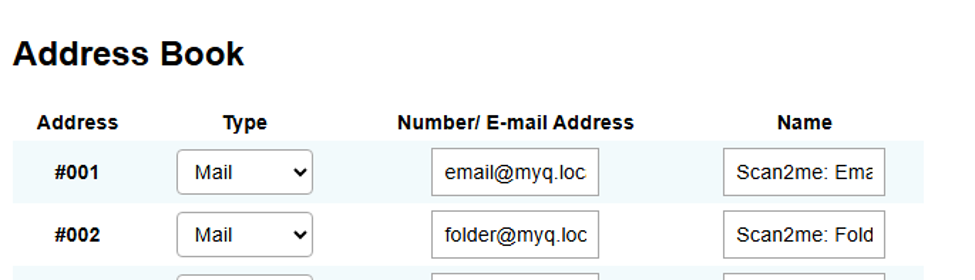
Go to Address Book.
-
Add E-mail Address email@myq.local.
-
Add E-mail Address folder@myq.local.
-
-
-
Set the destinations for the MyQ users on the MyQ server.
Using Scan to Me
To send the email to the desired destination, the scan needs to be directed to a specific receiver email address. There are two options to enable MyQ users to send the scans there: provide them with the respective receiver email address or predefine these email addresses on the printing device's Web UI.
Email addresses for Scan to Me
Sending scans to the user's primary email: the scanned document is sent to the user email set in the email text box on the user properties panel. The receiver email address must have the format email@myq.local.
Sending scans to other emails: The scanned document is sent to all emails set in the User's scan storage text box (multiple emails are separated by commas) on the user properties panel. The receiver email address must have the format folder@myq.local.
Sending scans to the user's scan folder: You must create a shared folder and ensure that MyQ has access to this folder. After this, enter the folder's location in the User's scan storage text box. The scanned document is sent to MyQ, and then stored in the shared folder via the SMB protocol. The stored document file name consists of the user account name, the date, and the time when the scan was sent. The receiver email address must have the format folder@myq.local.