
Register a Microsoft Entra application for Universal Print before configuring Universal Print in MyQ.
This procedure creates the Microsoft-side application registration, configures public-client authentication, adds the required Microsoft Graph and Universal Print permissions, and enables document conversion in Universal Print.
Prerequisites
-
Universal Print is available in the Microsoft tenant.
-
You can register applications in Microsoft Entra ID.
-
You can add API permissions and grant administrator consent.
-
You can access Universal Print > Settings in the Microsoft Entra admin center or Azure portal.
-
A Universal Print license must be assigned to the user account that creates the connection in MyQ.
Register the application in Microsoft Entra ID
-
Sign in to the Microsoft Entra admin center at https://entra.microsoft.com/
-
Go to Identity > Applications > App registrations.
-
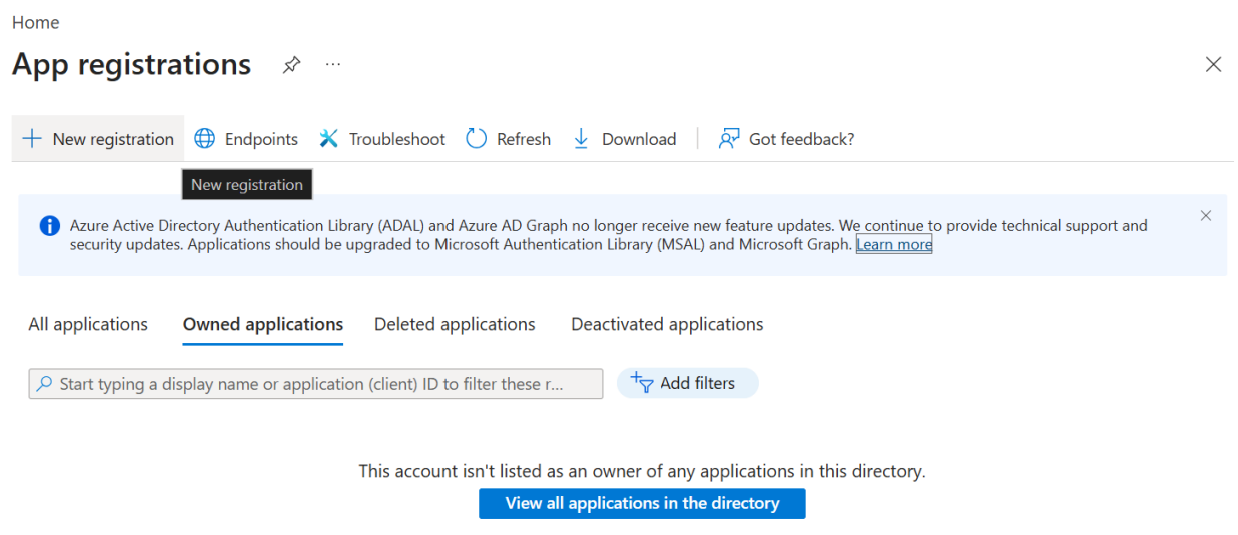
Select New registration.
-
In Name, enter a name for the application.
Examples:
MyQ Connector,MyQ Universal Print,MyQ SharePoint,MyQ OneDrive,MyQ Exchange -
In Supported account types, select the account type required for your deployment.
-
Leave Redirect URI empty.
You add the required redirect URIs later in this procedure.
-
Select Register.
The application is created.
In the Overview page of the application registration, copy and save the values:
-
Application (client) ID
-
Directory (tenant) ID
You enter these values when configuring the connection in MyQ.
Configure Authentication
Configure the application as a public client. No client secret is required.
-
In the application registration, go to Manage > Authentication.
-
Select Add a platform.
-
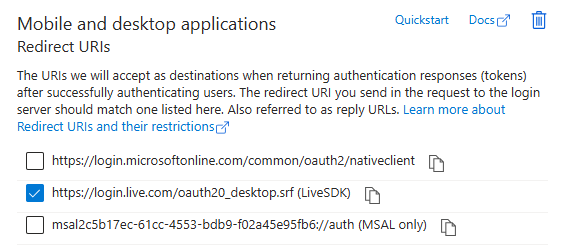
Select Mobile and desktop applications.
-
Select the following redirect URI:
https://login.live.com/oauth20_desktop.srf -
Select Configure.
-
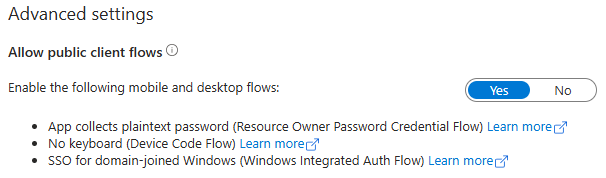
In Advanced settings, enable Allow public client flows.
-
Save the changes.
Add API Permissions
Add the Microsoft Graph and Universal Print permissions required by MyQ.
-
Go to Manage > API permissions.
-
Select Add a permission.
-
Select Microsoft Graph or Universal Print, as appropriate.
-
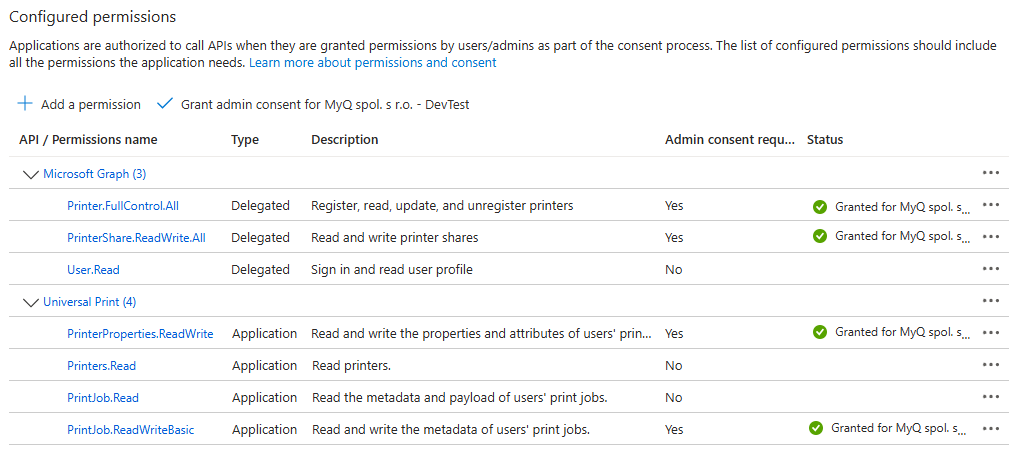
Add the permissions according to the table.
Microsoft Universal Print requires the following runtime permissions:
|
Permission |
API |
Type |
Purpose |
|---|---|---|---|
|
|
Microsoft Graph |
Delegated |
Read and write printer shares. |
|
|
Microsoft Graph |
Delegated |
Register, read, update, and unregister printers. |
|
|
Universal Print |
Delegated |
Create and register printers. |
|
|
Universal Print |
Application |
Read printers without a signed-in user. |
|
|
Universal Print |
Application |
Read and write printer properties and attributes without a signed-in user. |
|
|
Universal Print |
Application |
Read print-job metadata and payload without a signed-in user. |
|
|
Universal Print |
Application |
Read and write basic print-job metadata without a signed-in user. |
Grant Administrator Consent
Grant administrator consent for the permissions added to the application.
-
Go to Manage > API permissions.
-
Review the configured Microsoft Graph and Universal Print permissions.
-
Select Grant admin consent.
-
Confirm the consent request.
Enable Document Conversion in Universal Print
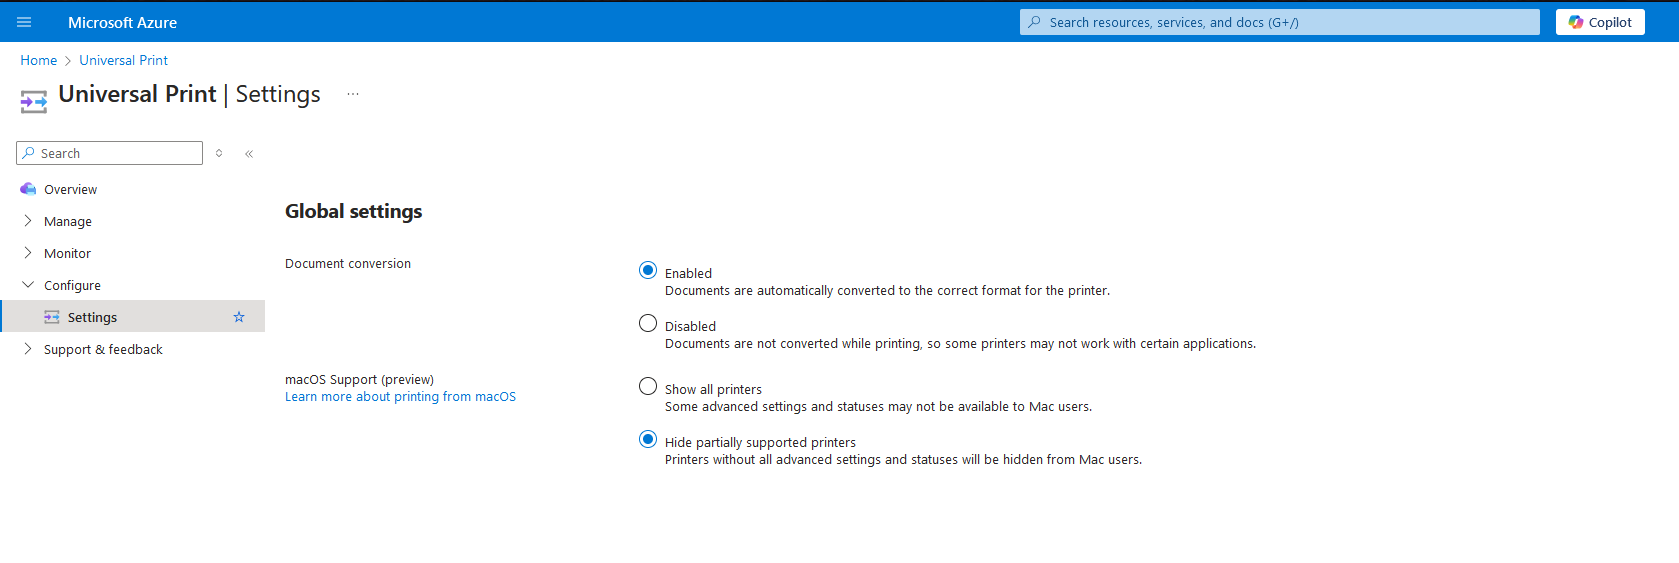
Enable document conversion for Universal Print. In the Azure portal, go to Universal Print > Settings and set Document Conversion to Enabled.
Now you are ready to set up Universal Print in MyQ. See Connect to Microsoft Universal Print.