.png)
Get Started with REST API
The MyQ X Print Management REST API enables seamless integration between your MyQ print environment and external applications or services. This powerful interface allows developers to extend MyQ X functionality, automate workflows, and create custom solutions that enhance the print management experience for both administrators and end users.
This document describes the basic usage of the MyQ X REST API. You will learn how to create a REST API application in MyQ Web UI, use the generated credentials to obtain an authentication token from the server, and perform basic operations.
Contents
Integration Possibilities
Print Portals, Intranets, Desktop and Mobile Applications: Integrate MyQ functionality directly into your organization's existing web portals and intranet systems; enable users to view and update their MyQ account details, check their current balance, purchase additional credits, reset their PIN, view, manage, release, and delete their print jobs.
Device Fleet Management: Programmatically monitor printer status, consumables, and maintenance needs.
Print Source Integration: Enable printing from proprietary document management systems, specialized departmental storage, or custom cloud repositories through Easy Print.
Scan Destination Options: Configure Easy Scan to deliver scanned documents directly to specialized storage systems, compliance archives, or department-specific repositories.
Workflow Automation: Trigger document workflows based on print or scan activities.
Authentication Integration: Connect MyQ with external identity providers or multi-factor authentication systems.
Cost Allocation: Integrate with financial systems for accurate billing and charge-back processes.
Automated Report Generation: Schedule and run MyQ reports programmatically for inclusion in organizational dashboards.
Custom Data Analysis: Download raw report data for integration with enterprise BI tools or specialized analysis applications.
Compliance Documentation: Automatically generate and archive usage reports required for regulatory compliance.
Open API Documentation
The full technical specification of the REST API is provided in YAML files with every MyQ X installation. These files contain the description of all available API endpoints, as well as their requirements (scopes, token type), and usage.
Find out how to access the files and read them here.
Working with REST API
The REST API in MyQ X may change with time, and to ensure backward compatibility, it exists in multiple versions, which are indicated in the request path, such as {{baseUrl}}/v3/server/config.
In MyQ X 8.2 and 10.2, the latest Print Server REST API is v3, while the Central Server’s latest version is v2.
It is recommended to start developing integration for the latest available REST API version of each product, since older versions may be deprecated in future MyQ X releases.
Always follow the REST API docs for the product you intend to use.
In this guide, we will also use Postman to illustrate the features of the REST API. You can download Postman from https://www.getpostman.com/apps.
When working with Postman, utilize the console (available in the bottom left corner of the application) to inspect the entire communication, especially to debug any issues. You can also display the code in various programming languages (top right corner).
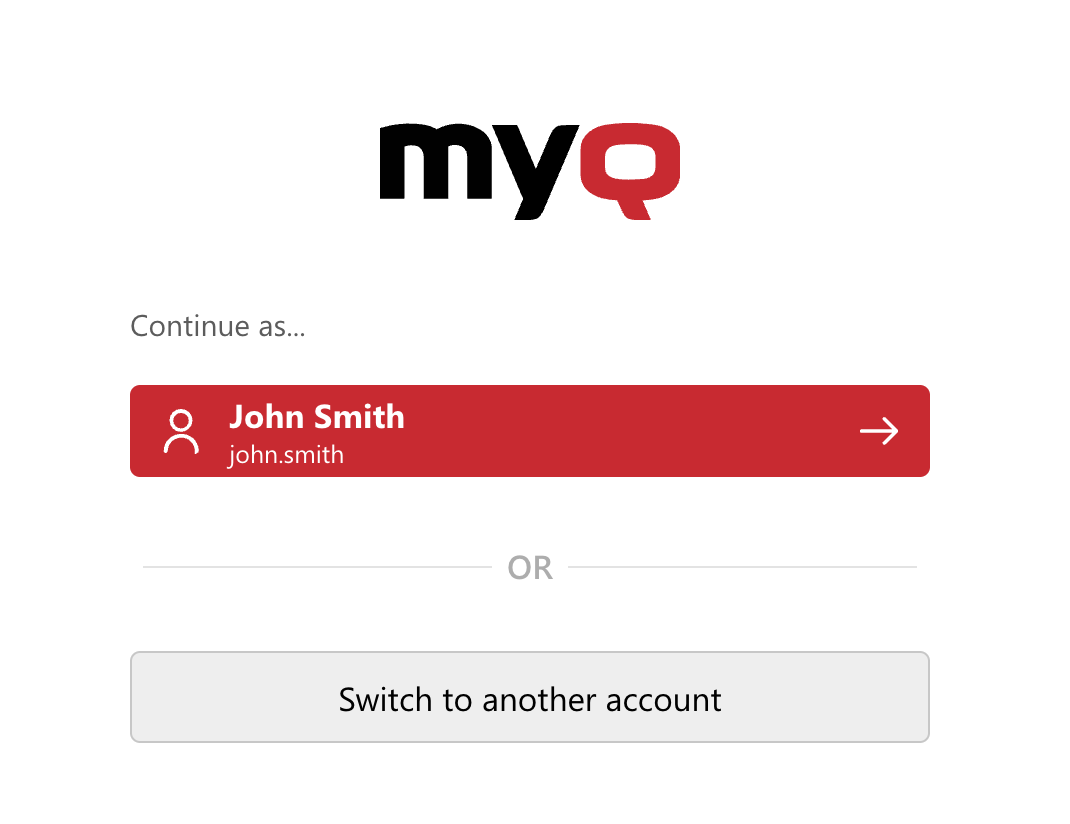
Register Your Client in MyQ X
MyQ X a Client ID and Client Secret to authenticate API calls. To get these credentials, register a new client, Client ID and Secret will be generated automatically.
In the MyQ X Web Interface:
Open the Settings tab.
Navigate to External Systems (or Connections).
Under REST API applications, click Add.
Specify the Title of your client and the Scope required by your application; read more about different scopes below.
Copy your Client ID and Secret; you will later need them to get an Authentication token from the X Server.
Click OK.
Before MyQ X 10.1, the Settings tab was called External Systems. From version 10.1, this option is called Connections.
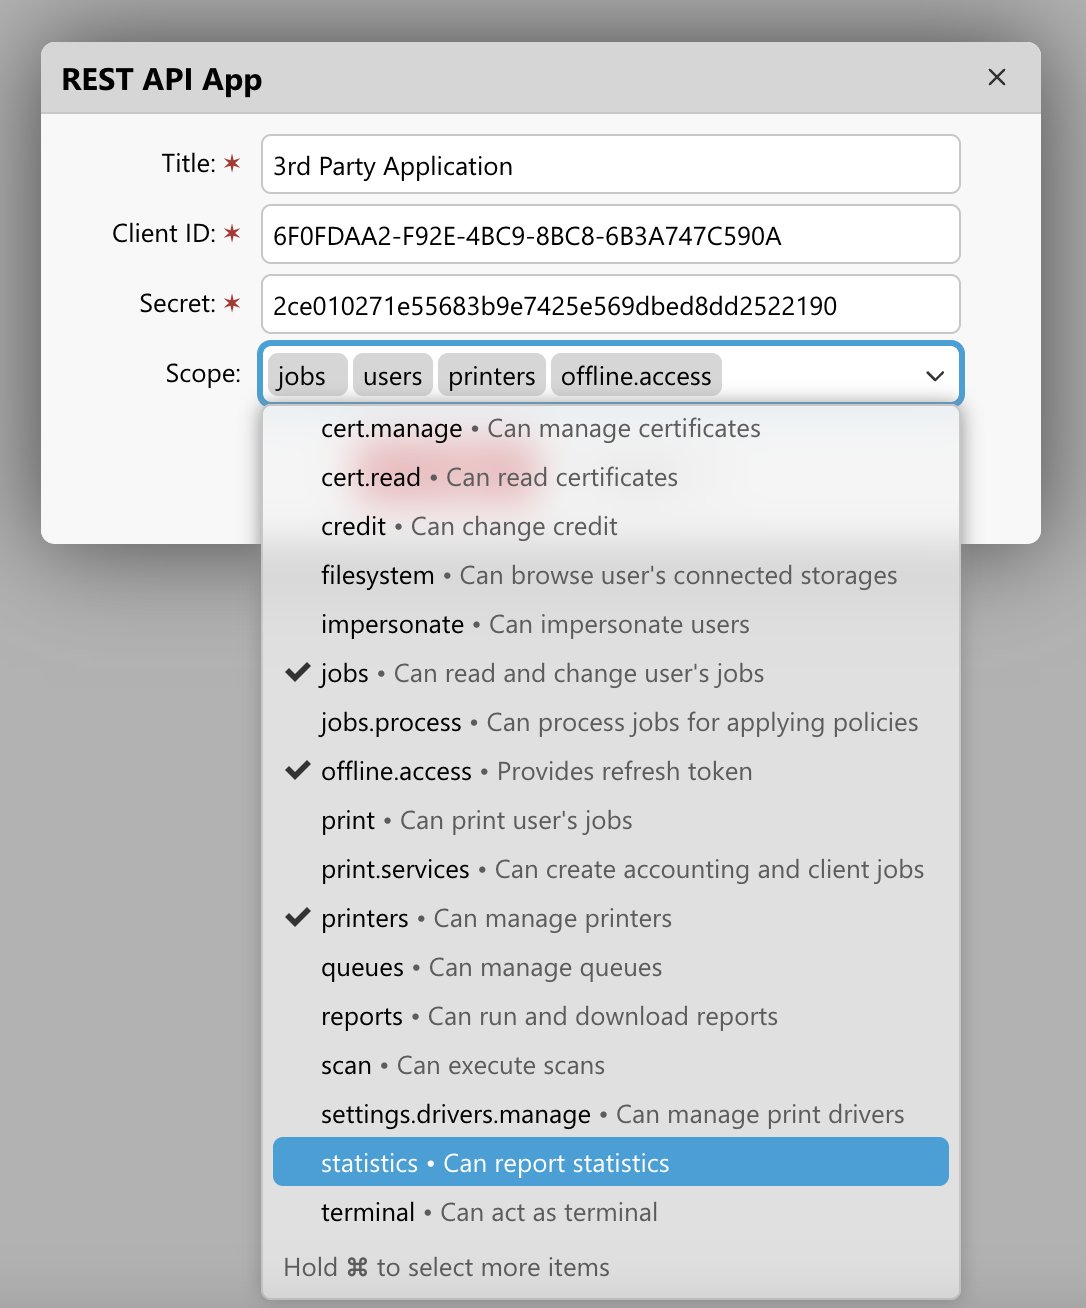
Scopes
Authentication scopes define the specific permissions that an application has when accessing an API. They control which resources and operations the application can use, following the principle of least privilege.
During the authentication process (often using OAuth 2.0), clients request particular scopes, and users approve granting these permissions. The API then issues tokens that contain or reference these approved scopes, and validates each request against them before allowing access to protected resources.
The scope needed to call an endpoint will be specified in this REST API documentation, or you can find it in the OpenAPI documentation.
For testing purposes, you can assign all available scopes.
For production applications, choose only the scopes your application needs, depending on what operations it will carry out.
Secure Connection
MyQ X REST API requires a secure SSL connection and cannot run without it; a certificate must be installed on the client side for the communication to work.
If you choose to use your company’s CA or manual certificate management, you must obtain the CA certificate from your organization and then import it into the MyQ X Web Interface, under Settings > Network > Certificates.
If you use the built-in CA from MyQ X, export the CA certificate from the MyQ X Web Interface, in Settings > Network > Certificates.
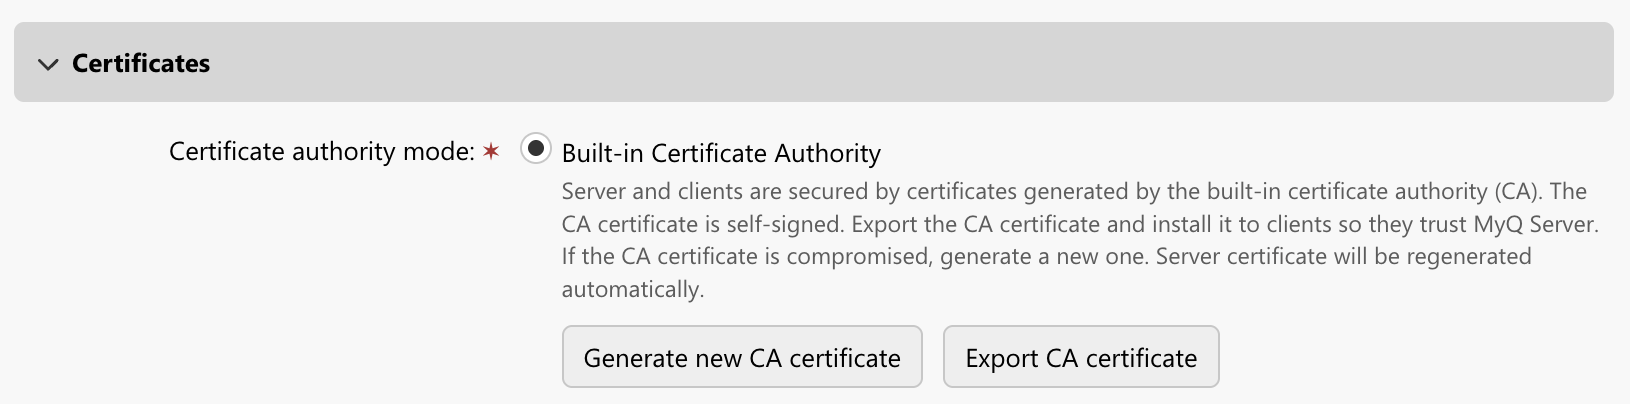
Another option is to copy the certificates (files server.cer and myq-ca.cer) from C:\ProgramData\MyQ\Cert on your server.
Install the CA certificate; double-click the .cer file, select Install certificate > Local machine > Place all certificates in the following store (Browse) > Trusted Root Certification Authorities.
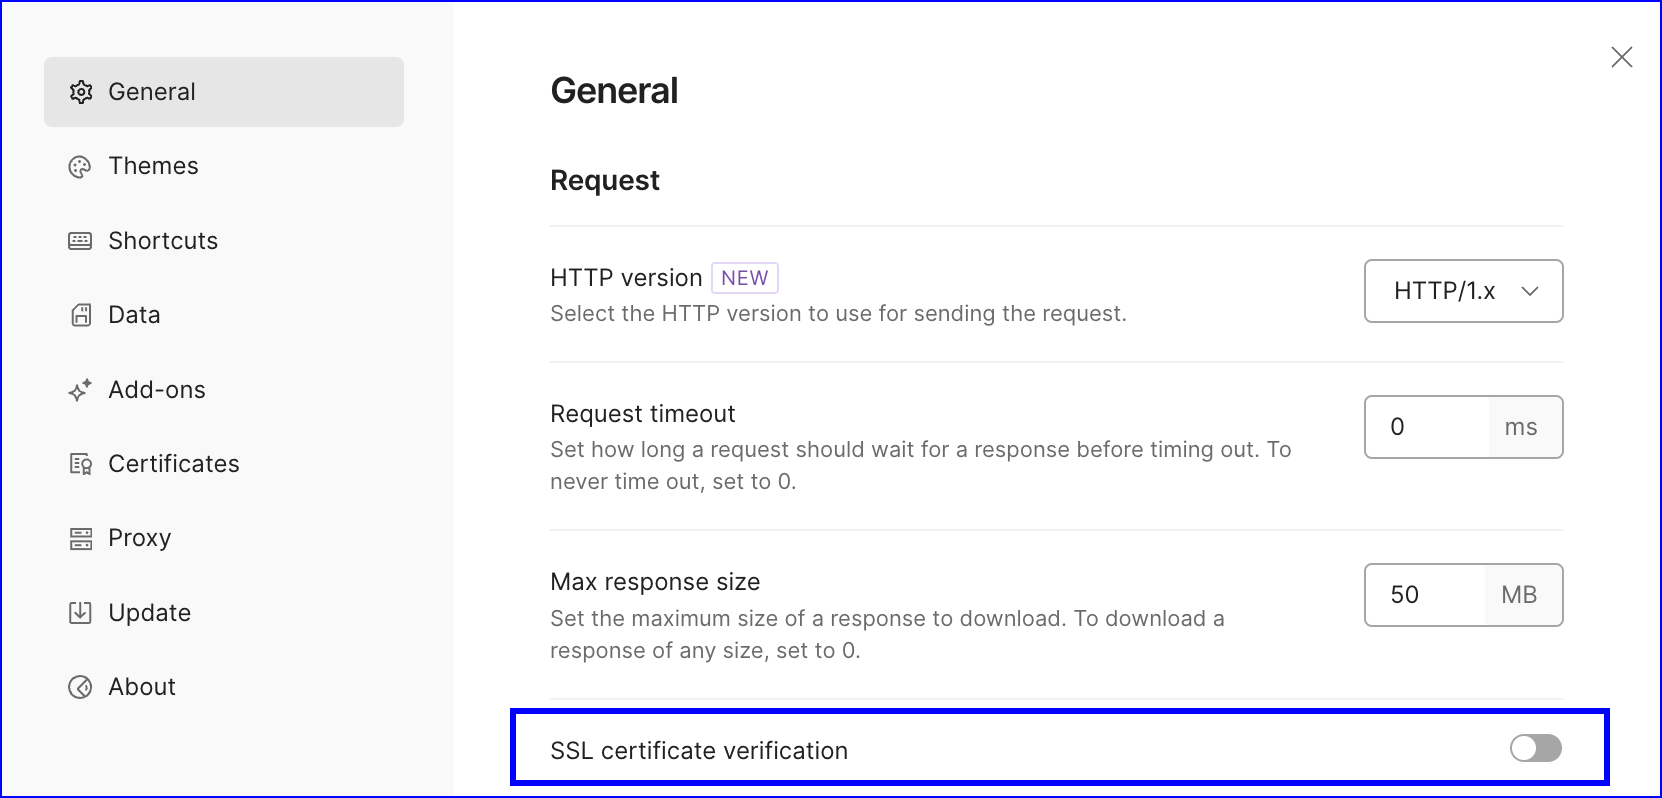
In Postman, you may need to upload the CA certificate so that the tool can verify the MyQ X’s server certificate during the initial steps of the connection.
Since we use a self-signed certificate for testing purposes, we can also temporarily configure Postman to skip this validation in File > Settings > General > SSL certificate verification > Off.
Authentication
MyQ X REST APIs use OAuth 2.0 access tokens for request authentication. Your access token serves as your authorization credential when interacting with the MyQ X REST API server.
To implement the REST API in your integration, you'll need to exchange your MyQ X client ID and client secret for an access token. This token must be included with your API requests to access protected resources.
Client Authentication
To retrieve your authentication token on behalf of the registered client application, call the endpoint POST /api/auth/token.
Some endpoints require a user token and cannot be called using the client token.
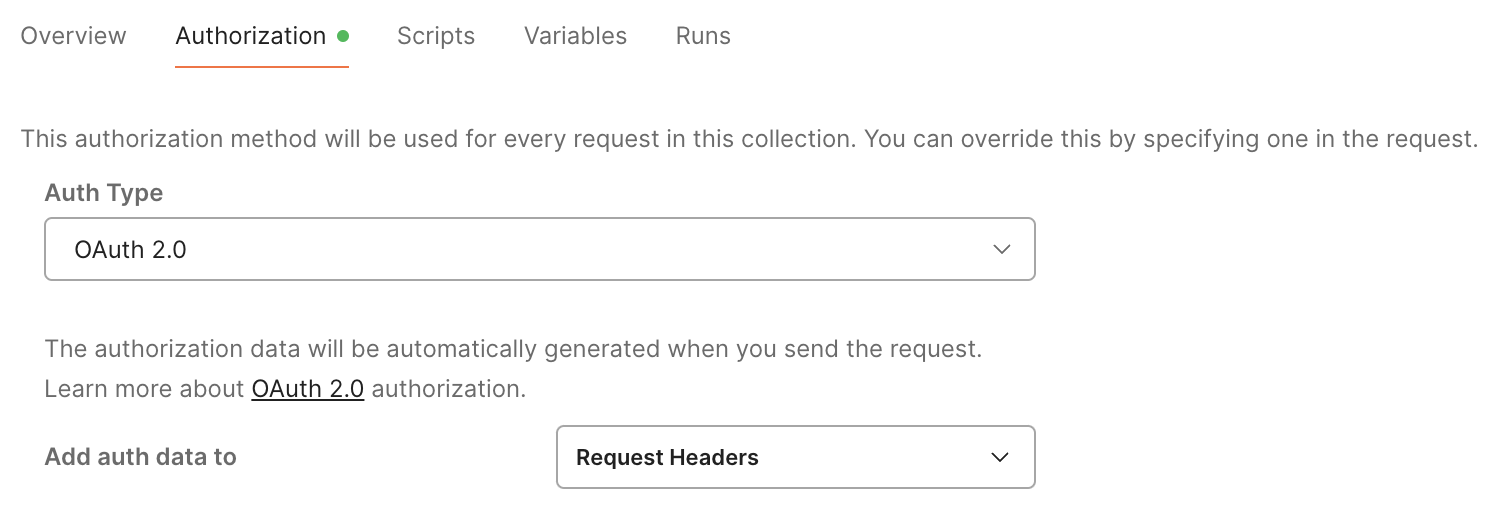
Create a new request. Go to the Authorization tab, and select:
Type to OAuth 2.0.
Add auth data to: Request Headers.
Header Prefix:
Bearer.Grant Type: Client Credentials.
Paste the Access Token URL.
CODEhttps://serverHostname:port/api/auth/tokenReplace the
serverHostnameandportwith the values from your installation.Client ID, and Secret you acquired in MyQ X’s External Systems/Connections.
List all required Scopes, e.g.,
users scan printers credit statistics offline.access.Client Authentication: Send as Basic Auth header.
For more details about the grant types, refer to the article “Authentication Methods” in the Print Server and Central Server chapters.

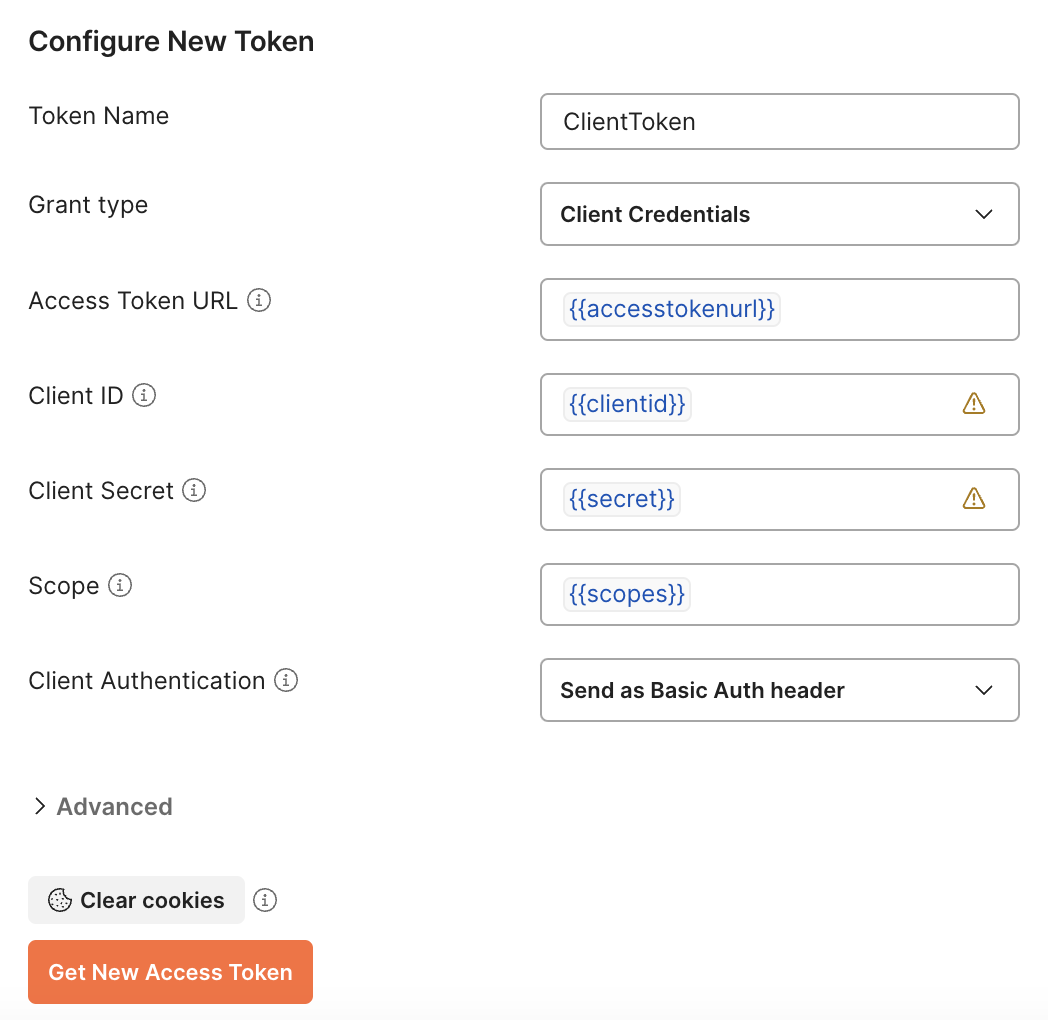
Click Get New Access Token.
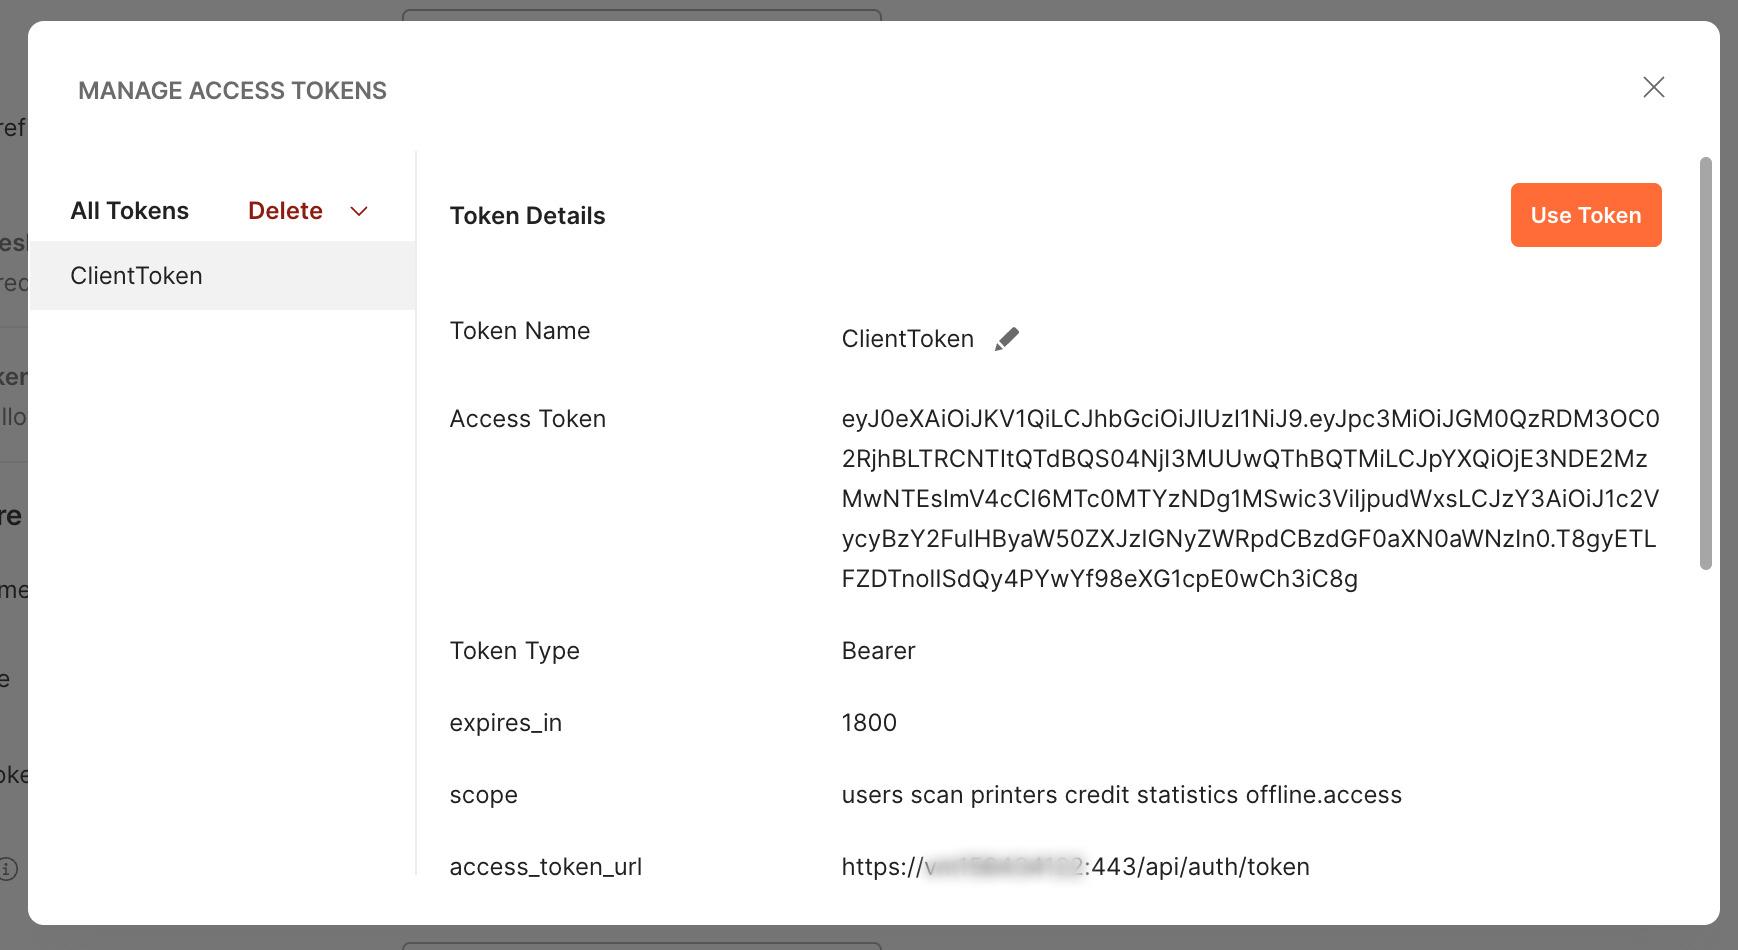
If authentication is successful, you'll receive an access token that must be provided at any other API endpoint in the authorization header: Authorization: Bearer {{accessToken}}.
Review the scopes and whether they align with the scopes you requested (Scopes in the Authorization request above), and if they do, click Use Token.
Example request:
POST https://print.acme.com:443/api/auth/token

{
	"grant_type": "client_credentials",
	"scope": "users scan printers credit statistics offline.access",
	"client_id": "7B4CD3C2-F57E-4D52-A90A-23EED001CE81",
	"client_secret": "89fbf537fe689fca26f67abae7a557106f4348d5"
}
Example response:
{
	"access_token": "your_bearer_token",
	"token_type": "Bearer",
	"expires_in": 1800,
	"scope": "users scan printers credit statistics offline.access",
	"refresh_token": "your_refresh_token"
}
The client can be granted only the scopes allowed in the REST API registration for this client ID in Settings > REST API App; otherwise, the server will return Invalid scopes.
When offline.access scope is used, the client will also receive a refresh token that can be used to issue a new access token using the refresh_token grant type.
User Authentication
In the steps above, we requested the client access token; it functions on behalf of your client application without the user context. However, users signing in to MyQ X and its applications need to obtain a user token to perform operations within their context.
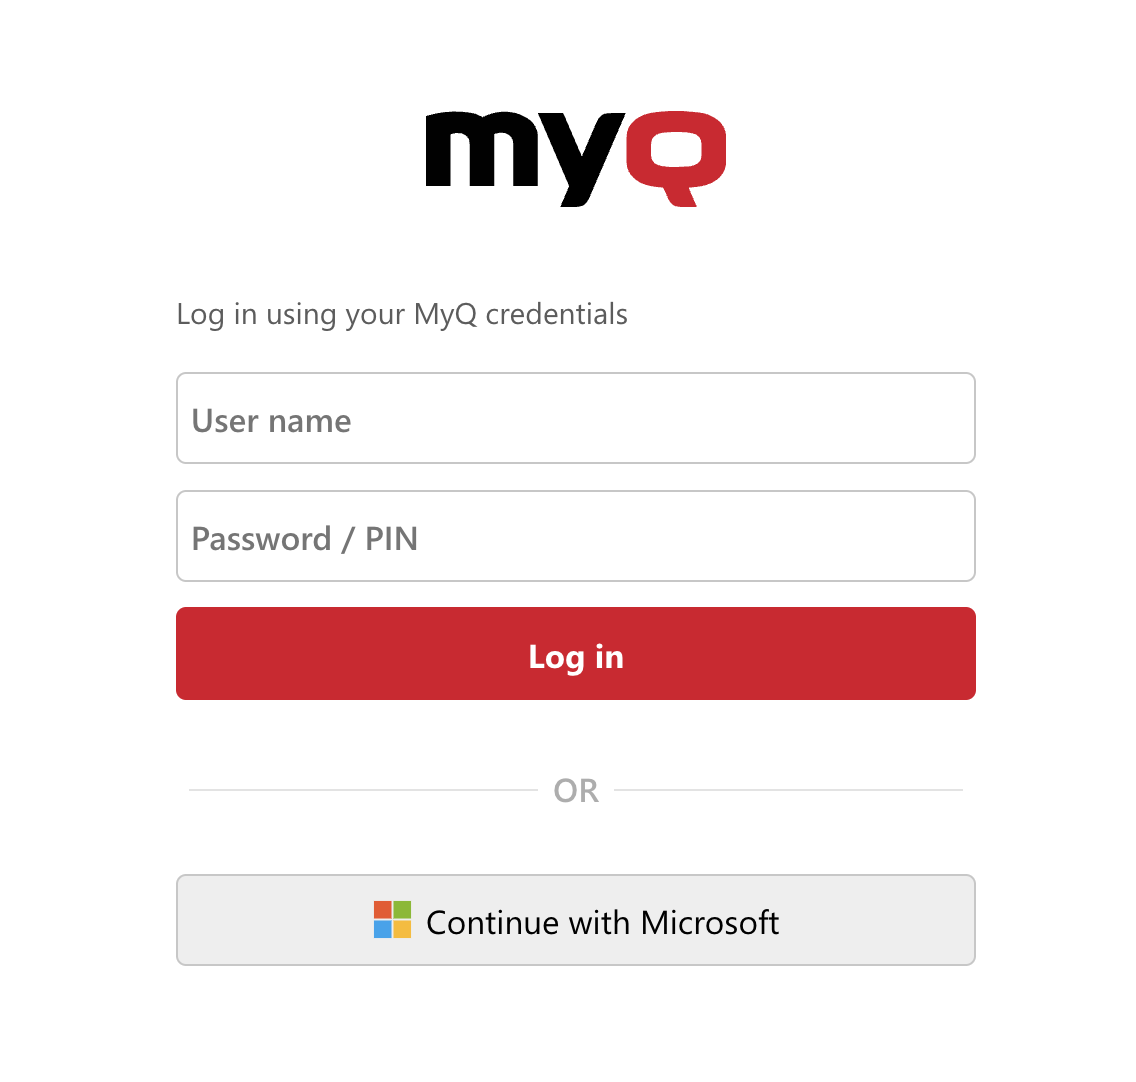
PIN, Password
To perform a sign-in on behalf of the user, call the same endpoint as above:
https://serverHostname:port/api/auth/tokenReplace the
serverHostnameandportwith the values according to your installation.Use the Grant Type:
login_info.Provide the information about a registered client in MyQ X that can interact with the REST API (
{{clientid}},{{secret}},{{userscopes}}.In the
login_info, specify the login type and PIN or password + username.
For more details, refer to the article “Authentication Methods” in the Print Server and Central Server chapters.
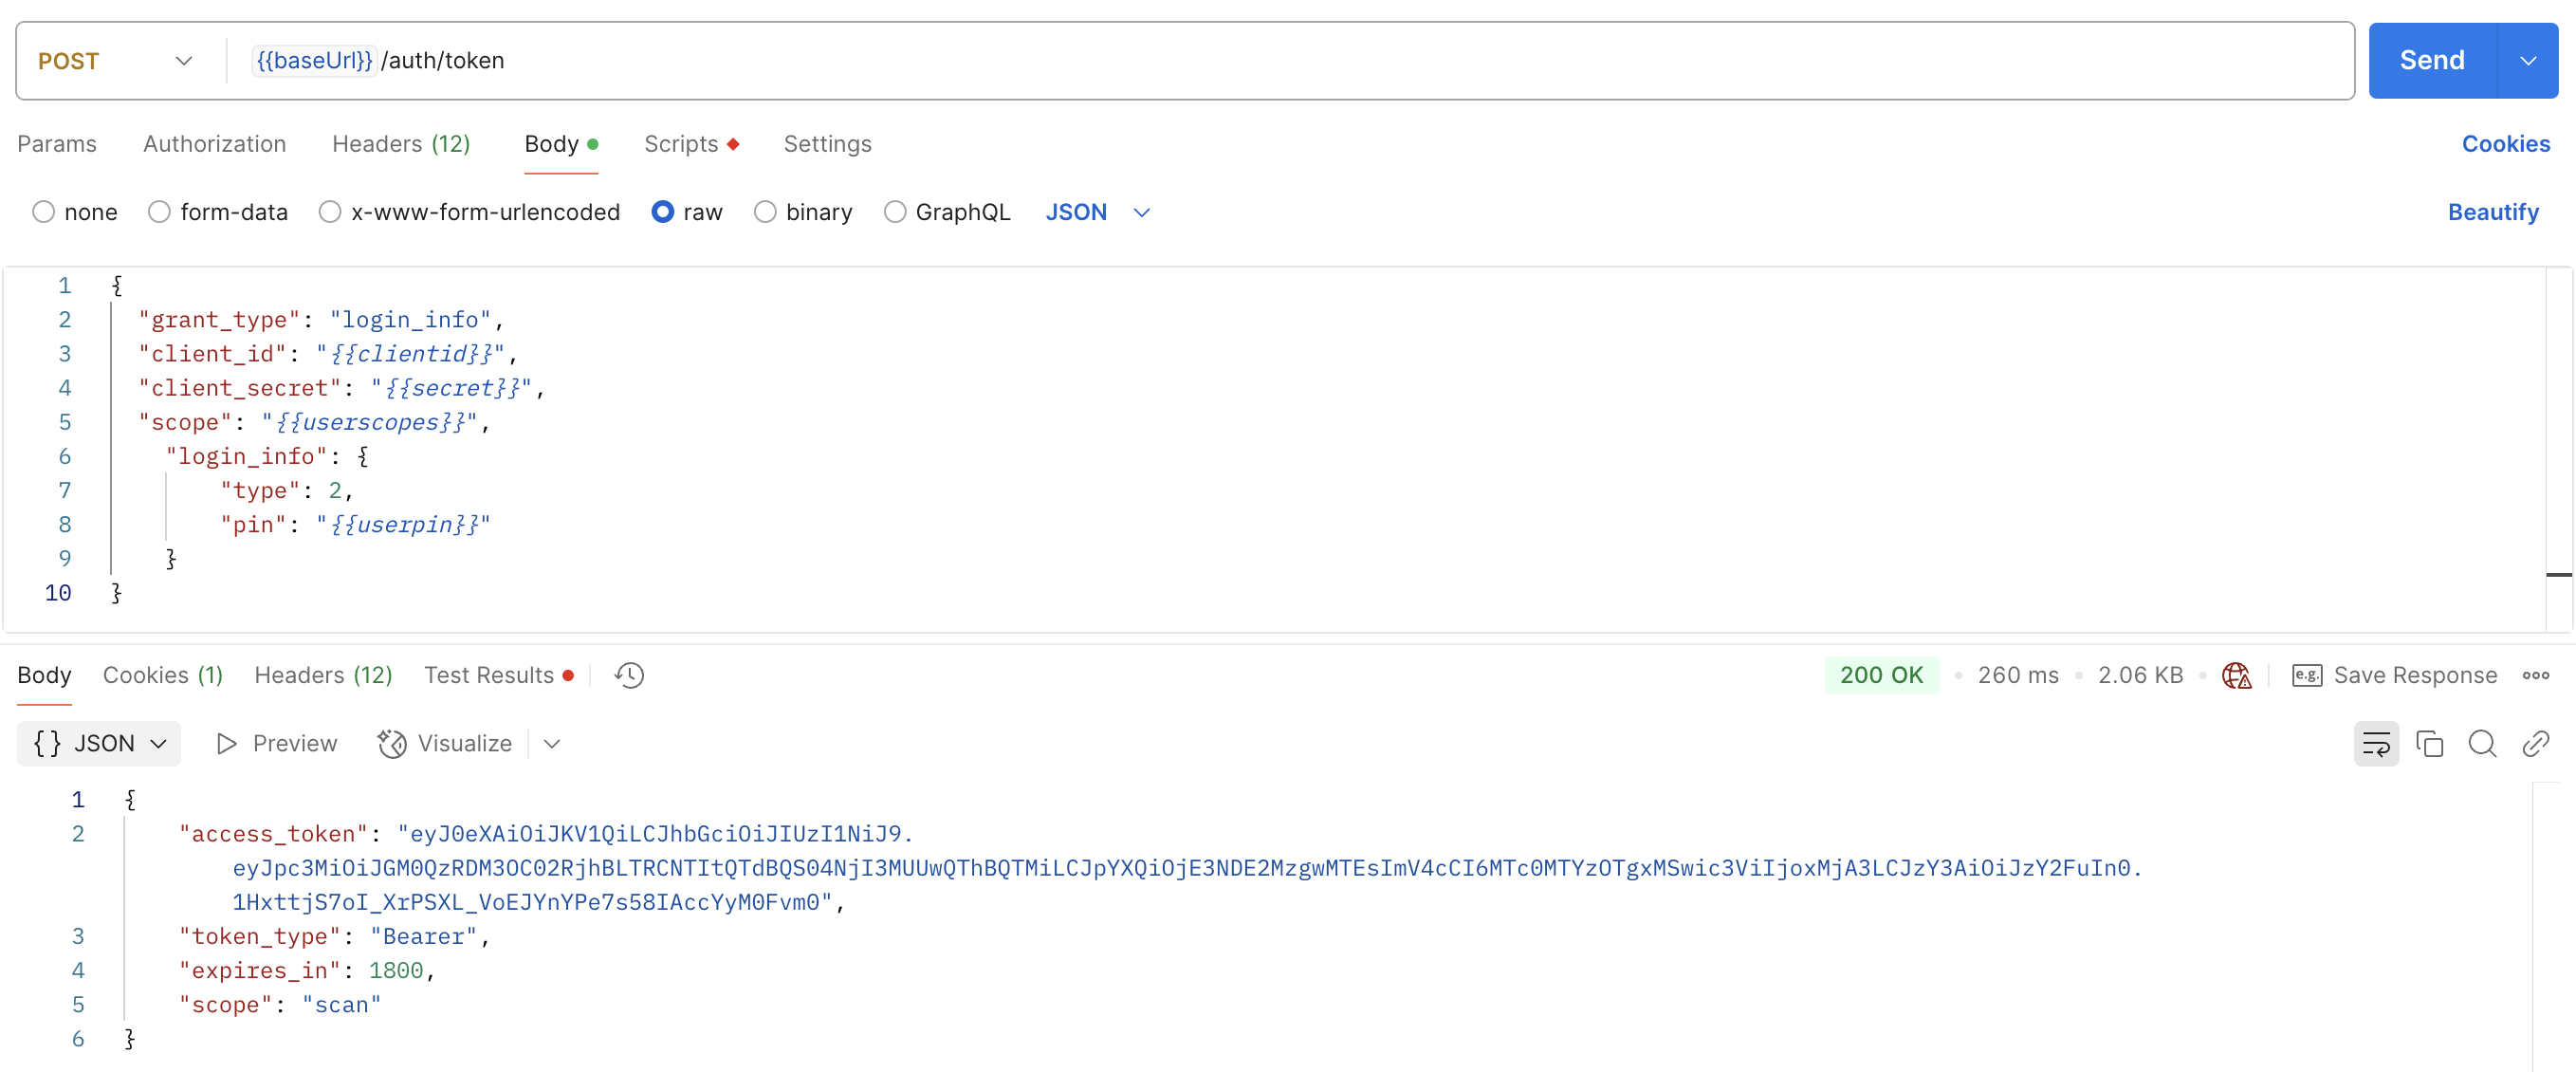
Example request:
POST https://print.acme.com:443/api/auth/token

{
  "grant_type": "login_info",
  "client_id": "F3D3D378-6F8A-4B52-A7AA-86271E0A8AA3",
  "client_secret": "8c10ad3b3ed98ec08f56af721483679bcf6f7e81",
  "scope": "scan",
    "login_info": {
		"type": 2,
		"pin": "507875"
    }
Example response:
{
"access_token":"eyJ0eXAiOiJKV1QiLCJhbGciOiJIUzI1NiJ9.eyJpc3MiOiJGM0QzRDM3OC02RjhBLTRCNTItQTdBQS04NjI3MUUwQThBQTMiLCJpYXQiOjE3NDE2MzgwMTEsImV4cCI6MTc0MTYzOTgxMSwic3ViIjoxMjA3LCJzY3AiOiJzY2FuIn0.1HxttjS7oI_XrPSXL_VoEJYnYPe7s58IAccYyM0Fvm0",
  "token_type":"Bearer",
  "expires_in":1800,
  "scope":"scan"
}
Sign in with MyQ
MyQ X Print Server 10.1 and higher supports OAuth 2.0 authentication via Sign in with MyQ using the Grant Type: authorization_code.
You can use it to have users sign in with their MyQ X account and obtain a user token to perform operations on their behalf.
For more details, refer to the article “Authentication Methods” in the Print Server chapter.
Calling the REST API
Once we have the client or user token, we can send requests to MyQ over the REST API and perform operations.
Base URL
When we refer to the
{{baseUrl}, we mean:https://serverHostname:port/api
Replace theserverHostnameandportwith your values.
REST API version
The REST API version (e.g.,
v3) that follows may differ between the Print Server and Central Server.
When calling the following endpoints, make sure that the access token you obtained previously is present in the authorization header: Authorization: Bearer {{accessToken}} of each request.
Read Basic Server Configuration
GET {{baseUrl}}/v3/server/config
Required scope: none
It may be useful to obtain general information about the server, such as the language, currency, printing methods available, supported job formats, accounting mode, and more.
Example request:
GET {{baseUrl}}/v3/server/config

Content-Type: application/json
Authentication: Bearer %access_token%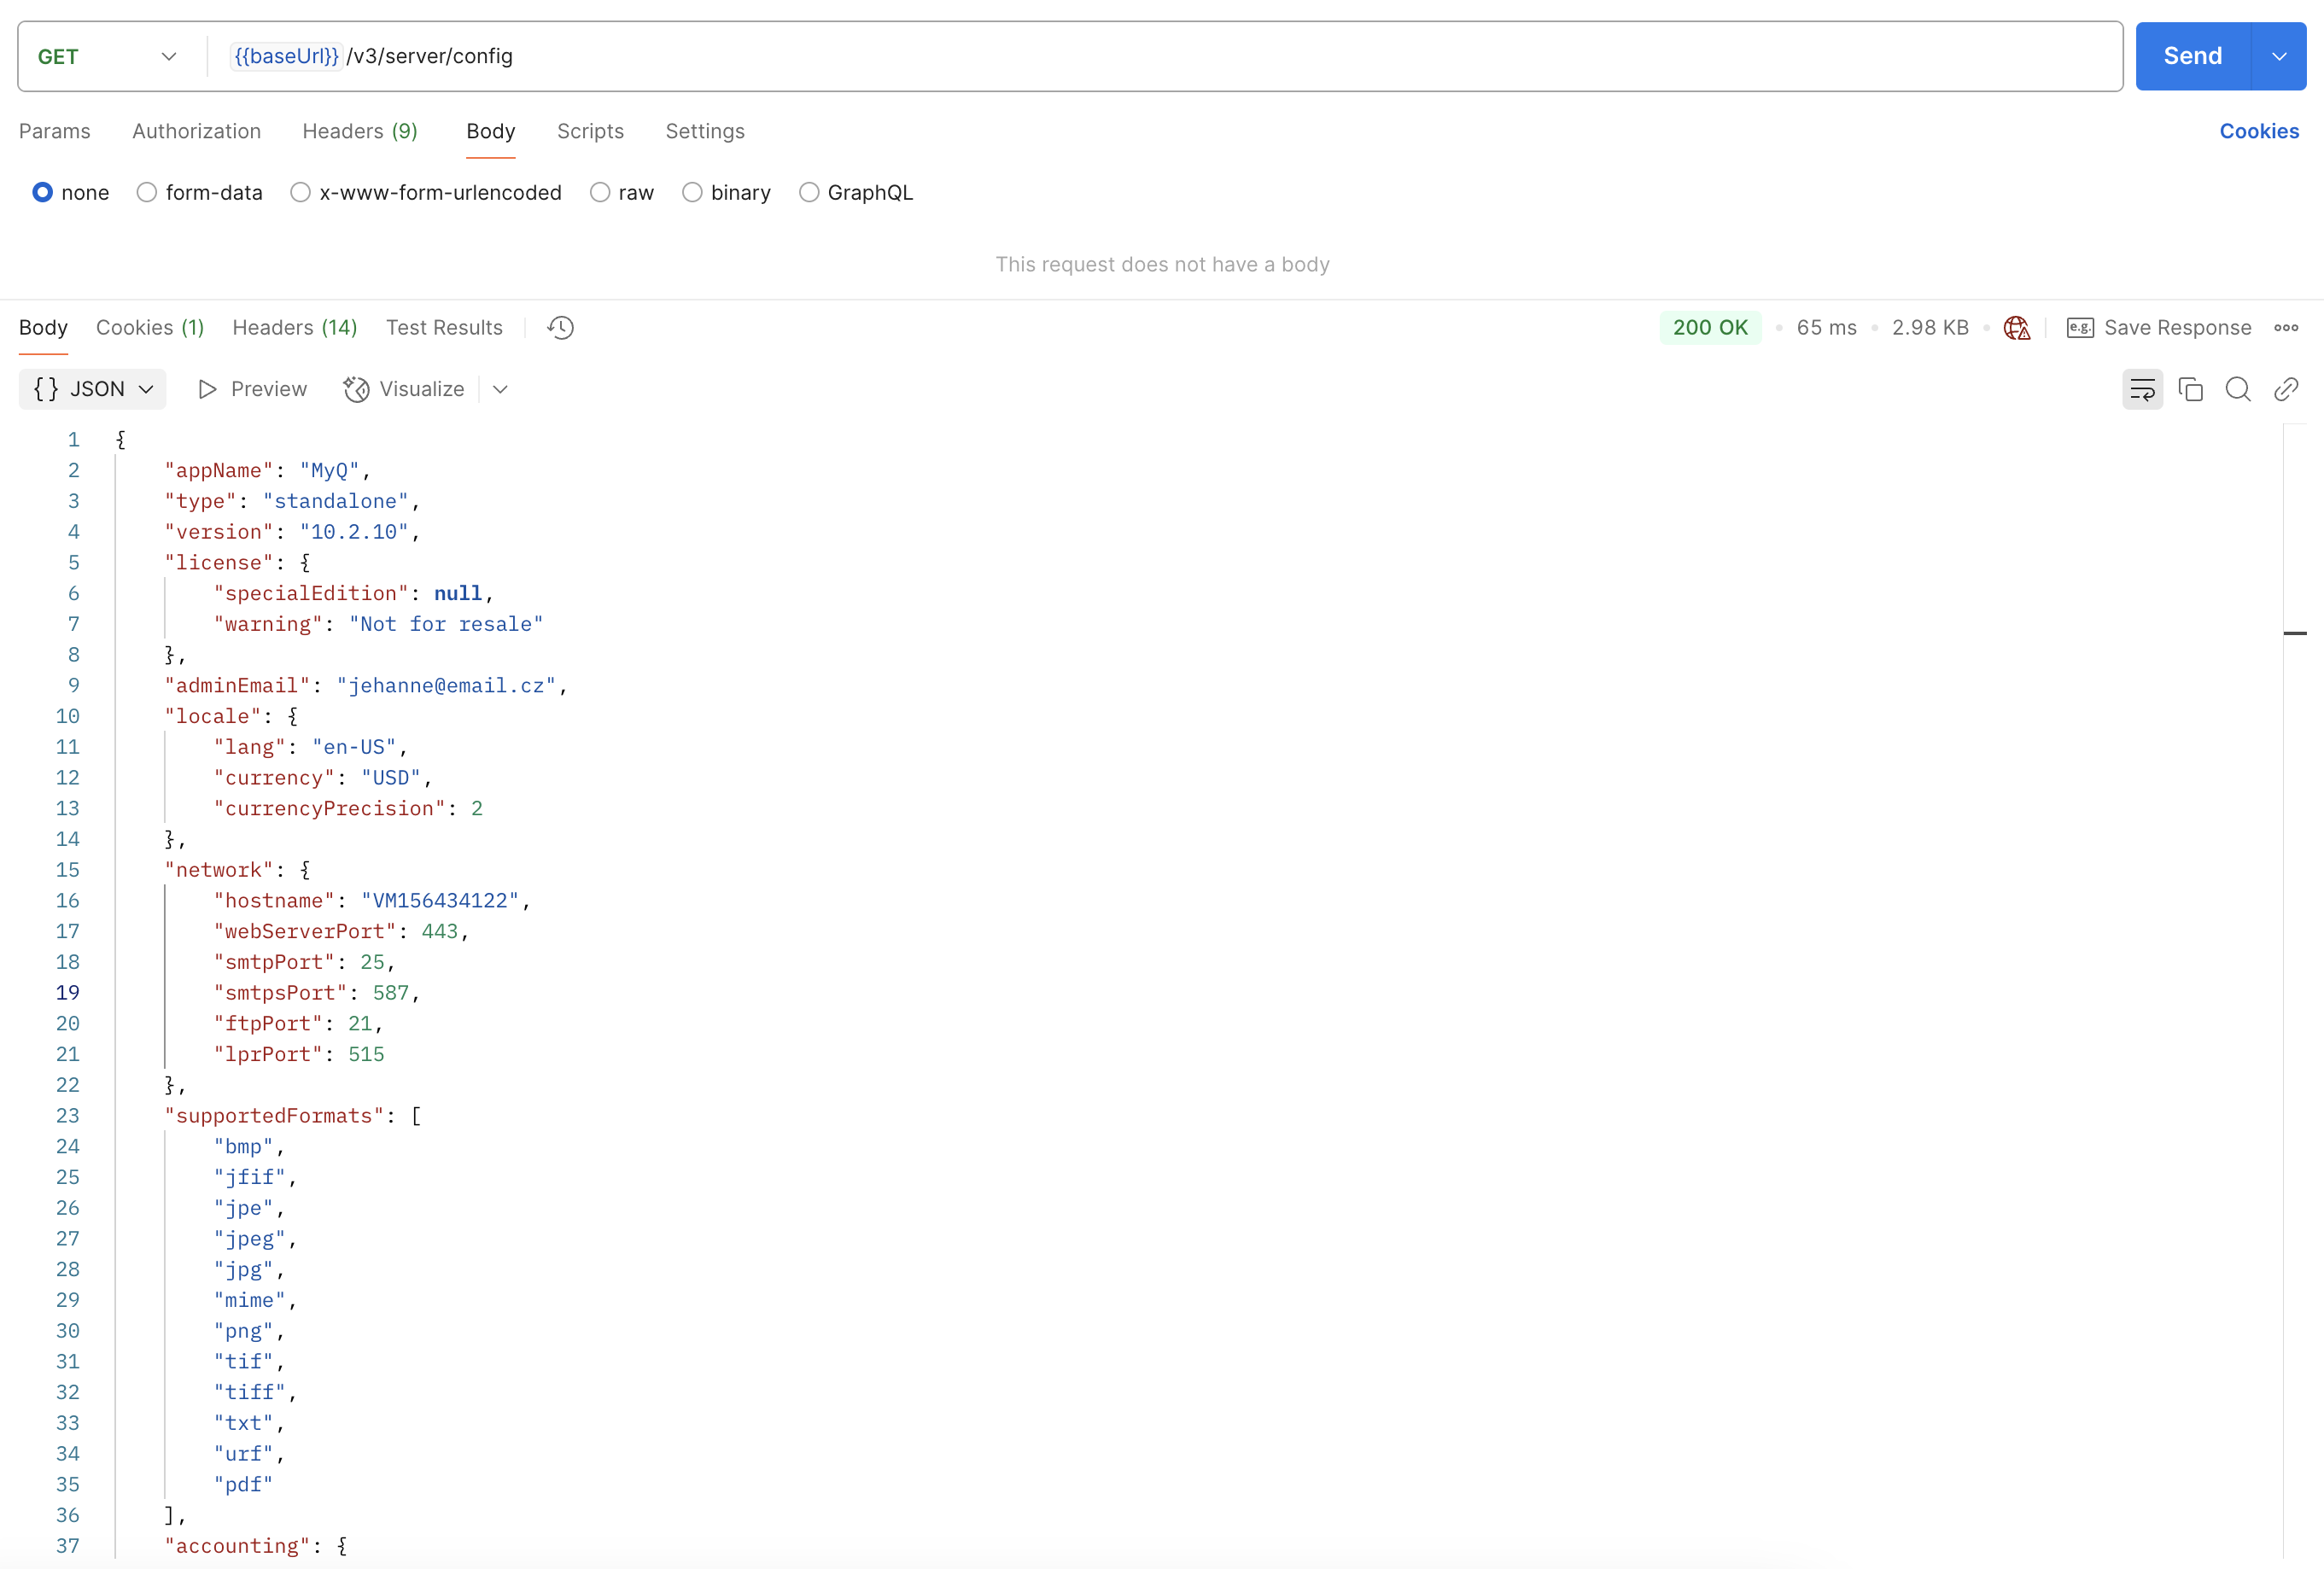
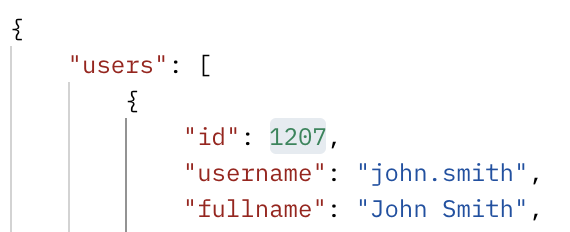
Obtain User’s Information and ID
GET {{baseUrl}}/v3/users/find?username={{username}}&include=aliases,accounts
Required scope:
users
Let’s obtain a user’s ID by searching for them by username.
Example request:
POST {{baseUrl}}/v3/users/find?username=john.smith&include=aliases,accounts

Content-Type: application/json
Authentication: Bearer %access_token%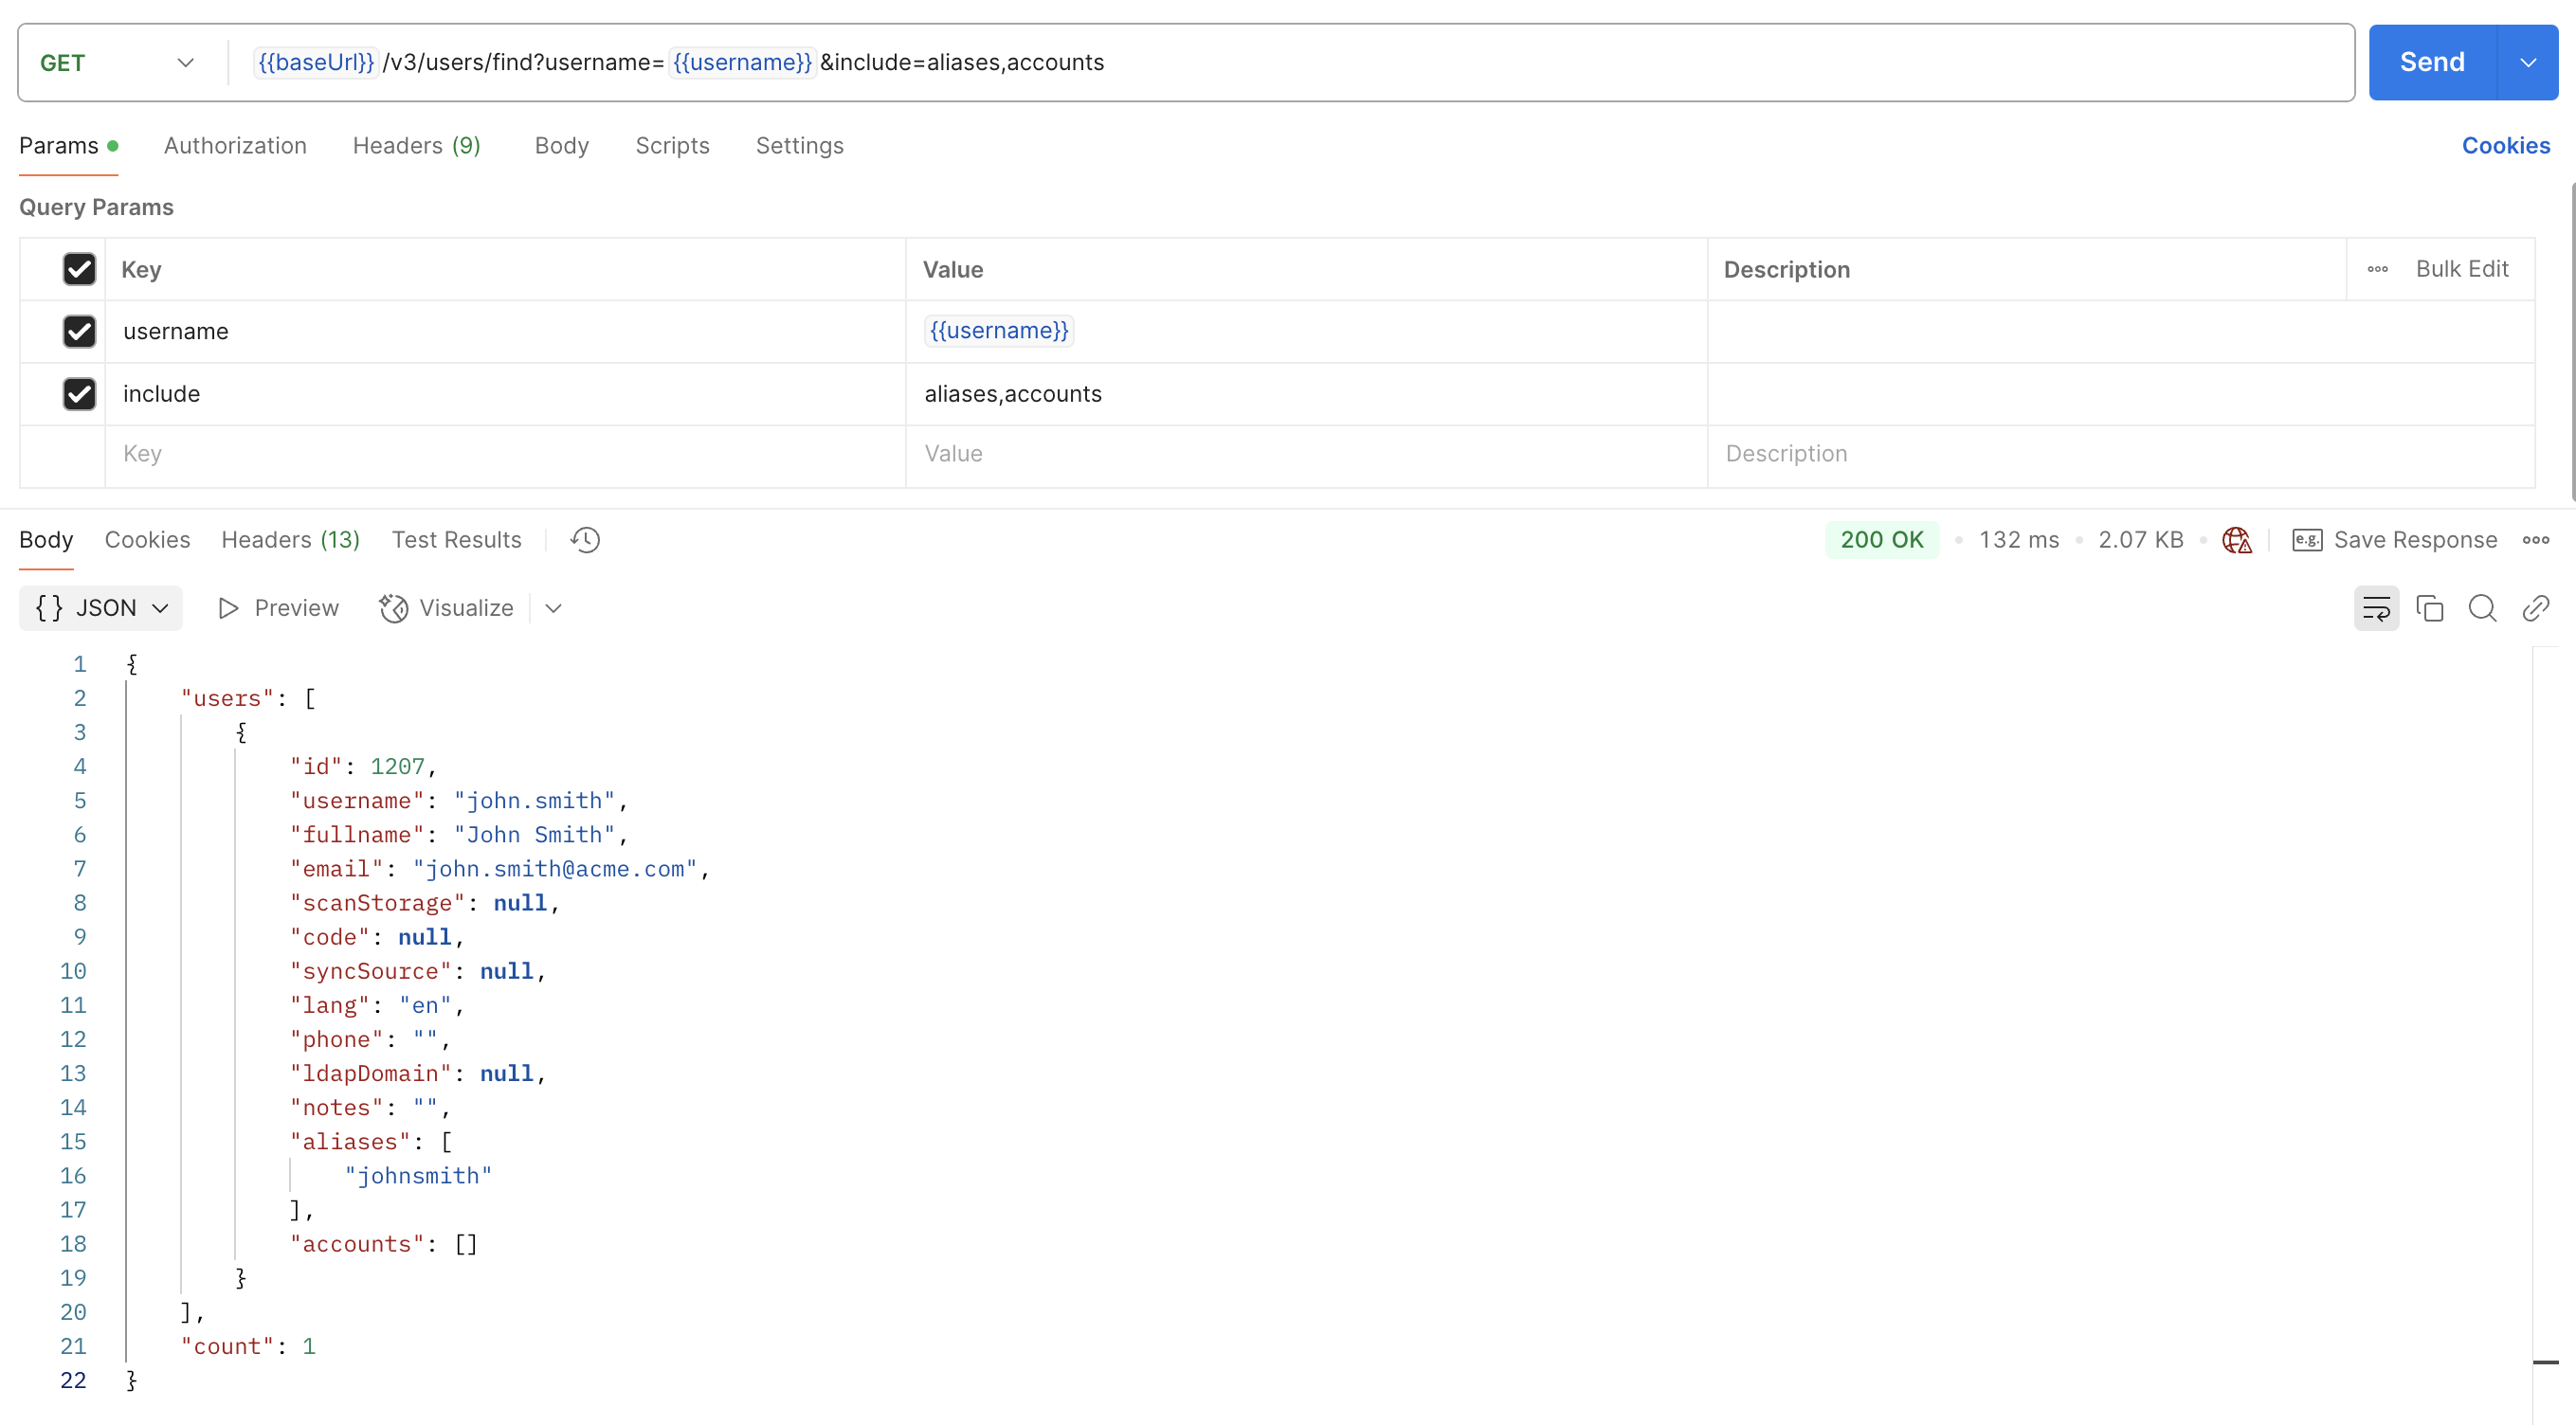
As illustrated above, some endpoints also support the include operation that requests additional information otherwise not included in the default response.
IDs are most commonly used to identify objects you want to perform operations on (user ID, printer ID, etc.).
Next Steps
After this practical showcase of how to work with the MyQ X REST API, continue to the docs for the product you want to interact with. Select it from the left menu, and start with the Overview section, containing examples for the particular product.