
Once Scan Review is successfully installed, it must be paired and configured with a MyQ Print Server before it can be used.
Establish Trust
Before pairing Scan Review with MyQ X, establish certificate trust between the two systems.
-
Obtain the CA certificate that issued the MyQ X server certificate. If MyQ X uses the built-in MyQ Certificate Authority, open the MyQ X Web Interface, go to MyQ > Settings > Network, and select Export CA Certificate.
-
Install the CA certificate on the Scan Review machine in the Trusted Root Certification Authorities store.
-
Install the CA certificate that issued the Scan Review server certificate on the MyQ X server in the Trusted Root Certification Authorities store.
-
If applicable, run the System Maintenance task in MyQ X to refresh the list of trusted Certificate Authorities. See Task Scheduler Settings.
Add a MyQ Scan Review Connection
You pair the connection in two places: generate a pairing code in MyQ, then enter the code in Scan Review.
-
Sign in to the MyQ web administrator interface with the Administrator or Manage settings rights.
-
Go to MyQ > Settings > Connections, click Add, and select MyQ Scan Review.
-
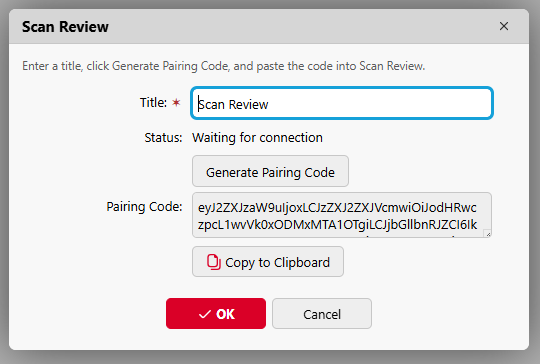
In Title, enter a name for the Scan Review connection.
-
Click Generate Pairing Code and copy the code. The pairing code is valid for 5 minutes. If it expires, close the connection dialog, open it again, and generate a new code.
-
On the Scan Review machine, open the Scan Review web interface: use the Scan Review system tray menu, or go to
http://localhost:7184in a browser. -
Enter the pairing code and click Save and continue.
-
In Scan Review, configure the Scan Review hostname and HTTPS certificate. See Configure Scan Review.
-
When Scan Review prompts you, sign in with a MyQ user account other than *admin.
After pairing, Scan Review registers its own REST API application in MyQ and sets up the connection. The Scan Review destination is now available in the Easy Scan terminal action.