
Once Scan Review is installed and successfully connected to a Print Server, several settings should be configured.
Configure the Hosting Settings
-
Open the Scan Review Web Interface and sign in as an administrator.
-
Open Settings.
-
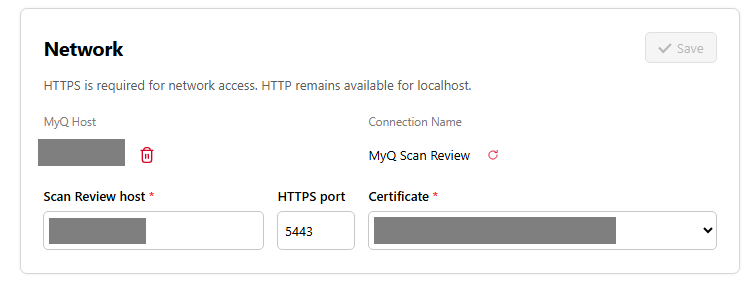
Under Network, review the following information is correct:
-
MyQ Host: The URL used to connect to MyQ X. The URL must be reachable from Scan Review.
-
Connection Name: The name of the MyQ X connector pointing to Scan Review.
-
Scan Review host: The hostname used to access Scan Review. The URL must be reachable from MyQ X.
-
HTTPS port: The port used for HTTPS communication with Scan Review.
-
Certificate: The Scan Review server certificate used for HTTPS.
-
-
Select the HTTPS server certificate. Only certificates whose Server Alternative Name (SAN) matches the configured hostname are displayed.
-
Click Save.
-
Restart the MyQ Scan Review Windows service to apply the change.
Do not disable HTTP until you have confirmed that HTTPS is working correctly and can be accessed by users and the MyQ X Print Server.
Configure Document Signing
If document signing is enabled, import a CA-issued signing certificate into the Local Computer > Personal (LocalMachine\My) certificate store. The certificate must meet the signing certificate requirements described below.
Scan Review validates the signing configuration in the background. Blocking signing issues prevent document approval, while warnings indicate limitations such as a missing Timestamp Authority or missing revocation endpoints.
To configure PDF signing:
-
Sign in to the Scan Review web interface as an administrator.
-
Open Settings.
-
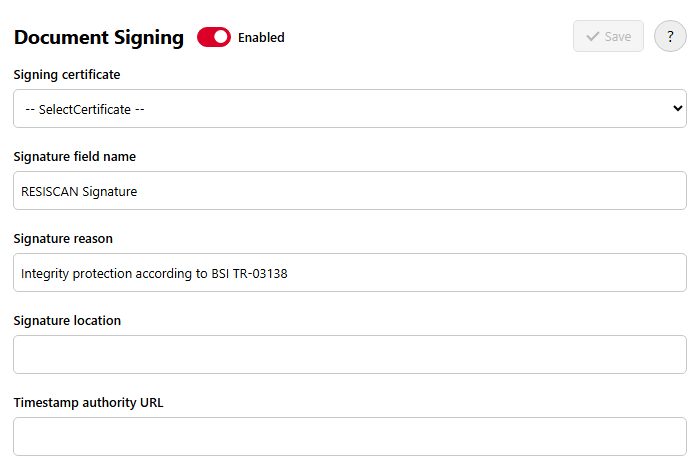
Under Document Signing, select the signing certificate.
-
(Optional) Enter a Signature field name.
-
(Optional) Enter a Reason and Location for the signature.
-
(Optional) Specify a Timestamp Authority (TSA) URL.
-
Select Save.
Scan Review displays the signing level that will be used and warns you if any required settings are missing.
If no Timestamp Authority (TSA) is configured, Scan Review uses PAdES B signatures. If a TSA is configured and the required validation data is available, Scan Review uses PAdES B-LTA signatures.
Disable Document Signing
Document signing can be disabled for a Scan Review instance. When signing is disabled, the signing certificate and other signing settings are hidden and signing-related warnings are no longer displayed.
Approved documents are delivered without a Scan Review signature. The rest of the approval process remains unchanged, and the audit log records that signing was skipped.
Disable document signing only when the documents are signed or otherwise protected by another system.
Configure Document Destinations
Document destinations define where approved PDF files are delivered after they have been approved and signed.
Destinations are configured globally and can then be assigned to one or more queues.
Supported Destination Types
|
Destination |
Description |
|---|---|
|
Hot folder |
Copies approved PDF files to a local or network folder. |
|
SFTP |
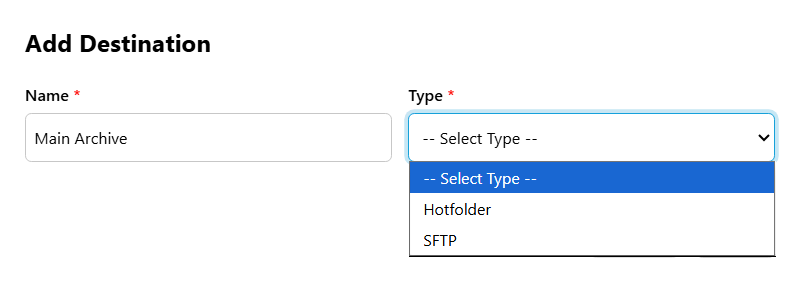
Uploads approved PDF files to an SFTP server using SSH key authentication. |
Add a Document Destination
-
Sign in to the Scan Review web interface as an administrator.
-
Open Settings.
-
Under Destinations, select Add.

-
Enter a destination Name and Type.
-
Configure the connection settings for the selected destination.
-
Select Save.
-
If you are configuring an SFTP destination, generate or upload an SSH key and test the connection before using the destination.
Destination credentials are encrypted using http://ASP.NET Data Protection. The encryption keys are stored in the Scan Review data folder.
Configure Audit Log Retention
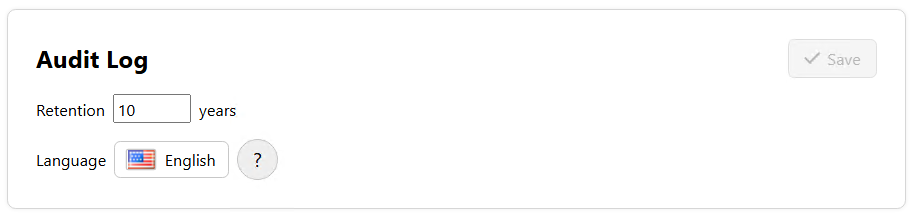
Audit log retention determines how long Scan Review keeps audit events before they are removed. The default retention period is 10 years.
To configure the retention period:
-
Sign in to the Scan Review web interface as an administrator.
-
Open Settings.
-
Under Audit Log, enter the number of years to keep audit events.
-
Select Save.
Audit Log Backup
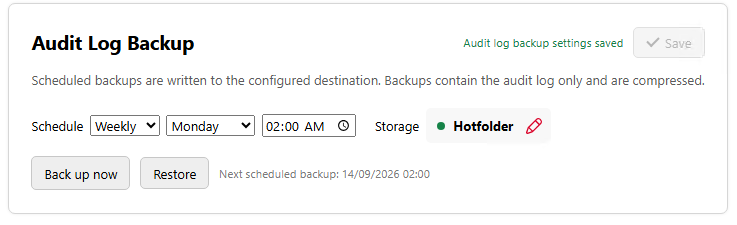
Audit log backup specifies how often and to what location a compressed audit log backup should be saved.
To configure backup:
-
Choose a schedule from Off, Daily, Weekly, or Monthly. Choose a time and day of the week/month as necessary.
-
Select Hotfolder or SFTP as a storage destination and fill in any further details required.
Additionally, you can use the option to Back up now to immediately download a current backup and Restore to upload a backup file created earlier to restore the audit log.
Restart and Verify
Restart the MyQ Scan Review service after making changes to server hosting or certificate settings.
-
Open Services in Windows.
-
Locate the MyQ Scan Review service.
-
Select Restart.
After the service restarts:
-
Open the Scan Review web interface.
-
Sign in with your MyQ account.
-
Verify that the following settings are configured as expected:
-
Network
-
Document Signing
-
Document Destinations
-
If all settings are correct and you can access the web interface, Scan Review is ready to use.