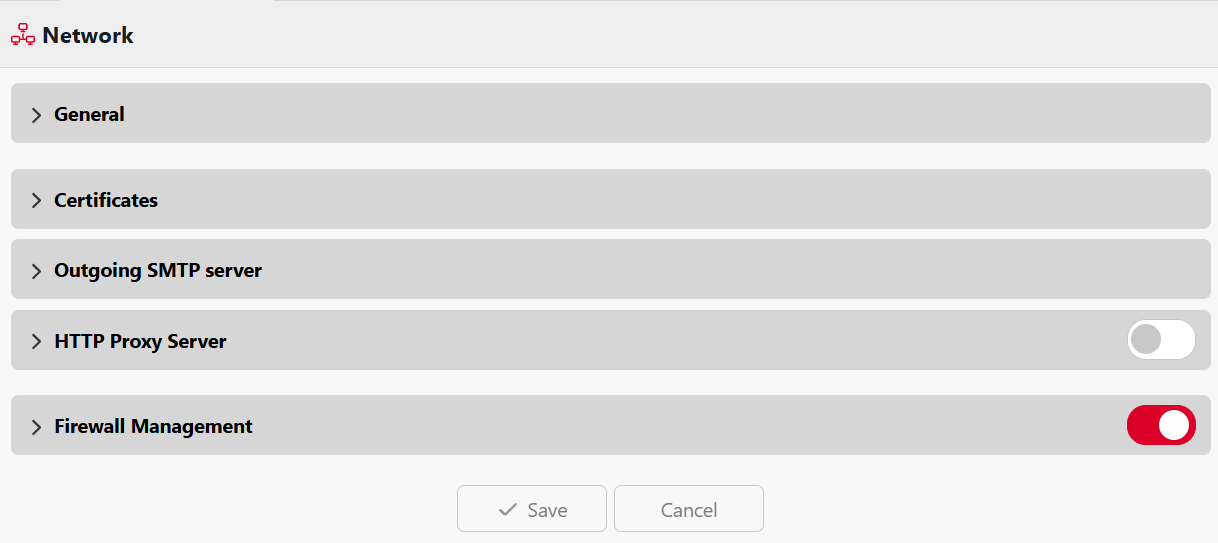
On the Network settings tab, you can manage the network communication between the MyQ server and other parts of the MyQ solution.
It is divided into the following sections:
General, Communication Security, Outgoing SMTP server, HTTP Proxy server, and Firewall Management.
General
In this section, you can enter the hostname of the MyQ Central server. This hostname is used by external components of the MyQ system, such as the MyQ Replicator or Site servers, for communication with the MyQ Central server.
Certificates
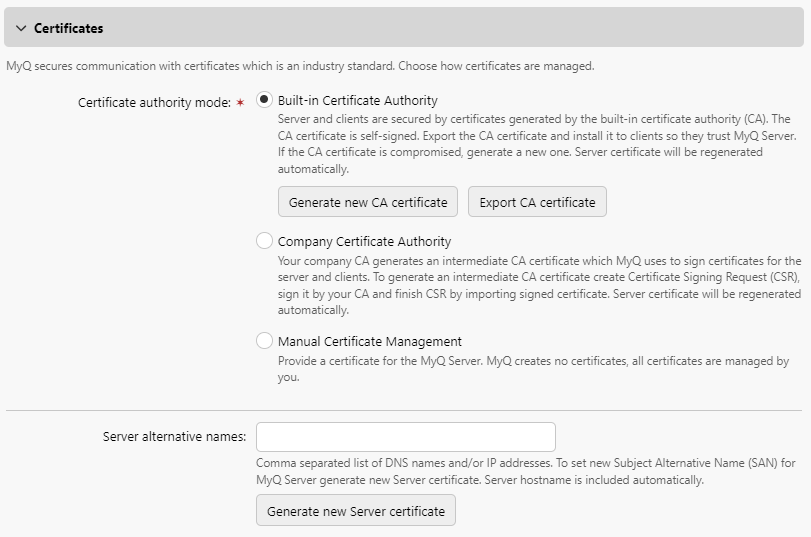
In this section, you can choose how your security certificates are managed.
MyQ offers three different certificate management modes:
-
Built-in Certificate Authority - This is the default mode for new installations. MyQ creates a self-signed CA certificate and uses it to sign server and client certificates. The public key of the CA certificate can be exported (click Export CA certificate) to install it to clients, so they trust MyQ server.
-
Company Certificate Authority - Your company CA generates an intermediate CA certificate which MyQ uses to sign certificates for the server and clients. To generate an intermediate CA certificate click Create CSR to create a Certificate Signing Request (CSR), sign it by your CA and click Finish CSR to finish CSR by importing signed certificate. If the intermediate CA certificate does not contain a CA root certificate in its chain, the administrator is prompted to upload the public key of the CA root certificate as well (the Import CA root certificate button appears).
-
Manual Certificate Management - Provide a certificate for the MyQ Server. MyQ creates no certificates; all certificates are managed by you. Click Import Server certificate to upload it. The certificate can be uploaded in PEM (public + private key separately) or in PFX format. The PFX format may be password encrypted. This mode is recommended only for expert users.
Use the Server alternative names field to specify additional DNS names and/or IP addresses to
include in the certificate's Subject Alternative Name (SAN) extension, entered as a comma-separated list. The server hostname is included automatically.
Important!
Any IP address or hostname that devices or the MyQ Desktop Client (MDC) use to connect to the server must be listed here. If a client connects by IP address and that IP is not included, certificate validation will fail and the client will be unable to authenticate. This applies to both Device Configuration Profiles and MDC configurations that reference the server by IP. As a best practice, populate this field during initial installation, before enrolling devices or deploying MDC.
After editing the Server alternative names field, click Generate new Server certificate to
apply the changes.
When upgrading an existing MyQ installation, the Certificate Authority mode is selected according to the existing server certificate:
-
if the certificate is not CA, then the mode is set to Manual Certificate Management.
-
if it was generated by MyQ before, then the mode is set to Built-in Certificate Authority.
-
in other cases, the mode is set to Company Certificate Authority.
Outgoing SMTP Server
To send email reports, send error messages to users, send automatically generated PIN to users, and forward scanned documents, you have to configure the email server where all emails are forwarded.
To configure the server, do the following:
Select a Type from Classic SMTP Server, Microsoft Exchange Online or Gmail.
For Classic SMTP Server:
-
Enter the server hostname or IP address in the Server text box. If the email server listens to a port other than the 25 TCP port, change the Port setting to the correct value.
-
Choose one of the available Security options.
-
Prefer StartTLS - allows even unencrypted communication (default)
-
Implicit TLS - allows only full encryption
-
Require StartTLS - allows for the handshake to be unencrypted then switches to encrypted
-
-
Optionally choose to Validate certificate or not.
-
If credentials are required, enter the User and Password.
-
Enter the address that you want to be displayed as the Sender email for PIN, alert and report messages.
-
After you enter the data, you can click Test to test the connection to the email server and click Save to save your changes.
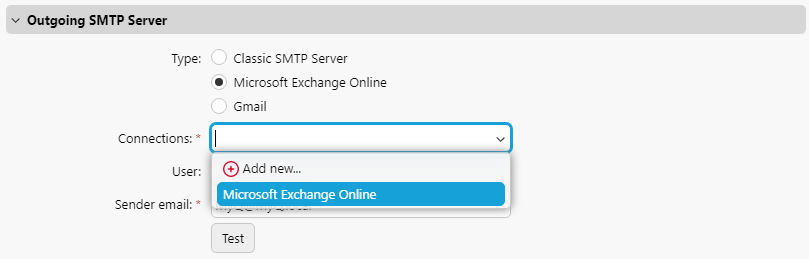
For Microsoft Exchange Online:
-
If you have already set up a Microsoft Exchange Online server in the Connections settings, the server is available in the Connections field drop-down. If not, you can click on the Connections field and then click Add new to add your Microsoft Exchange Online server connection. For more information, check Microsoft Exchange Online Setup.
-
If credentials are required, enter the User.
-
Enter the address that you want to be displayed as the Sender email for PIN, alert and report messages.
-
After you enter the data, you can click Test to test the connection to the email server and click Save to save your changes.
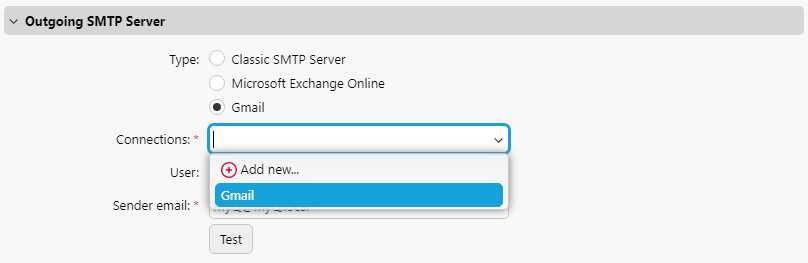
For Gmail:
-
If you have already set up a Gmail server in the Connections settings, the server is available in the Connections field drop-down. If not, you can click on the Connections field and then click Add new to add your Gmail server connection. For more information, check Gmail with OAuth2 Setup.
-
If credentials are required, enter the User.
-
Enter the address that you want to be displayed as the Sender email for PIN, alert and report messages.
-
After you enter the data, you can click Test to test the connection to the email server and click Save to save your changes.
HTTP Proxy Server
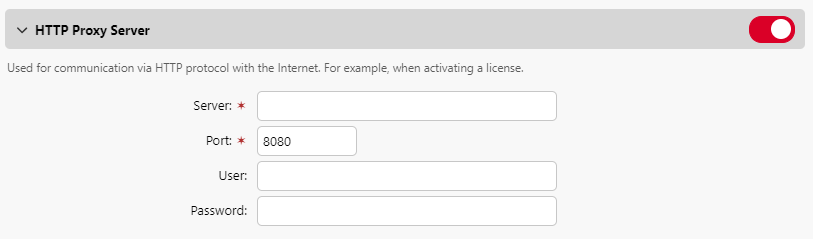
In this section, you can choose whether to enable and set up a MyQ Proxy server which can be used for activating a license. Mandatory fields are Server (name) and Port. After changing ports, restart all MyQ services.
Supported/Unsupported HTTP Proxy Services
Supported Services
-
Microsoft Azure Entra ID
-
Microsoft OneDrive for Business
-
Microsoft OneDrive Personal
-
Microsoft SharePoint Online
-
Microsoft Exchange Online
-
Gmail
-
Google Drive
-
Dropbox
-
Box
-
Amazon S3
-
License Server Communication
Unsupported Services
-
Microsoft Exchange (Local)
-
Payment Providers
-
Site → Central Communication
-
Central → Site Communication
-
Site → Terminals Communication
Firewall Management
In this section, you can Allow editing firewall rules of the Microsoft Windows Firewall and you can also Reset firewall rules.