Scanning by a single touch. After the user taps this action, the page is immediately scanned to a predefined destination. You can define multiple destinations where the scanned document is sent to, and set scan parameters in MyQ.
For information on how to configure the Easy Scan action and define its destinations and parameters, check Easy Scan settings in the MyQ Print Server guide.
-
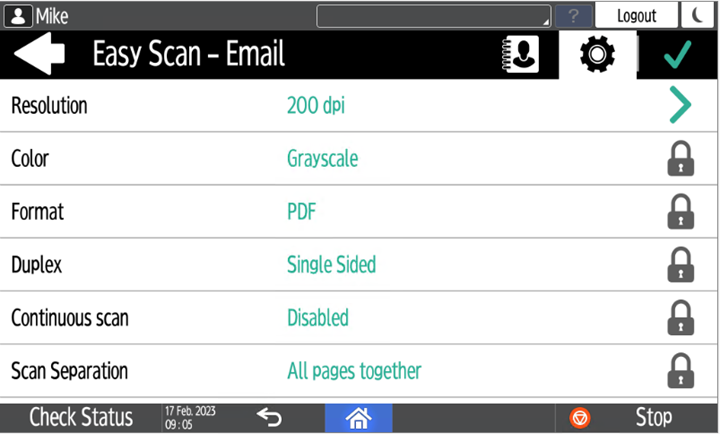
If enabled on the server, users can change their scan settings from the terminal screen.
-
You can also create new custom parameters to be used in the scan metadata, or as parts of file names, addresses, subjects and email bodies, and as paths to folders, passwords to folders etc. You can find further details in Create custom parameters on the MyQ Print Server guide.
-
OCR (Optical Character Recognition) can be used with Easy Scan, by creating OCR profiles and enabling users to select them on the embedded terminal. You can find further details in OCR on the MyQ Print Server guide.
Easy Scan Parameters
Each parameter has a Default option. If selected, the actual values are taken from the default scan settings of the printing device.
An exception for Ricoh devices are the following parameters, which have their Default state set by MyQ Embedded terminal, due to limitations:
-
Resolution - 200 dpi
-
Color - Greyscale
-
Resolution - The outgoing file's resolution. You can select from the following options:
-
100 dpi
-
200 dpi
-
300 dpi
-
400 dpi
-
600 dpi
-
-
Color - The outgoing file's color scale. You can select from the following options:
-
Color
-
Grayscale
-
B&W (two tones)
-
Automatic
-
-
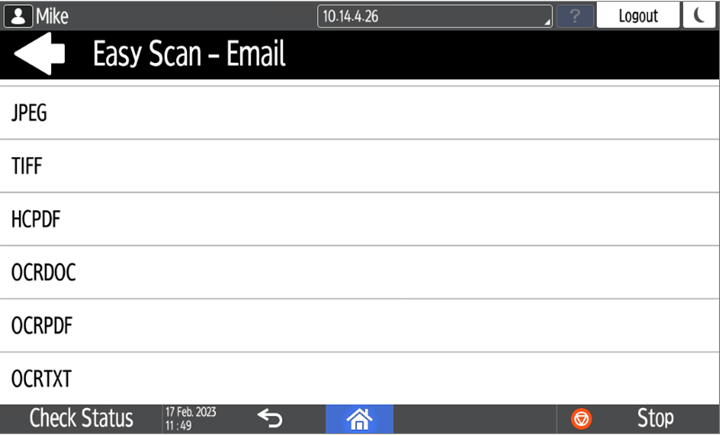
Format - The outgoing file's format. You can select from the following options:
-
PDF
-
JPEG
-
TIFF
-
HCPDF
-
-
Duplex - Simplex and Duplex scanning options. You can select from the following:
-
Single Sided
-
Duplex - binding on top
-
Duplex - Binding on side
-
Booklet - binding on left
-
-
Continuous scan - With the continuous scan option Enabled, scan jobs are not sent until Done is tapped. After clicking Scan, the printing device scans another page.
You can select from the following:
-
Disabled
-
Enabled
-
-
Scan separation - If a document with multiple pages is scanned, scanned pages can be stored either separately (each page in a separate file) or all together in one file. You can select from the following options:
-
All pages together
-
Separate each page
-
-
Original Orientation - Determines the scanned page's orientation in the outgoing file. The paper's position is relative to the person standing at the printing device. You can select from the following options:
-
Top Edge on Top: The page is displayed in a horizontal position (top edge of the page opposite to the person)
-
Top Edge on Left: The page is displayed in a vertical position (top edge of the page on the left-hand side of the person)
-
-
Density - The picture's density in the outgoing file. The higher it is, the darker the resulting picture is. You can select from the following options:
-
Automatic
-
Lowest
-
Lower
-
Low
-
Normal
-
High
-
Higher
-
Highest
-
-
Size - The scanned output's size. This determines the size of the scanning area, therefore it should correspond to the actual size of the scanned paper. You can select from the following options:
-
Automatic
-
A3
-
A4
-
A5
-
A6
-
Folio
-
Ledger
-
Letter
-
Legal
-
Oficio II
-
Statement
-
Default
-
-
Skip blank pages - With this parameter, you can select to skip blank pages in the scanned document. You can select from the following options:
-
Default
-
Yes
-
No
-
-
Mixed size - With this parameter user is able to scan Mixed size jobs.
-
On
-
Off
-
Logging out while scanning
-
Ricoh does not allow users to log out when a scanning or copying job is running.
-
When the user tries to log out, the scan job must be cancelled or finished first.
-
The same is true when a device error (like paper jam) occurs; the device error must be fixed first, the scan job cancelled or finished, and only then can the user log out.
-
In such cases, the following is displayed on the terminal’s screen, in red: Before logging out, resolve the errors below.
-
The screen also displays a list of jobs along with their errors that need to be resolved first.
-
To resolve the error, one has to tap on the error message, and then tap on the Stop button (located in the right-bottom corner).
-
The user must not tap on the Stop button sooner nor later, and nothing should be tapped in-between.
-
Once the Stop button is tapped, follow the related instructions on the screen, for example, confirm cancelling the job.
-
Once the job is cancelled, the user can log out.
-
See the below video with an example of an error, how to stop the job, and then log out.