Custom parameters examples
These are some examples of using custom parameters.
Providing additional information in a metadata file
In this example, you can see how to use parameters for obtaining additional information about the scan file or any other data provided by users. The parameter’s Type can be Text or Yes/No.
As an example, we will create a Yes/No Type parameter, called Should the scan be archived?.
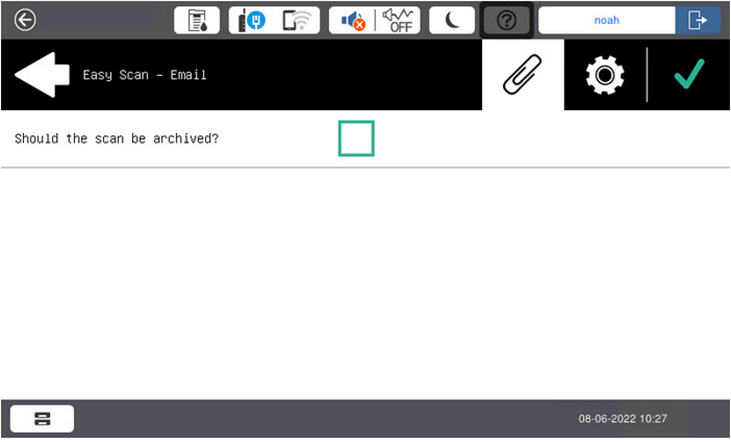
The Title will be shown on the screen, therefore we name it Should the scan be archived?
The Type is Yes/No.
The Required option is selected by default and cannot be deselected as it always has a value.
The Default value is left unchecked.
We do not have to use the reference, as the parameter is not going to be used in any string in MyQ. Therefore, we can Save the parameter settings.

The following two figures show two possible values of the Should the scan be archived? parameter. A DMS software can automatically archive the scans with value 1 into a predefined folder.


Enabling users to scan to their home folder protected by password
If you do not want to give to the MyQ server universal access to users' shared folders, but instead want to provide each user with separate rights to access their shared folder from MyQ, you can enable the scanning users to enter the password to their LDAP domain account to access the shared folder there.

To be able to access their shared folders, users should have the LDAP domain defined in MyQ. The information about the domain is taken either from the Authentication server setting on the user's properties panel in MyQ, or from the user's MyQ user name (if the name is in the form LDAPusername@domain.local).
During the scanning, after the password is entered and submitted, MyQ takes the name of the user's domain (either from the Authentication server setting, or from the back part of the user name) and attempts to log on the user's account on this domain (either the whole user name, or its front part). If the password is correct, MyQ saves the scan in the shared folder; otherwise, it displays the error message "Error while delivering a scan X/Y. Unable to write to the folder.".

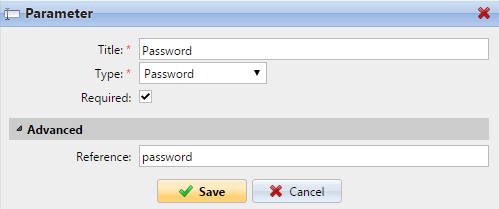
On the Parameters tab, create a parameter with the following properties: Title: Password, Type: Password, Required: selected, Reference: password.
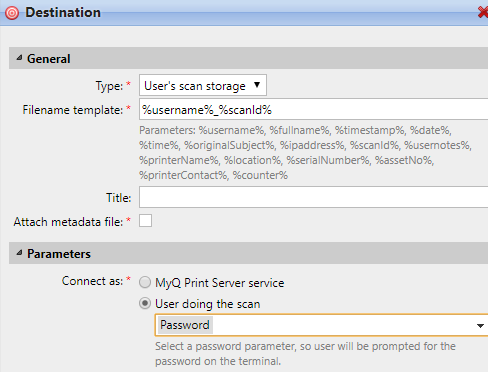
On the Destinations tab, set the User's scan storage destination type. In the Parameters section, select the Connect as: User doing the scan option and select the newly created password parameter in the drop-down.
Enabling users to select the output folder from a code book
In this example, you can see how to enable users to select the scan destination folder from a predefined code book. For this example, we have already created and saved the Easy Scan action node, and we have created a code book named Folders, which has names of folders as its values. The next step is to add and set up a new Code Book type parameter and a new Folder destination type for the Easy Scan action. The parameter is then used as a part of the path to the folder.
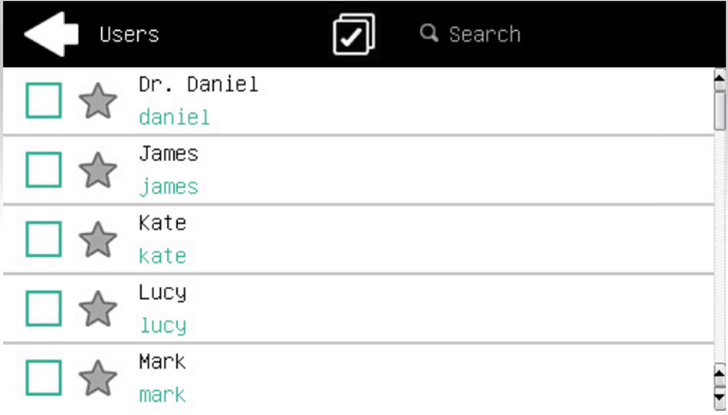
On the Parameters tab create a parameter with the following settings: Title: Output folder, Type: Code Book, Code Book: Folders, Default value (optional), Prohibit change of value: deselect, Reference: folder. If you want to allow users to select multiple recipients, select Allow multiple values.
If you want to allow users to enter their own value, select Allow custom values. If you don't want to allow empty values, select the Required option so that users have to enter its value before sending the file. Optionally, you can select a default value to define the folder where the output files will be saved, if users don't change it.

On the Destinations tab, create and set up a new destination. For this destination, you can use the parameter as any part of the destination path set in the Destination folder text box. To use the parameter, enter its reference name bounded in percentage signs as part of the path. In our example, we used a parameter with the reference name folder as the folder where the files are stored (\Users%folder%).

Enabling users to search recipients via LDAP Source code books
In this example, you see how to enable users to search for recipients on LDAP servers via LDAP Source code books. LDAP Source code books contain two parameters: Title and Value. The value of the Title parameter is used as an input for searching in the LDAP database and the Value parameter defines the value returned by the database. We use an LDAP Source code book with the cn attribute assigned to the Title parameter and the mail attribute assigned to the Value parameter. We also create a new parameter and a new folder destination for the feature. The scanning user types a string to be used in a search query. MyQ sends the query to the LDAP database to search for user accounts, whose cn begins with the entered string. The scanning user can select from the returned accounts. After they select the account, the value of the mail attribute of the account is used as the scan destination.
On the Parameters tab, create a parameter with the following settings: Title: Recipients, Type: Code Book, Code Book: Emails (or the LDAP source code book that you want to use), Prohibit change of value: deselect, Reference: recipients. If you want to allow users to select multiple recipients, select Allow multiple values. If you want to allow users to enter their own value, select Allow custom values. If you don't want to allow empty values, select the Required option so that users have to enter its value before sending the file.

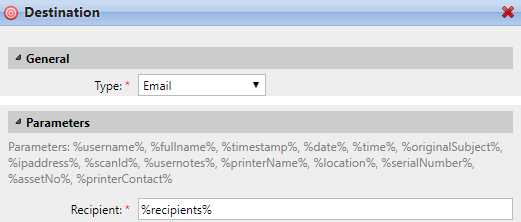
On the Destinations tab, create an Email destination type and enter the parameter in the Recipient text box, enclosed in percent signs (%recipients%).
.png)