.png)
Easy Fax Settings
With the Easy Fax feature, users can fax their scanned documents in just two steps; all they need to do is tap the Easy Fax button on the home screen of the embedded terminal, and then type the fax number.
By adding multiple Easy Fax action nodes and giving rights to different users or groups, you can create a variety of faxing options for the selected users and groups
To enable the feature on a printing device, you need to enable the Fax module option on its properties panel in MyQ, deactivate and reactivate the device. Go to MyQ, Settings, Configuration Profiles. Select the configuration profile and click Edit (or double-click, or right-click and Edit). The properties panel opens on the right side. In the General tab, mark the Fax module checkbox. Click Save.
On the Parameters tab, you can select from a number of options for each parameter.
All parameters are dependent on the particular printing device type. Therefore, some parameters and/or values might not be available.
Vendor Compatibility Specifics
Easy Fax compatibility may differ between brands. Please check the relevant terminal documentation for more details.
Fax to a contact from Address Book
To enable the Address Book parameter, the administrator has to set it up as a custom parameter for the Easy Fax action.
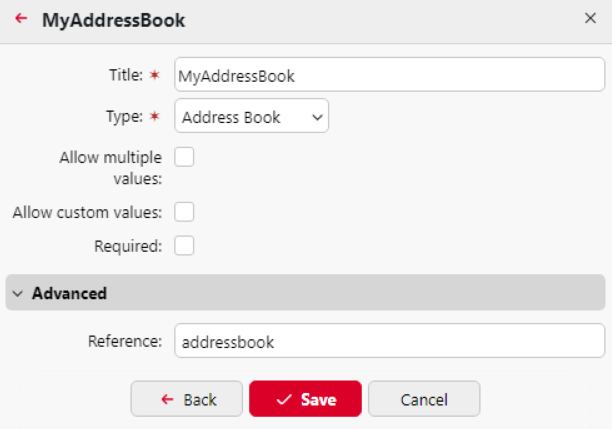
It is not necessary to enable the Required field, as the Fax destination field is already mandatory in the Easy Fax’s Phone Book where the user will be selecting contacts from their Address Book.
Once done, users can manage their Address Book on the MyQ Web UI and faxes are sent to the contact from the users Address Book.
Accessing and Using Address Book
Log in to MyQ.
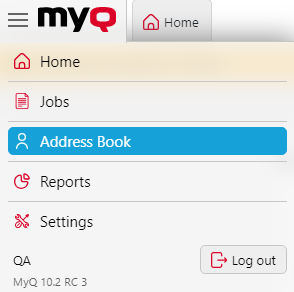
In the main menu, select Address Book.
Address Book is not available to built-in accounts such as *admin.
Here, you'll see your contact list with available columns: Full name, Email, and Fax number.

Managing Contacts
To add a contact, click on Add contact. A pop-up appears where you can enter the contact's Full Name, Email, and Fax Number.
To edit or remove a contact, locate the contact from the list and choose the respective option.
For searches, use the left pane. Options available: All Contacts, Email Contacts, Fax Contacts, and Deleted.
In the Deleted section, you can either Undelete or Permanently Remove a contact.
All email inputs undergo validation checks to ensure they are of a valid email format.
Fax numbers are saved without validation. Make sure your users understand what number formats are supported by Fax devices.
Using Address Book in Easy Fax
Log in to the terminal.
Choose Easy Fax.
In the parameters, select the Address Book option.
Browse and select a contact from your list as the destination.
A user can only access contacts from their own Address Book. Accessing the contacts of another user, even by administrators, is prohibited.