In the Terminal Actions settings tab on the MyQ Web administrator interface, you can view and manage embedded terminals features. The features are called actions and can be accessed from action nodes on the terminal. The action nodes correspond to buttons on the printing device display.
You can configure the layout of the display screen, as well as the behavior of each button. This means you are free to choose any combination of available actions and their positions on the screen. The layout is displayed on a WYSIWYG (what-you-see-is-what-you-get) terminal preview and can be configured there.
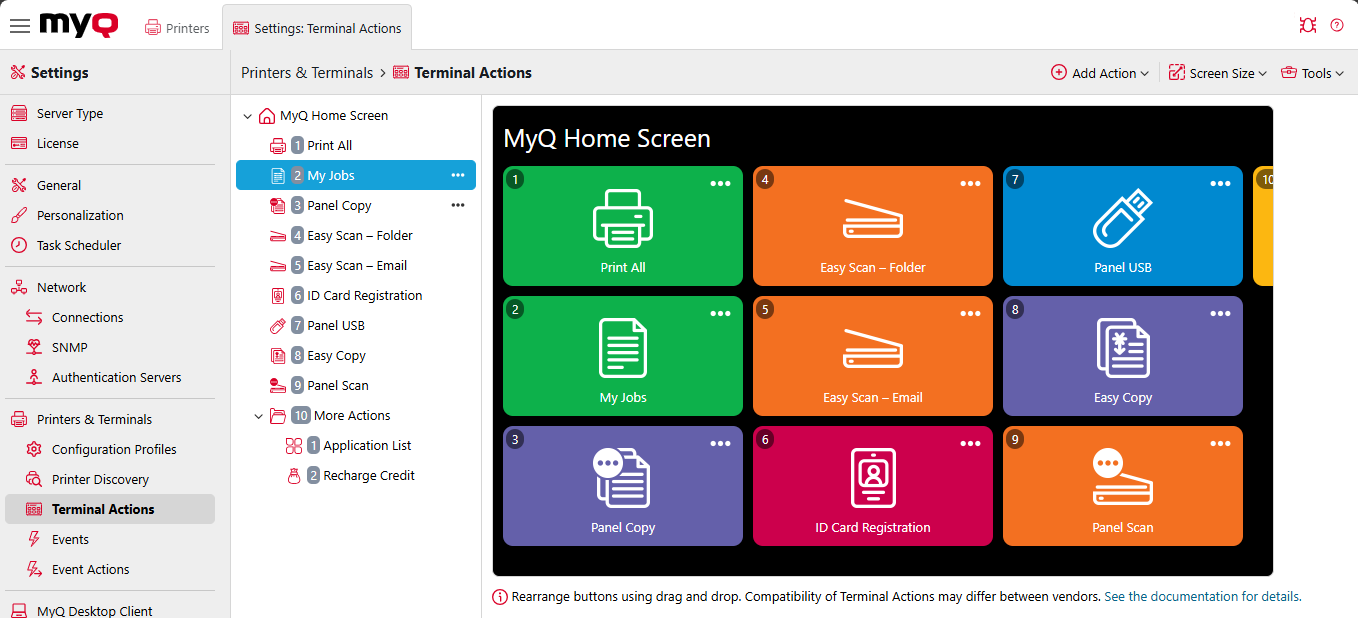
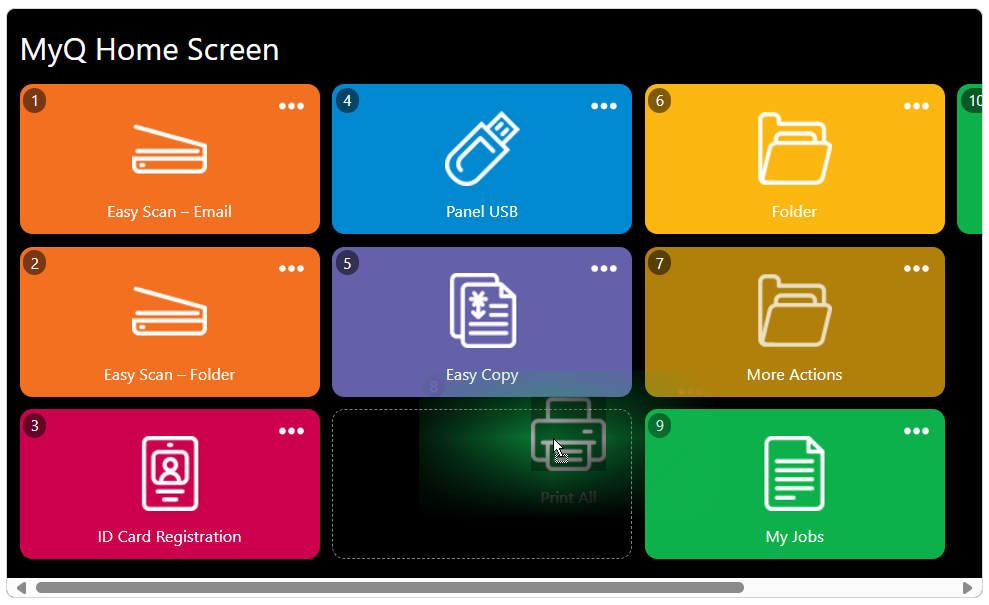
Terminal actions are arranged vertically in blocks of three. A maximum of eighteen terminal actions per level is allowed. If the number of terminal actions is greater than nine, the buttons are stretched to show arrows that allow switching between pages. This, however, depends on the terminal display and smaller screens have fewer top menu actions per page, as well as either pagination on the left or dotted pagination at the bottom.
Additional layout options are provided by the possibility to create folders and put action nodes inside. Folders can be used to group actions of the same type, such as scanning to different destinations, or to enable users to access a higher number of actions.
Users and groups can be given rights to different actions. This way, you can configure individual home screens for each user or group of users.
The terminal action nodes can be managed directly on the terminal screen preview where you can:
-
Drag and drop actions to change their order.
-
Drag and drop to place certain actions inside folders.
-
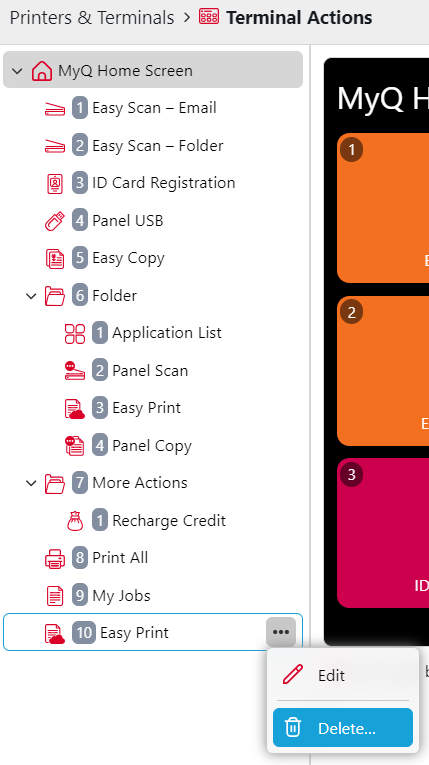
Use the context menu of an action to Edit or Delete it.
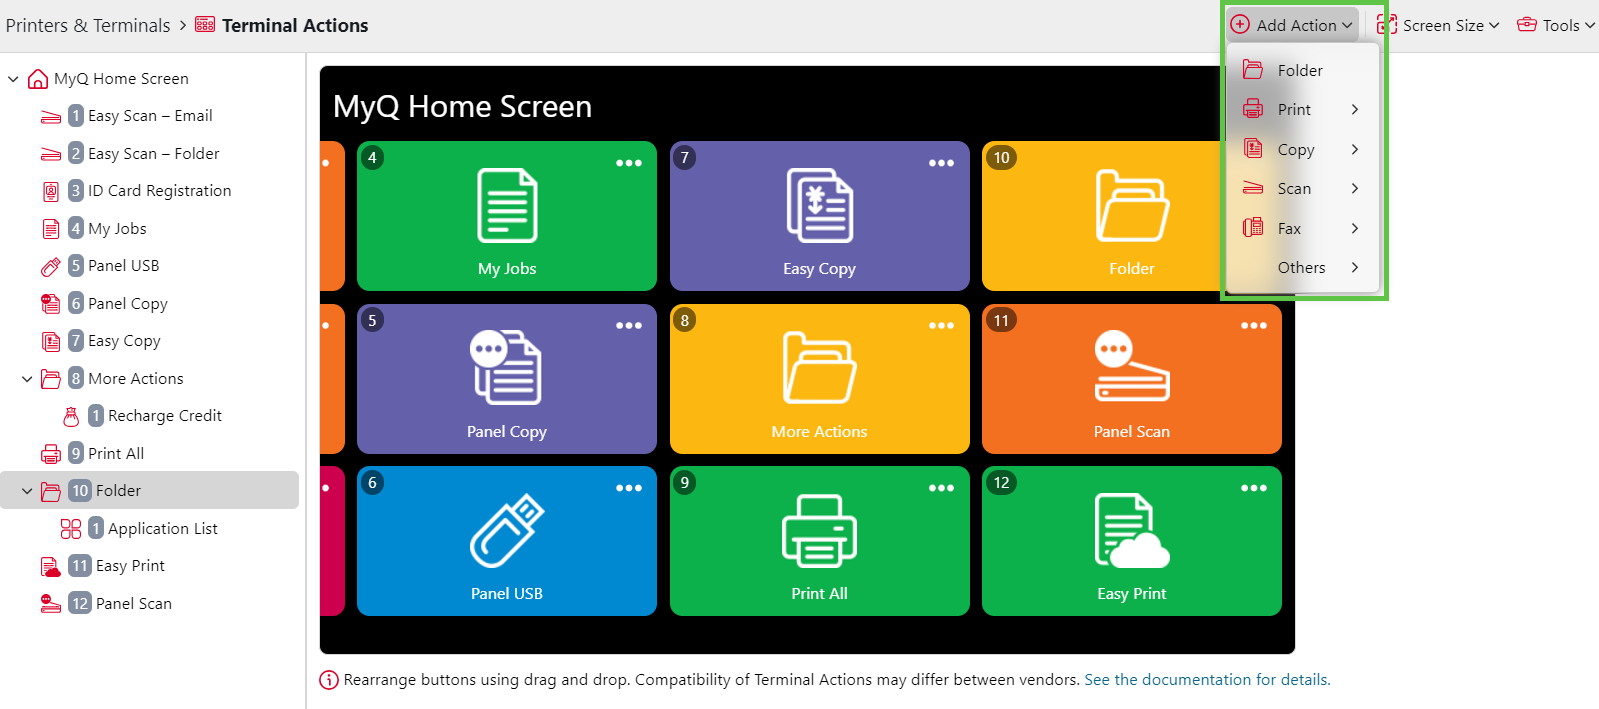
Adding new terminal action nodes
To add a new terminal action node:
-
Click on Add Action from the header options and select from Folder, Print, Copy, Scan, Fax, and Others.
-
Your new terminal action is created, you can now use the content menu on that action’s icon to Edit the action or drag and drop it to change its position or place it into a folder.
Duplicating a terminal action
To create a new terminal action with the same general settings and parameters as an existing action, duplicate the action.
-
Click the three-dot-menu for the action that you want to duplicate.
-
Click Duplicate.
A new terminal action appears with the name of the source action, followed by a number in parentheses.
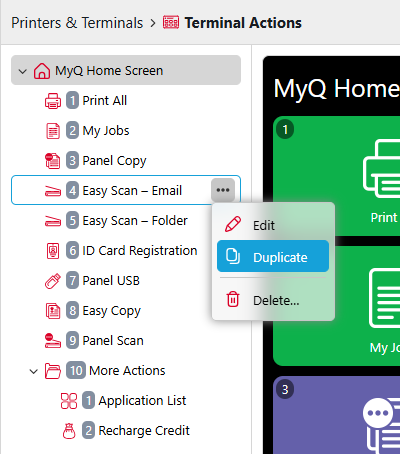
You cannot duplicate native panel actions or special purpose actions such as Print All or My Jobs.
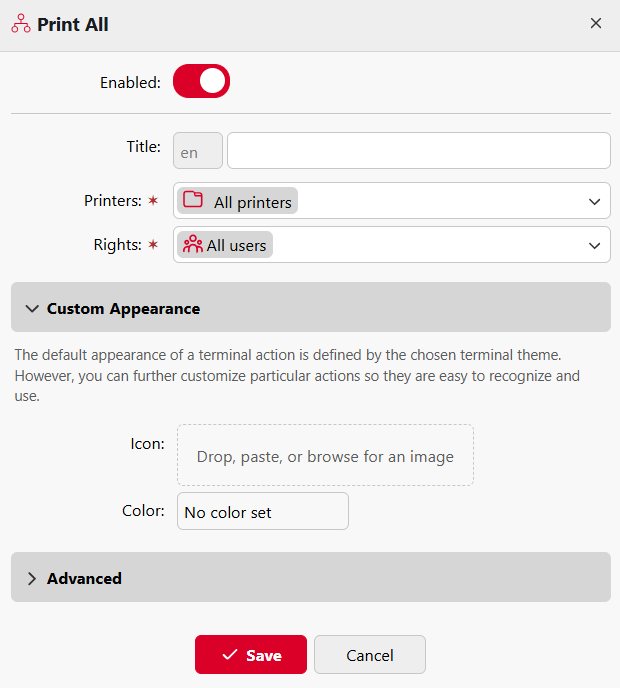
Editing terminal action nodes
Each action can be edited from its properties panel. To access the panel, double-click the terminal action node on the list of nodes or on the terminal screen preview. On the properties panel, you can see up to three settings tabs (depending on the particular action): General, Destinations, and Parameters. The Destinations and the Parameters tabs are mostly used in Easy Scan action nodes and are described there.
General tab
-
Enabled: If you disable the node, it is not displayed on the terminal and cannot be used there.
-
Title: Allows you to change the action node's name. If you do not change it, the default name is used. Depending on the number of additional languages set on the MyQ Web administrator interface, you can use different names in different languages (additional languages can be set on the MyQ General settings tab.)
-
Printers: Allows you to select the printers the action node will be available on. All printers are assigned by default. To add more printers, select them from the Printers drop-down.
-
Rights: Allows you to select the users or the groups of users that will be able to see and use the action node. According to this setting, the layout and available features of the embedded terminal can vary depending on user's rights to particular nodes. By default, the right to see the node is given to all users. To provide an additional user or a group of users with rights to the action node, select the user or group from the Rights drop-down.
-
Custom Appearance: This option allows you to change the icon displayed for this terminal action. You can either Browse for a file on your device, drag and drop an image file onto the selector, or Paste a file from your clipboard. File types .jpg, .png, .gif, and .bmp can be used. The selected image will be re-sized automatically, and if it contains transparent space, the selected icon Color will be visible in the transparent parts of the image. In addition, you can select the custom color that will be displayed behind the icon.
-
Advanced/Reference: This option allows admins to force extra features on the terminal, providing enhanced functionality and customization for various terminal actions. The value stored in the
Advanced/Referencefield is accessible through the MyQ X API, allowing for seamless integration and retrieval of terminal action data.
Titles, Custom Icons, and Custom Colors set here will override those set in the Terminal Theme Editor.
Changing the terminal action nodes layout
To change the action nodes layout, simply drag and drop the action nodes on the terminal preview, their new order will be reflected in the left-hand panel.
Actions can be placed in a folder by drag and drop on the terminal action preview or using the same method in the left-hand panel.
If there are more than ten action nodes defined on the home screen or in any folder, move the scroll bar at the bottom of the preview screen to view the additional action nodes.
Deleting terminal action nodes
You can delete terminal action nodes either from the action nodes list or from the terminal screen preview. Both actions have the same result: when you delete the node, it is removed from both locations.
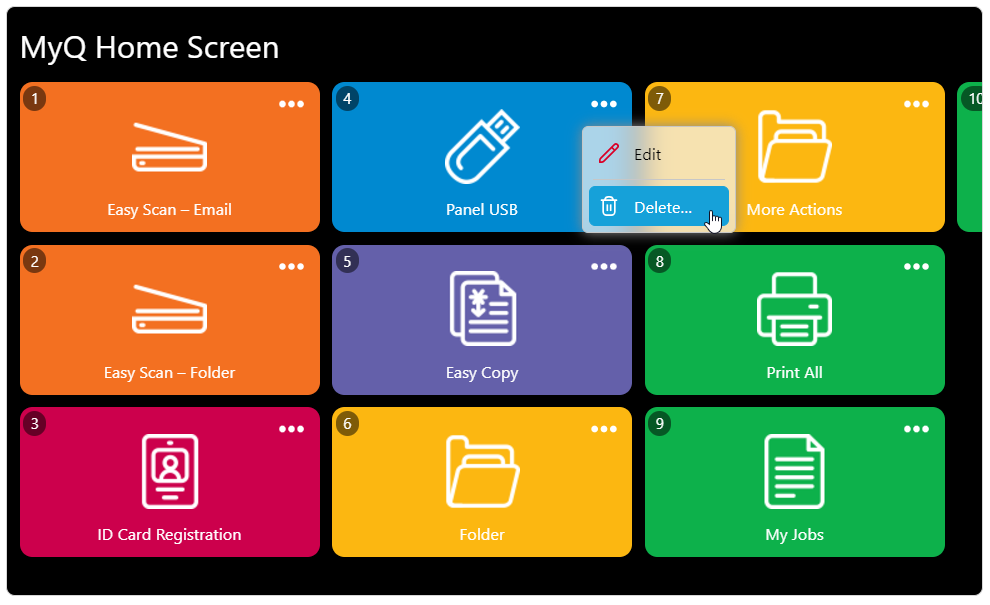
Deleting action nodes from the home screen list
On the list of actions on the Terminal Actions settings tab, right-click the action node that you want to delete, and then click Delete on the shortcut menu. The action node disappears both from the list, and the terminal screen preview.
Restoring the original layout
On the bar at the top of the Terminal Actions settings tab, click Tools, and then click Restore defaults…. All your layout changes are reverted to the default settings.
Vendor Compatibility Specifics
Terminal actions compatibility may be different between brands. Check the respective Embedded Terminal guides for details: