The Easy Print terminal action allows users to print files without sending them first to MyQ. These files can be printed from multiple sources, like several cloud storages, network drives or local drives, and the user's default storage.
The supported formats for Easy Print are: bmp, jfif, jpe, jpeg, jpg, mime, png, tif, tiff, txt, urf, and pdf.
If Microsoft Office suite or Libre Office are installed on the server, the Microsoft formats doc, docx, xls, xlsx, ppt, pptx and Libre Office formats are also supported. These are converted into PDF based on the settings in Jobs - General - Office file formats.
Add the Easy Print terminal action
-
Go to MyQ > Settings > Terminal Actions.
-
Select the Home Screen or any folder in the Terminal Actions tree.
-
Click Add Action. A list of available actions opens.
You can create multiple instances of the Easy Print action, and configure each one with different settings.
-
Select Easy Print. The action is added.
-
Click Edit on the action menu to configure the settings for your action, including which storage sources are available to the user and the default release options.
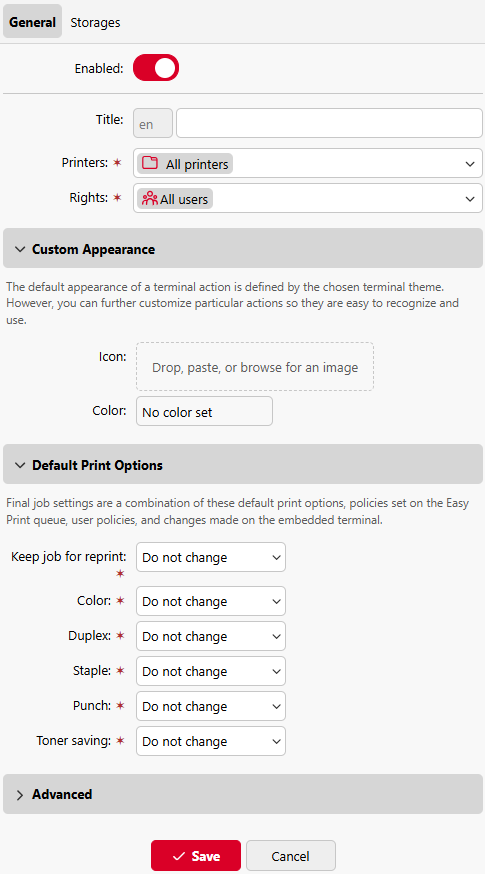
Easy Print Settings
General tab
-
Enable/Disable the action.
-
Printers - Specify the printers where the action is available.
-
Rights - Specify the users and/or user groups who can use the action.
You can set a Custom Appearance for the action.
-
Icon - add an image for the terminal action.
-
Color - select a color for the terminal action
You can specify the Default Print Options for the action.
The final job settings are a combination of these default print options, policies set on the Easy Print queue, user policies, and changes made on the embedded terminal.
-
Keep jobs for reprint
-
Color
-
Duplex
-
Staple
-
Punch
-
Toner saving
Storages tab
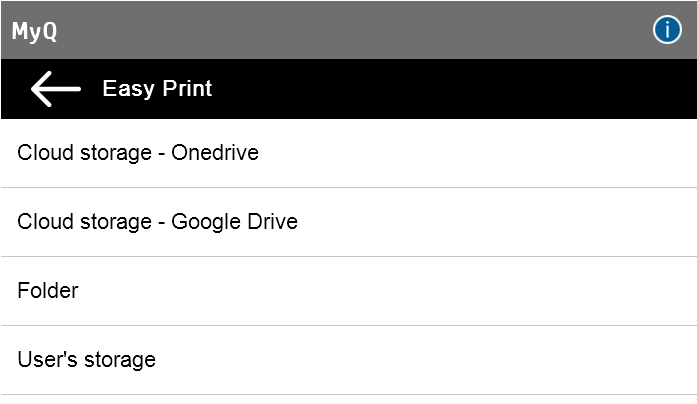
You can add one or more storage locations. These types are supported:
-
Cloud storage
-
Folder
-
User’s storage
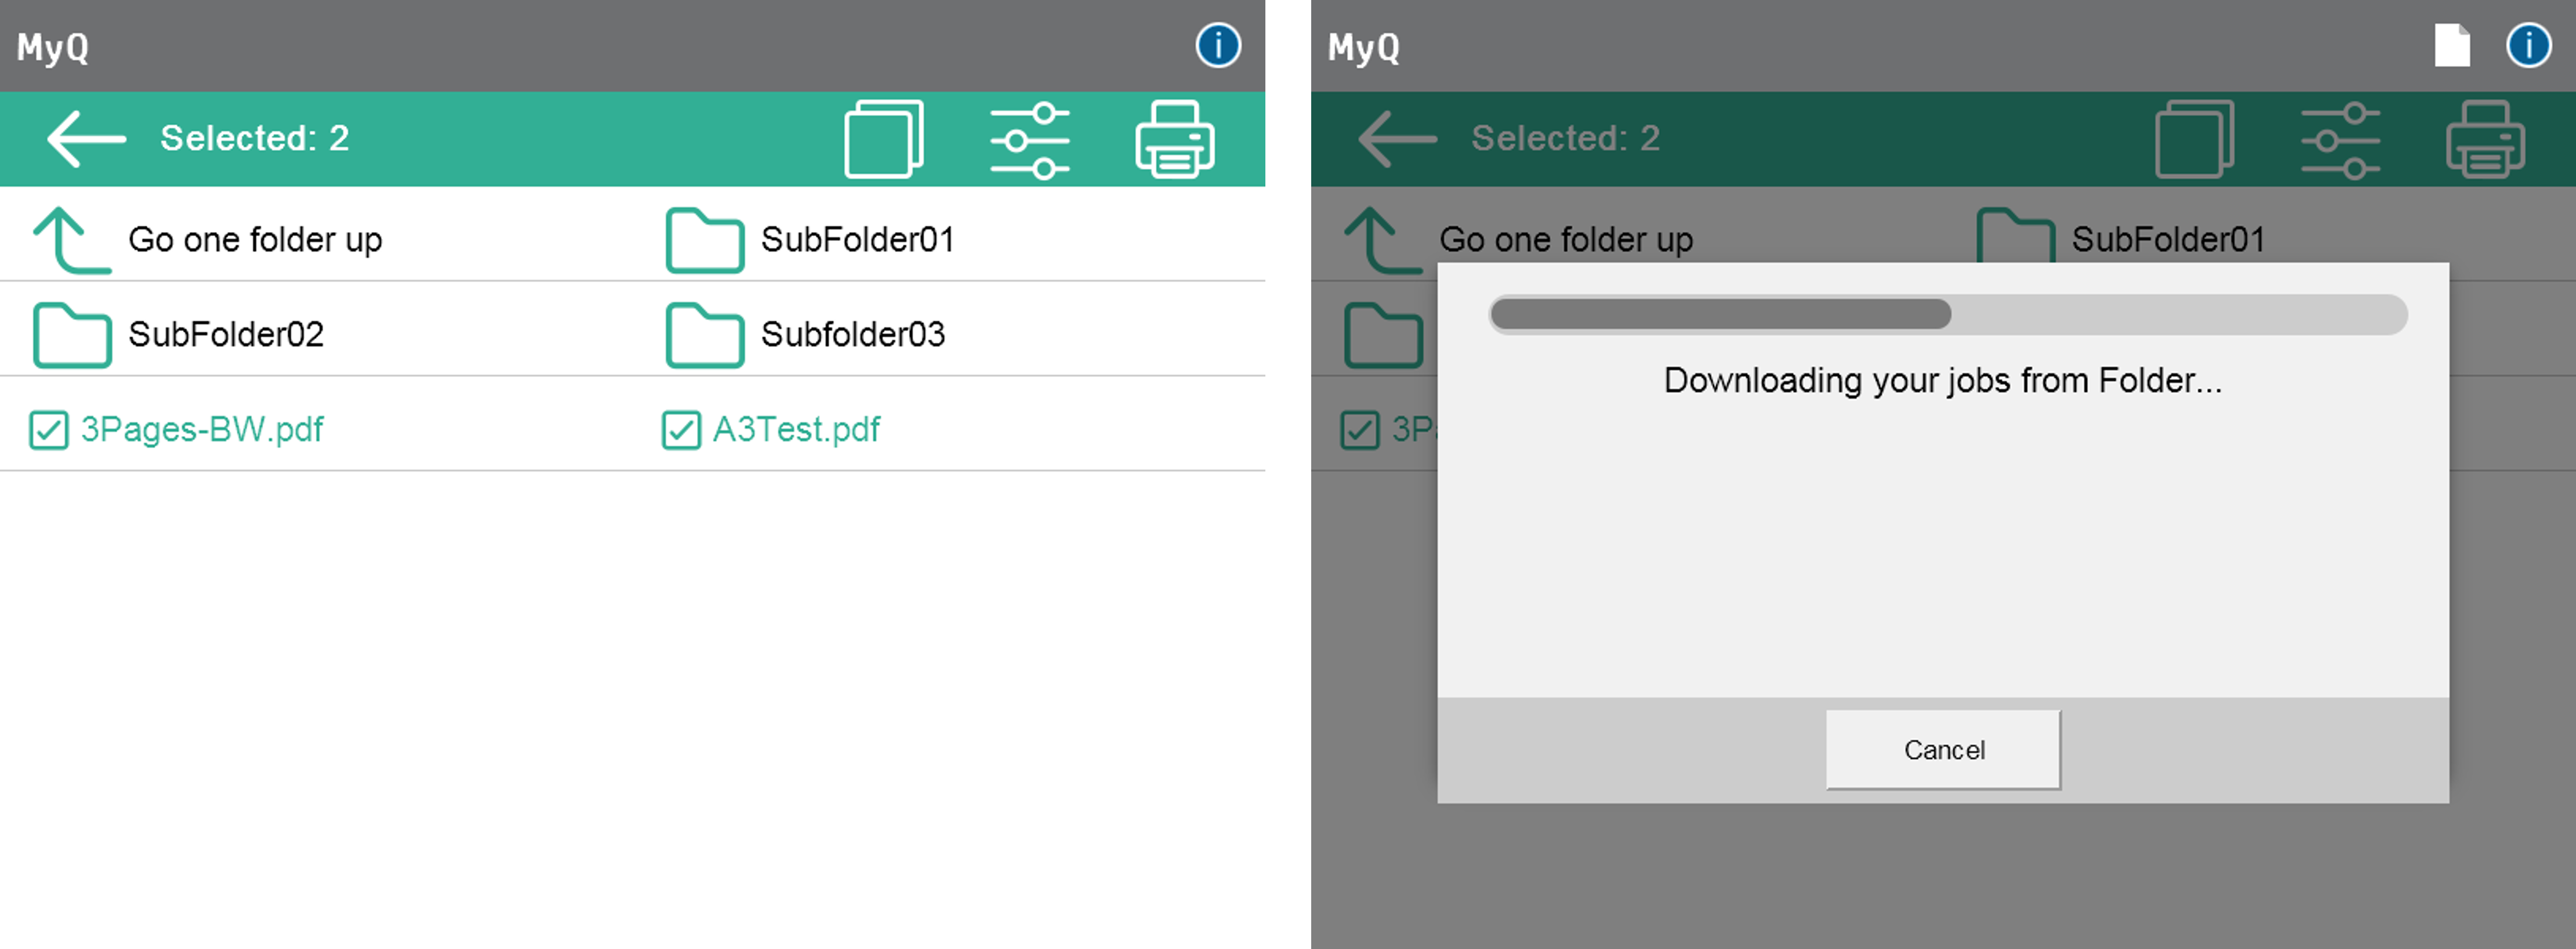
When Easy Print is used on the terminal, the user is presented with a list of possible sources associated with this action (this is skipped in case of a single source). After the source is selected, the user can browse it and select files for printing. For more information about how to connect these sources, see Easy Print Sources.
Once a file or files have been selected for printing, you can use the modify button to modify the print options (Color, Duplex, Staple, Punch, Toner saving, and Copies).
These options are listed on all terminals, regardless of whether or not the specific terminal can complete a particular action, so it’s possible that a selection made may be ignored.

After pressing the print button, the files are downloaded from the source to the server, processed through the default Easy Print queue, and released immediately to the printer. It is also possible to cancel the whole downloading and printing process. In this case, files that have already been downloaded, but not printed are deleted from the server.
Vendor Compatibility Specifics
Easy Print compatibility may differ between brands. Please check the relevant terminal documentation for more details.