Before Printer Provisioning Profiles (3P) can be used, it’s necessary to capture Print Drivers and Print Driver Sets, see details in Print Driver Capture.
Provisioning profiles are managed in the Web UI in Settings>Printer Provisioning. A profile consists of:
-
Profile Name: must be unique.
-
Filters: these dictate which computers and/or users this profile is deploying queues to.
-
Client Printers: defines which queue and print driver are deployed on the device targeted by the profile, and under which name the printer will be displayed to the user.
Create a Provisioning Profile
-
In the Web UI>Settings>Printer Provisioning click Add….
-
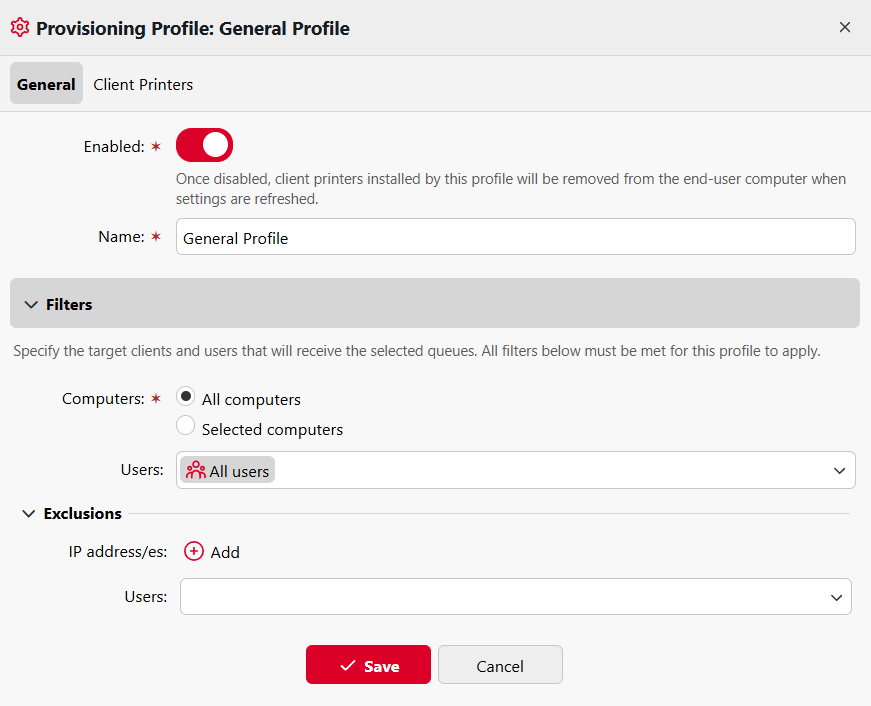
On the General tab:
-
Choose to Enable or Disable this profile. Once disabled, client printers installed by this profile will be removed from the end-user computer when settings are refreshed.
-
Enter a Name for this profile.
-
Set Filters to specify the target computers and users that will have access to this profile. A provisioning profile can target:
-
Computers
-
By IP ranges (e.g., 10.5.4.1–10.5.4.255), a device with IP 10.5.4.9 will receive queues defined in profiles covering the 10.5.4.x subnet.
-
By hostnames, supporting regular expressions.
-
Individual IP addresses and users can also be excluded, for cases where a specific device should not receive the given printers, or when it is necessary to create a special profile for individual users.
-
-
Users
-
By user groups.
-
By individual users.
-
-
-
If multiple filters are used in one profile, the queue is installed only when all conditions of all filters are satisfied.
-
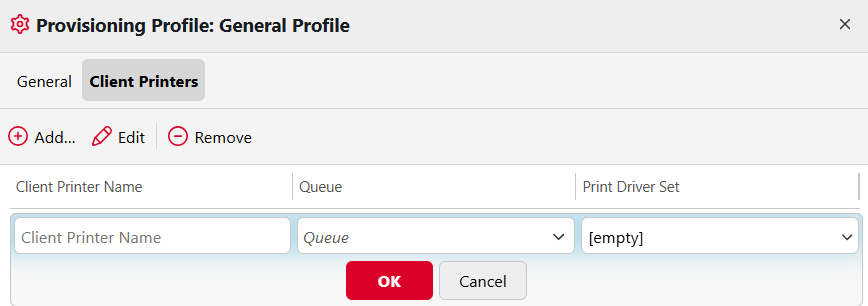
On the Client Printers tab click Add and specify combinations of:
-
Client Printer Name: this is the device name users targeted by this profile will see.
-
Queue: this is the queue that will be used by this Client Printer.
-
Print Driver Set: selected from those that have been captured and are listed in Settings>Print Drivers.
-
If any user is provisioned multiple profiles with the same queue and driver combination, they will only see one client printer, as any others would be functionally identical.
Only online print queues can be successfully provisioned. Offline queues can be assigned to profiles but are not deployed.
Restrictions set in the chosen queue (such as which users have rights to use it, and presets defined there) will override settings in the provisioning profile. This means:
-
If a user is assigned a profile but does not have rights to the queue selected for that profile, they will see the client printer but will be unable to print from it.
-
If a print driver is captured with certain printing presets (for example, to allow a choice between duplex and simplex), but the queue presets deviate from these (for example, force duplex is enabled) the queue presets will have priority.
Force Refresh
Once a profile has been created and assigned, it may take ~15 minutes for the client to refresh printers. A refresh can be completed manually by users at any time by selecting Update my printers in the MyQ Desktop Client options. At this point, the specified Client Printer Name should become available to the specified users/computers.
Managing Provisioning Profiles
To Edit a profile, double-click the profile name, or select the profile and click Actions>Edit.
To Delete a profile, select the profile and click Actions>Delete.
The Search bar can be used to quickly find particular profiles.
Profiles can be Imported or Exported in bulk in Tools, learn more in Provisioning Profile Import and Export.
Show Effective Profiles
Use this tool to view the profiles available to selected IP addresses, user groups, or users:
-
In the Web UI>Settings>Printer Provisioning click Tools>Show Effective Profiles.
-
Specify the relevant IP addresses, Users, or User Groups and click Show Effective Profiles.
-
The profiles available to the selected users/computers are listed.