Two steps faxing. You can define the fax parameters in MyQ.
For further information, check Easy Fax settings in the MyQ Print Server guide.
The Easy Fax default settings of the printing device can be configured in the HP Web UI, in Fax > Fax Send Setup > Default Job Options (supported from MyQ HP Embedded terminal 8.2 patch 3+). After changing the parameters in the device’s web UI, the remote setup or a restart of the services is required for updating the default parameters.
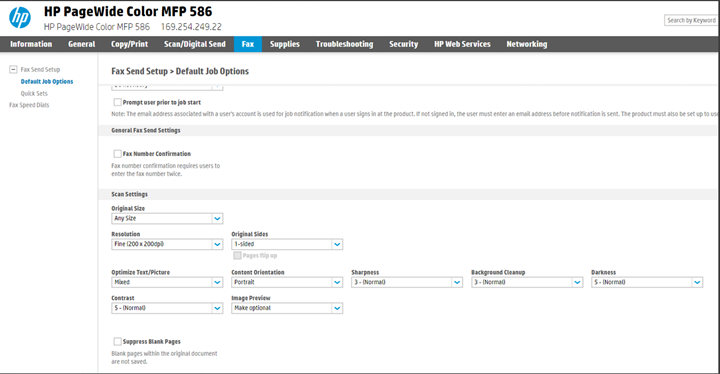
If the parameter’s Value is set to Default in the MyQ web administrator interface, the terminal will replace it with the device’s default value. If the device’s default value cannot be mapped to MyQ, Default will be displayed.
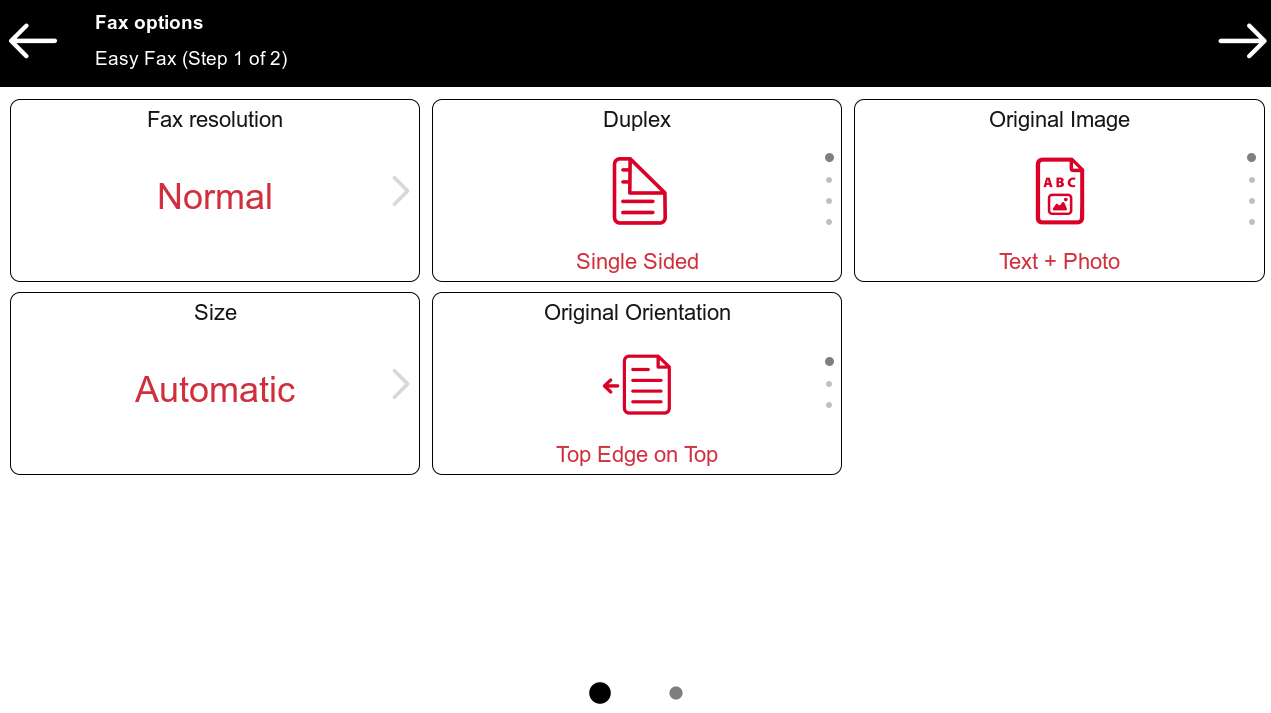
Easy Fax Parameters
-
Fax resolution - Resolution of the outgoing fax file. You can select from the following options:
-
Normal
-
Fine
-
Super Fine
-
Ultra Fine
-
Default
-
-
Duplex - Simplex and Duplex scanning options. You can select from the following options:
-
Single Sided
-
Duplex - binding on top
-
Duplex - binding on side
-
Default
-
-
Original Image - Determines the way in which the printing device is going to process the scanned page. You can select from the following options:
-
Text + Photo
-
Text
-
Photo
-
Default
-
-
Size - Size of the scanned input. It determines the size of the scanning area; therefore, it should correspond to the actual size of the scanned paper. You can select from the following options:
-
A3
-
A4
-
A5
-
A6
-
Folio
-
Letter
-
Legal
-
Oficio II
-
Default
-
-
Original Orientation - Determines the page's orientation in the outgoing file. The paper's position is relative to the person standing at the printing device. You can select from the following options:
-
Top Edge on Top
-
Top Edge on Left
-
Default
-
-
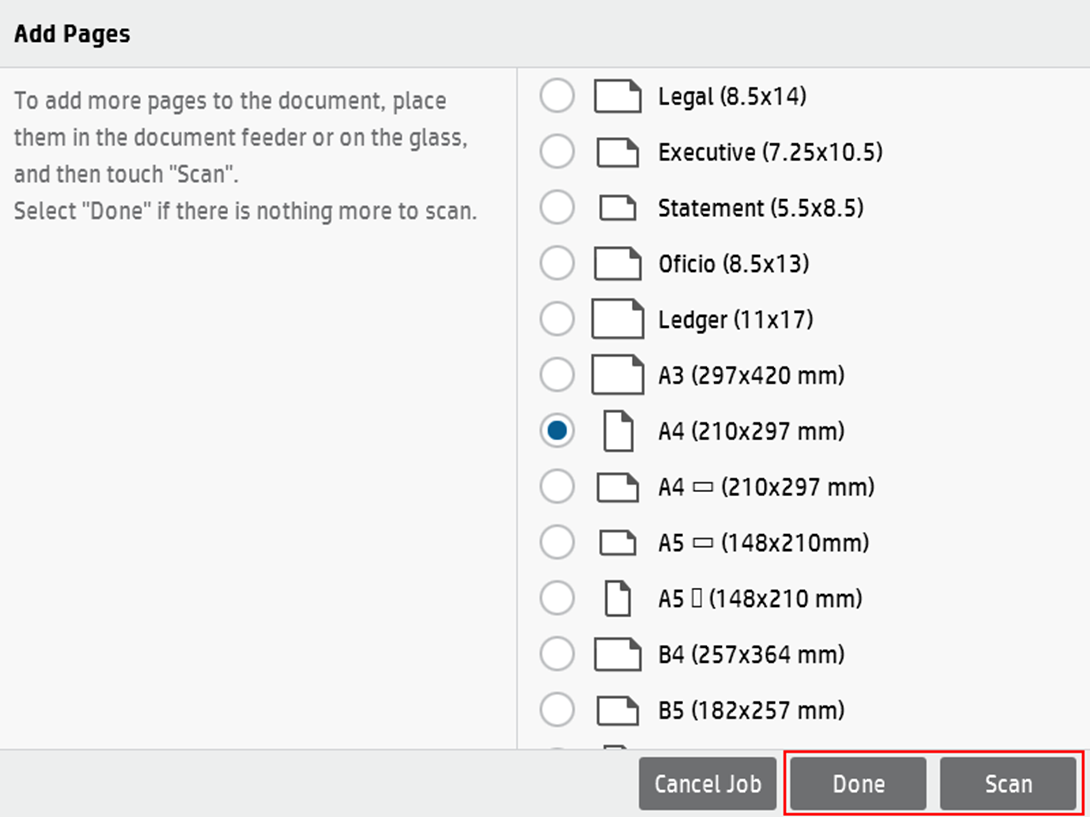
Continuous scan - With the continuous scan option Enabled, scan jobs are not sent until Done is tapped. After clicking Scan, the printing device scans another page. You can select from the following:
-
Disabled
-
Enabled
-