The easiest way to install the MyQ Epson Embedded terminal is via remote installation from the MyQ Web administrator interface. This method is very simple and it is preferable, especially when you need to install the terminal on a large number of printing devices, since you can install multiple devices in a batch.
You do this by creating separate printer discoveries and adding a configuration profile to any one of them. At the same time, you can assign the discovered printers to a group and/or queue. Another possibility is to create a remote installation for just one printer and place it in a direct queue.
Before the installation, make sure that the server hostname/IP address in MyQ, Settings, Network is correct. If it’s not, which could happen after a license update or upgrade, the remote setup will fail.

Remote installation via Printer Discovery
-
Follow the instructions in the MyQ Print Server guide to create and configure a Printer Discovery.
-
Then, you should create a configuration profile to attach to your Printer Discovery.
-
The Epson section is displayed when the Epson terminal package is installed on the MyQ server.
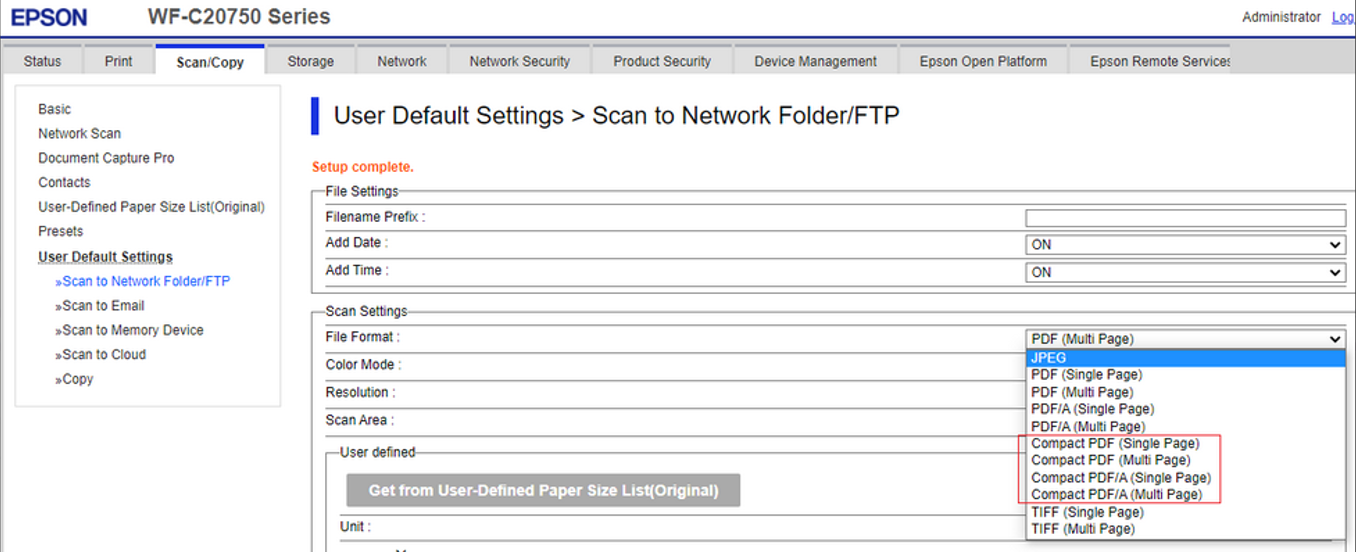
Limitations
Compact PDF
If the default value for the scan File Format in the device web UI is set to Compact PDF, the terminal package installation is failing. This issue is currently being investigated.
Enable Printing on WF-6590
Epson model WF-6590 doesn’t support PJL commands for the user access control. As a result, print jobs are rejected by the device with error message NG 107 (authentication error).
To enable printing via MyQ on WF-6590 Allows printing and scanning without authentication information must be enabled via device WebUI.
