Printers
In this example of creating a printer discovery we show you how to do this in a full automatic way. Discovery, embedding, and activating all form part of this process.
Discovering printing devices
On the Printer discovery pane, you can create and run printer discoveries to search for all network printing devices within a defined IP range of your company's network.
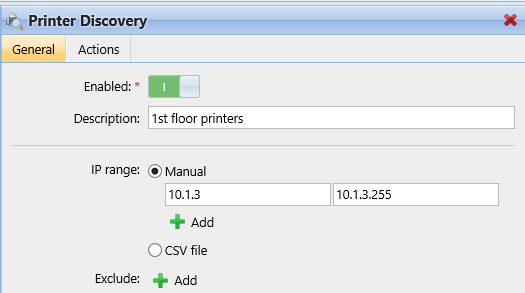
Click Add discovery. The new printer discovery properties panel opens.
On the panel, you can change the General discovery configuration:

Set Enabled to ON.
Add a meaningful Description, so you can create more printer discoveries with different IP ranges.
Change, if needed, the IP range or add more IP ranges by clicking +Add.
Click Save.
Click the Actions tab. The Actions pane opens. Click New action.
Leave the Filter section unchanged.
In the First run actions section:
Click Activate, so all the discovered printers are automatically activated.
Click Create direct queue. Now every single printer will be added to its own queue. In this way, your users can print from any printer.
Leave the Every run actions section unchanged and click Save.
The new printer discovery appears on the list on the Printer Discovery settings tab, with the number of actions you have created for it.
Run a discovery and add all printing devices
On the Printer Discovery settings tab, select the printer discovery that you want to use.
Click Run. The Discovering tab with a list of discovered printing devices opens.
Click Add to MyQ, and then click Add all in the drop-down. You can see the added printing devices on the Printers main tab.
Click the arrow next to the MyQ icon and select Queues. You will see that for every printer, a direct queue has been created.
By clicking Add printers manually, you open the Printers main tab, where you can add printing devices. This option is not covered in this guide. You can find more information in the MyQ Print Server guide.
.png)