Activating Card Readers
To activate a USB card reader:
Register it on the printing device’s touch panel
Add the card reader's Vendor ID and Product ID to the USB device list on the printing device’s Web UI.
Registering the card reader on the printing device’s touch panel
On the initial screen of the MyQ Embedded application, tap MyQ to open the admin login screen.
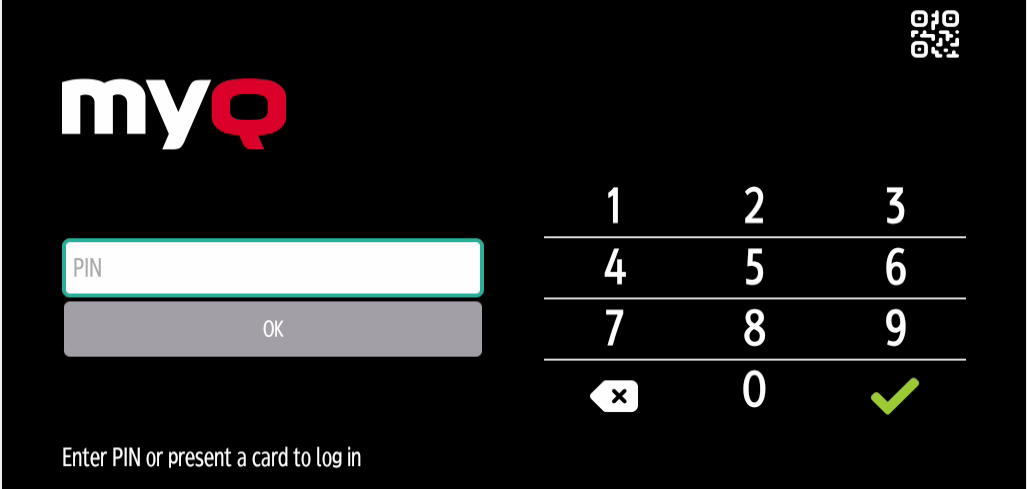
On the admin login screen, enter the admin password (the default password is 1087), and then tap OK. The Admin menu opens.
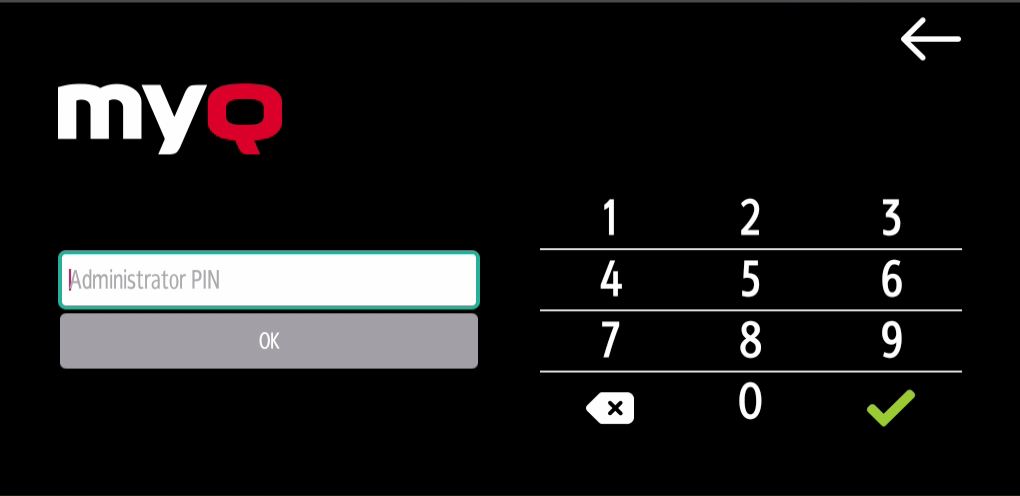
Tap Admin Login for opening the device’s panel screen.
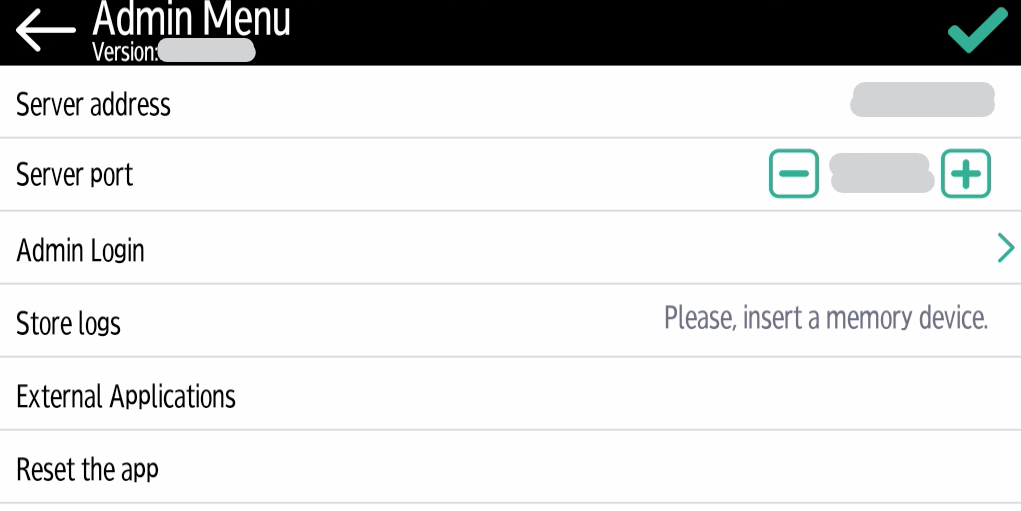
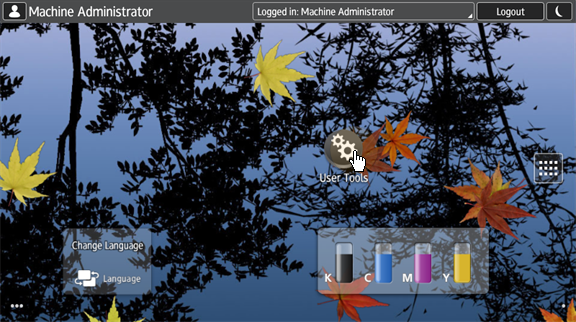
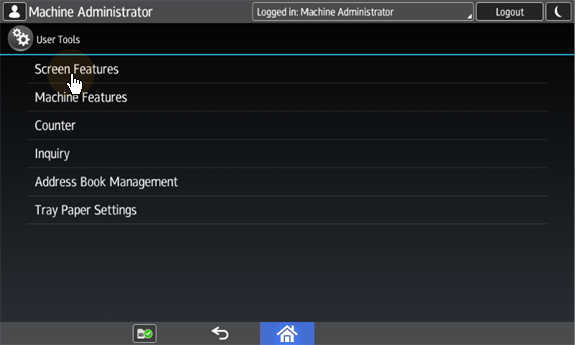
On the screen, tap User Tools. The User Tools screen opens.
Tap Screen Features. The Screen Features screen opens.
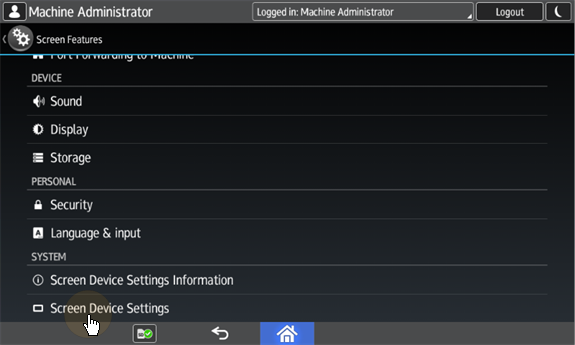
Tap Screen Device Settings. The Screen Device Settings screen opens.
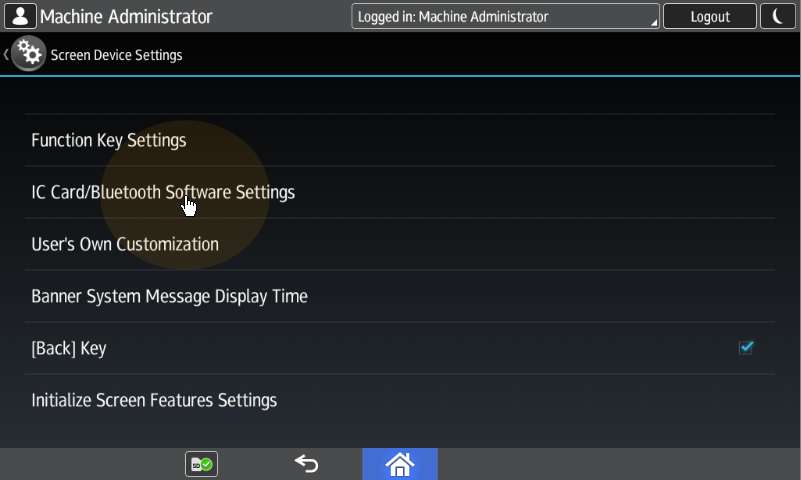
On the Screen device Settings screen, scroll down and tap IC Card/Bluetooth Software Settings. The IC Card/Bluetooth Software Settings screen opens.
Tap Select IC Card Reader. The Select IC Card Reader dialog box appears.
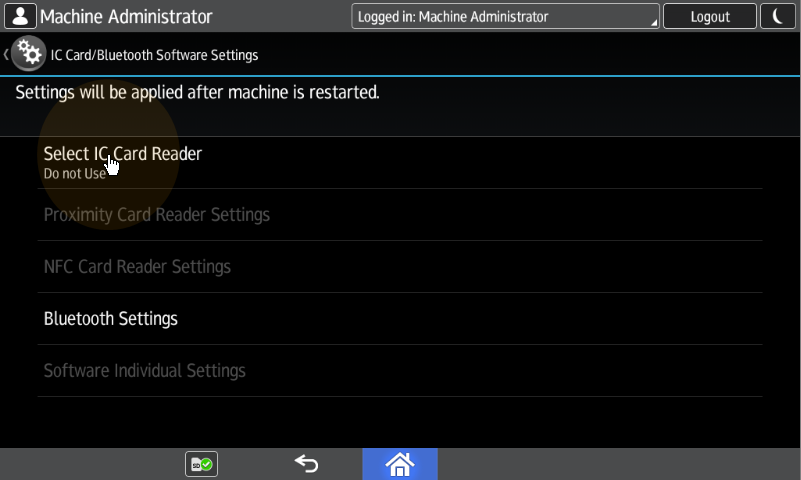
Tap Proximity Card Reader. The dialog box is closed.
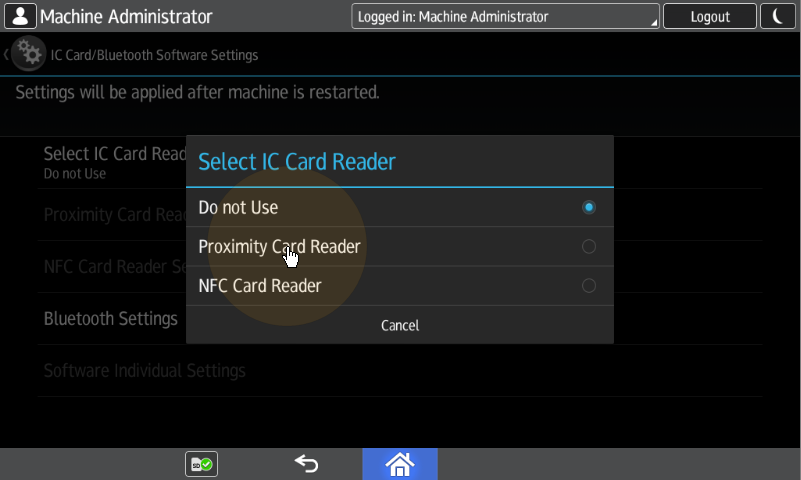
Back on the IC Card/Bluetooth Software Settings screen, tap Proximity Card Reader Settings. The Proximity Card Reader Settings screen opens.

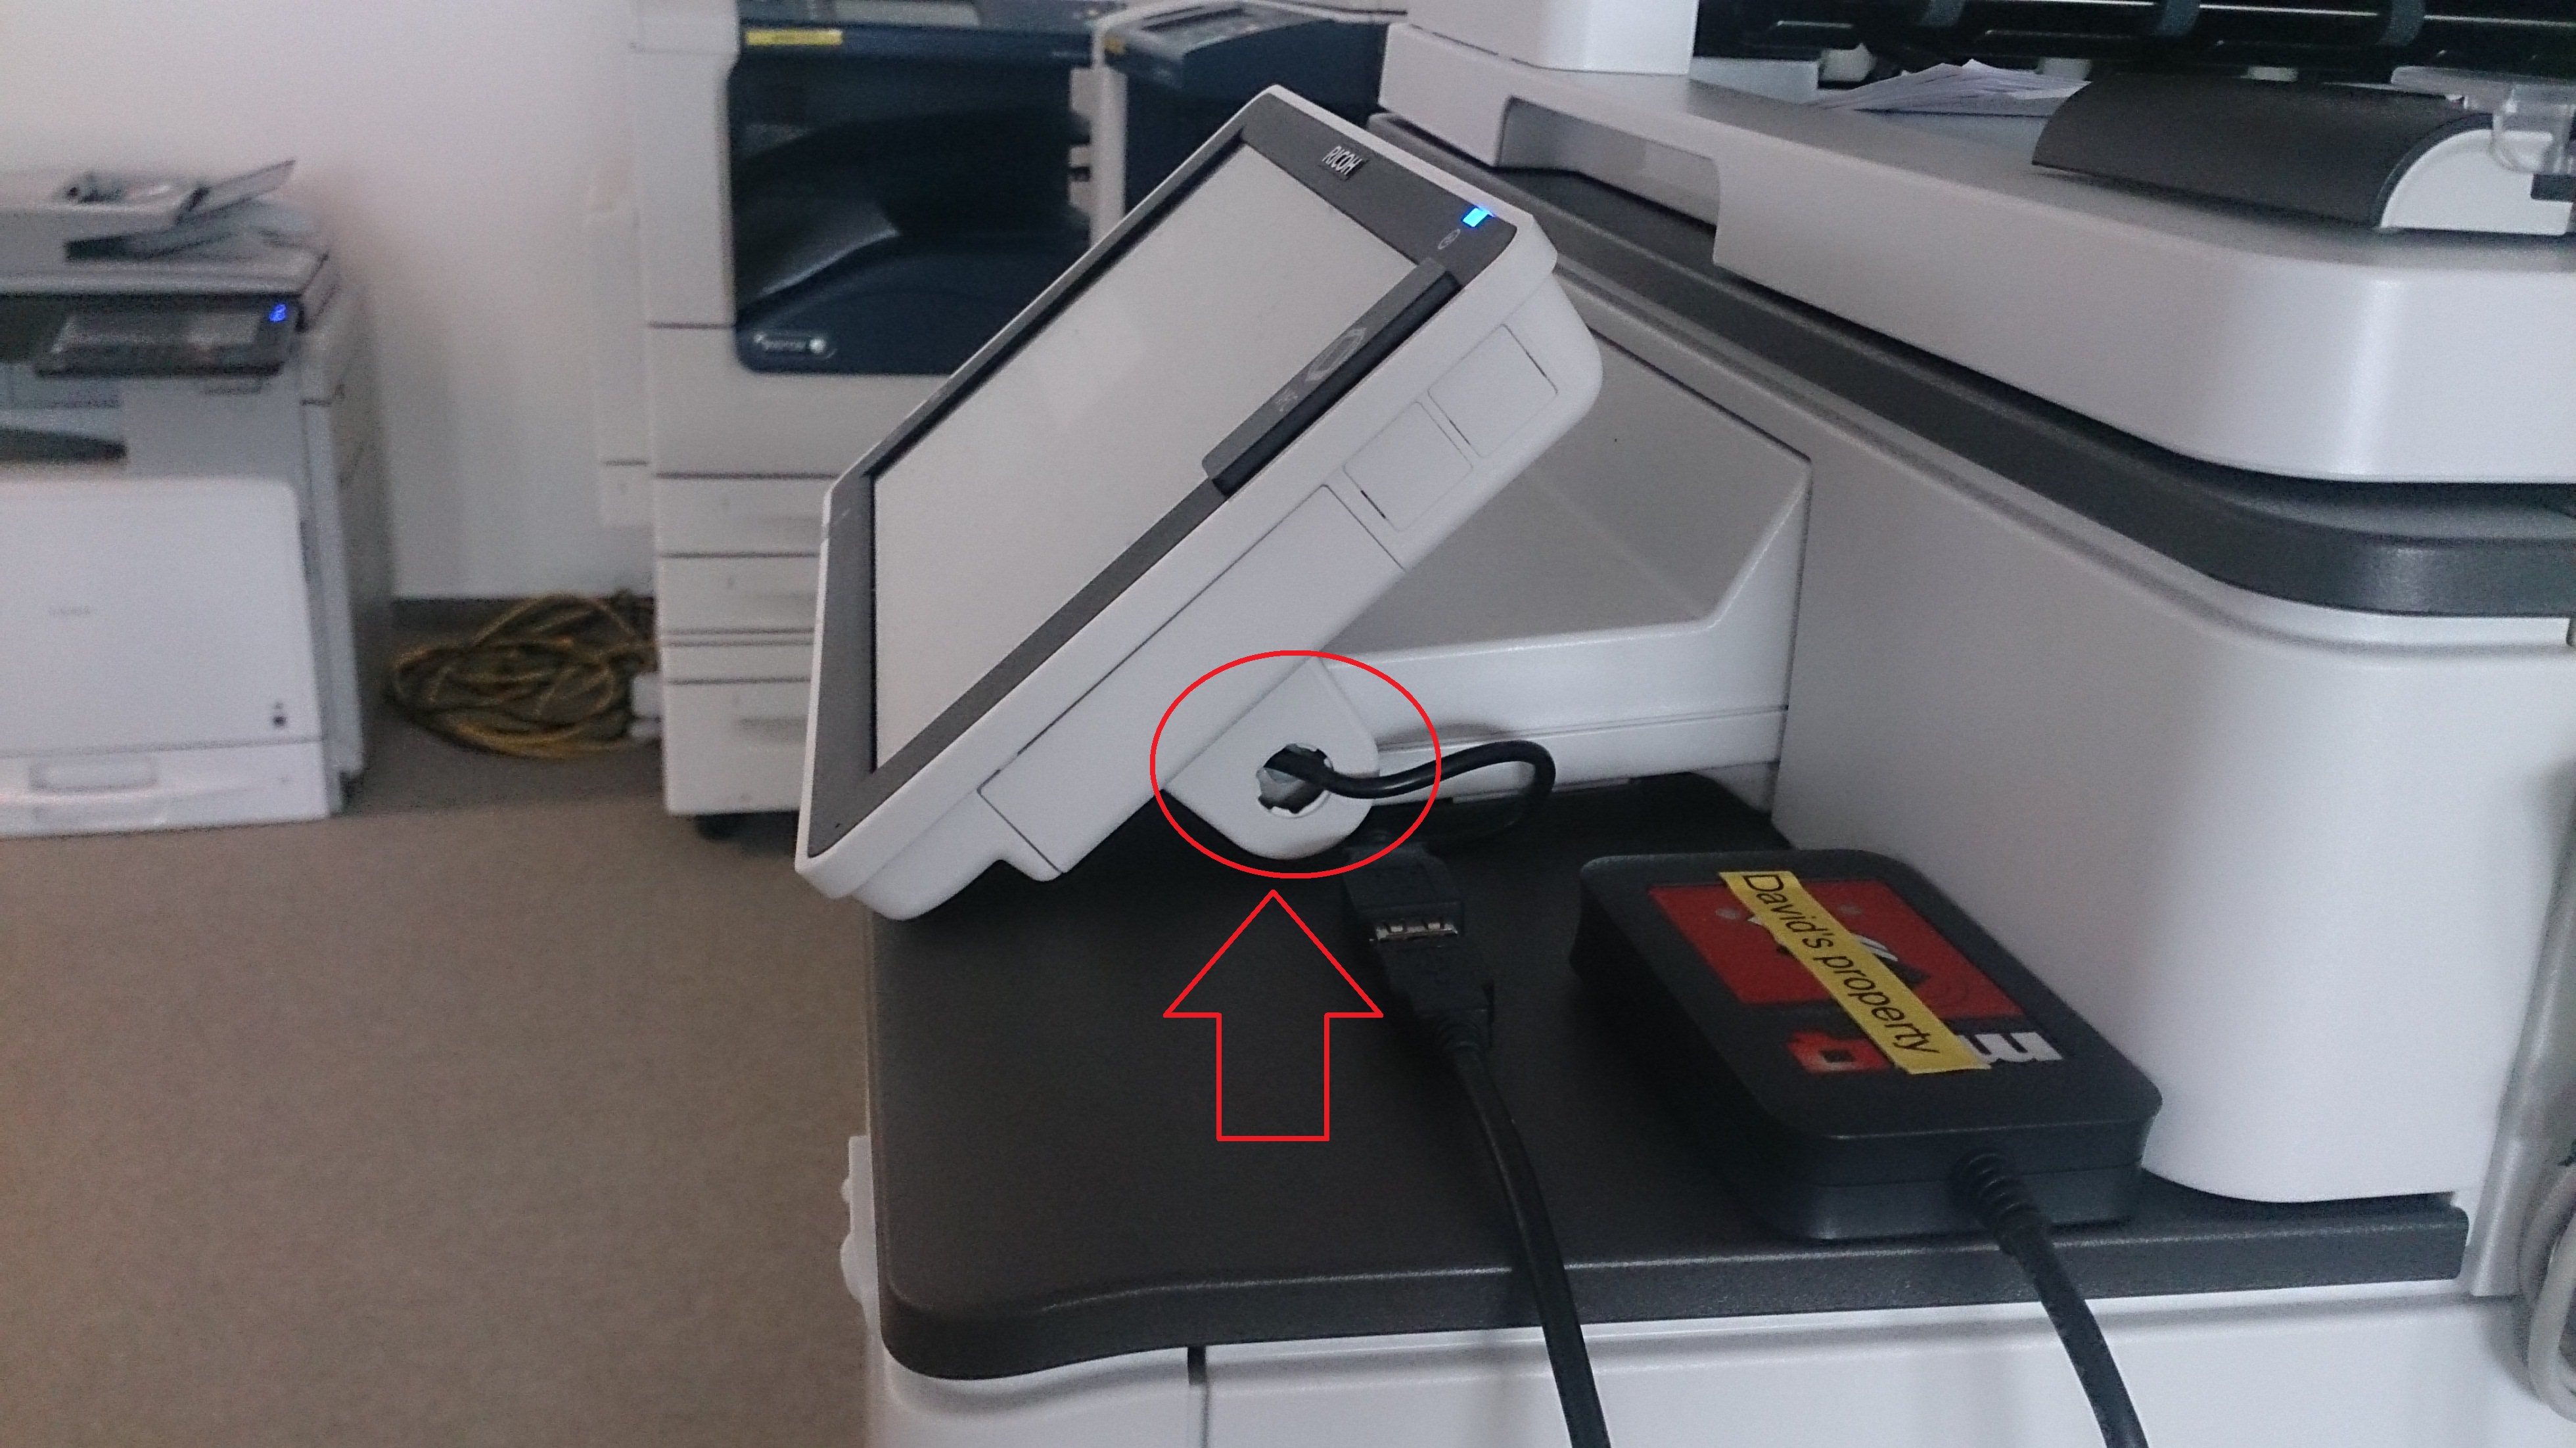
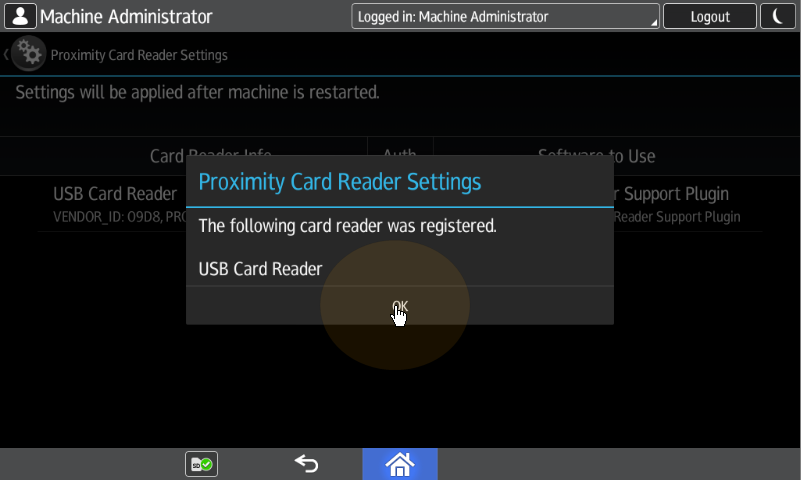
Plug in the card Reader to the Android panel via Mini USB — USB (female) reduction. The Proximity Card Reader Settings message box informs you that a USB card reader was registered.
Tap OK to close the Proximity Card Reader Settings message box.
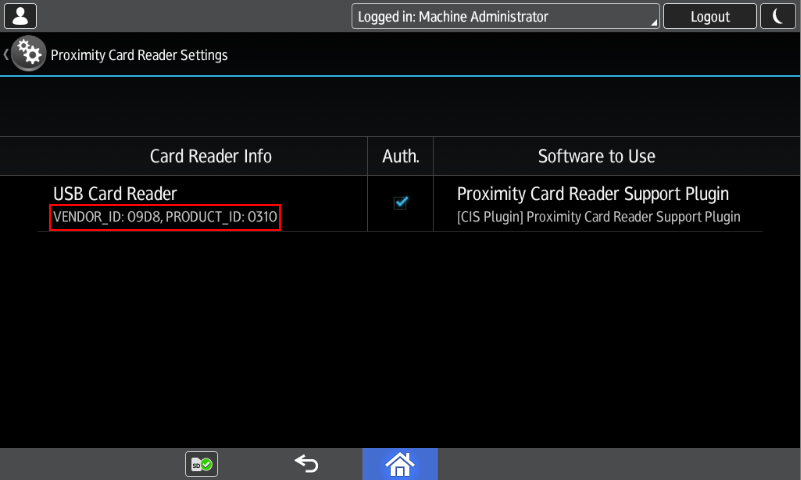
Back on the Proximity Card Reader Settings screen, remember (write down) the VENDOR_ ID number and the PRODUCT_ ID number displayed under Card Reader Info. These numbers have to be added to the printing device USB device list.
Exit the system settings.
For some newer devices, the system menu is different. Here are the steps in the updated system menu.
On the initial screen of the MyQ Embedded application, tap the MyQ logo to open the admin login screen.

On the admin login screen, enter the admin password (the default password is 1087), and then tap OK. The Admin menu opens.

Tap Admin Login for opening the device’s panel screen.

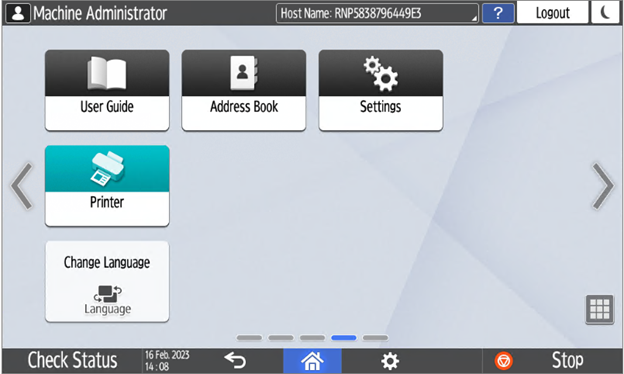
On the device panel, open Settings.
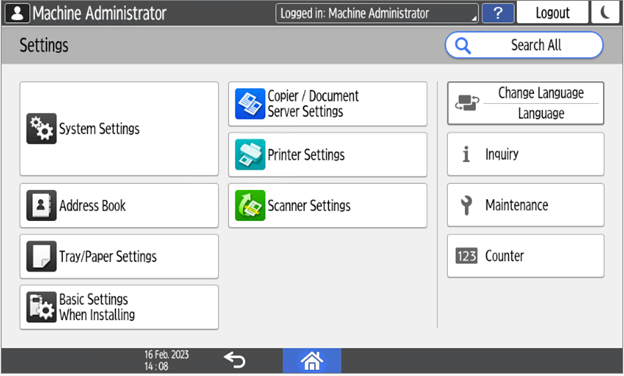
Tap System settings.
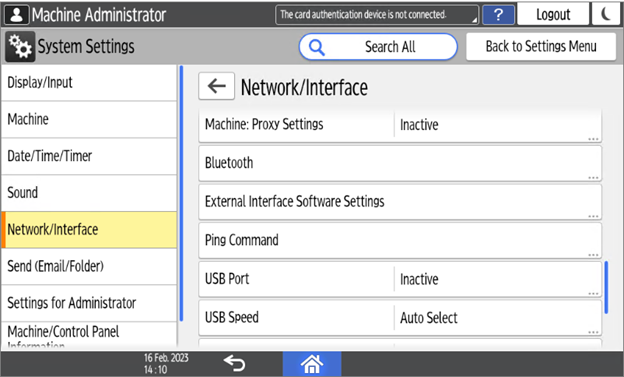
Open Network/Interface and then tap External Interface Software Settings.
In the Select IC Card Reader field, tap on Do not use.
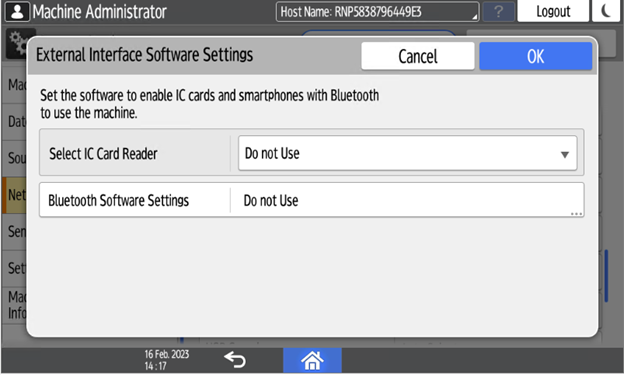
And then select Proximity Card Reader.
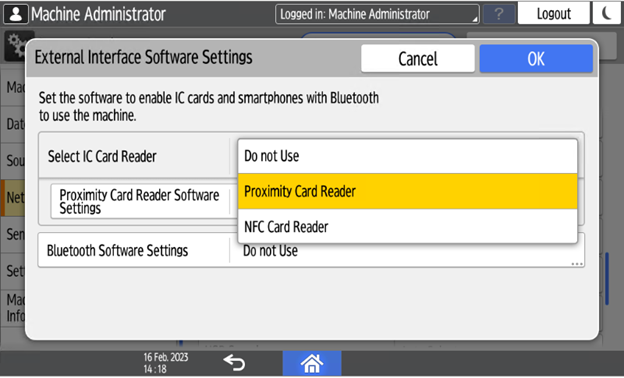
Select Not Set for Proximity Card Reader Software Settings.
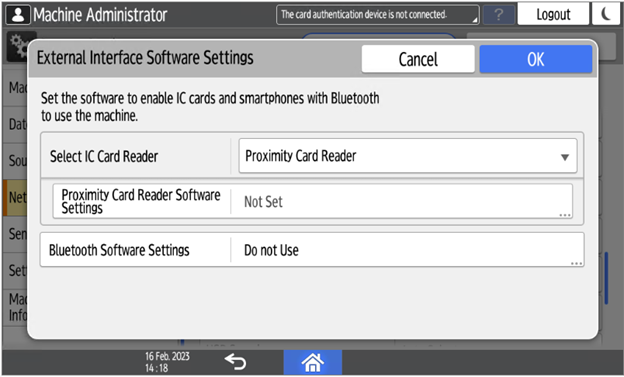
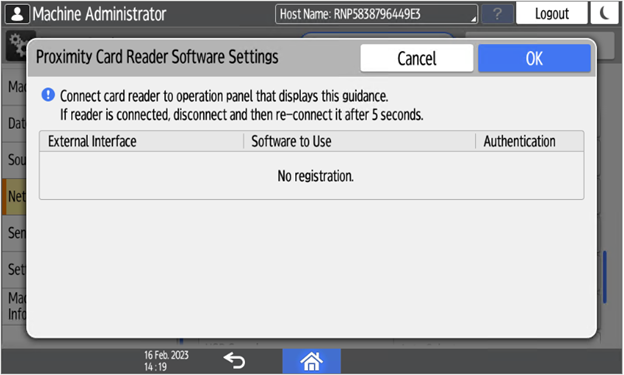
Connect the card reader when this screen is displayed:
Confirm the settings.
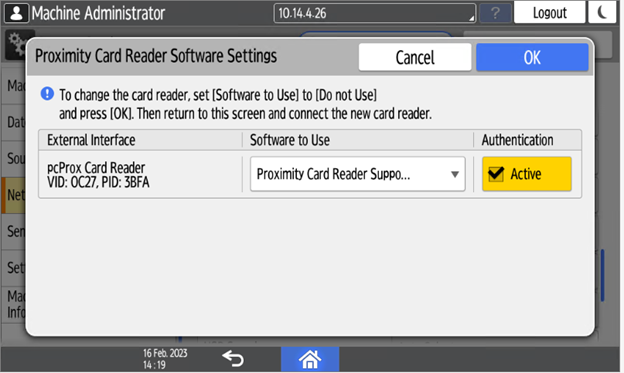
Restart the device.
.png)