.png)
Scan to SharePoint Online
The feature has to be enabled in three steps:
First you have to register the MyQ app in SharePoint.
Then you have to create and set the SharePoint Online destination.
Lastly, users have to connect their MyQ accounts to SharePoint.
Enabling access to SharePoint
To set up the access, you have to register the MyQ app in SharePoint and enter the SharePoint Application ID and Secret on the External Systems settings tab in the MyQ web administrator interface.
Register the MyQ app in SharePoint
In a browser, enter one of the the following URLs (you need to have admin rights on the specific level -for the SharePoint root site or for the specific site- to be able to access the settings):
For the root SharePoint site:
<https://<site_name>.sharepoint.com/_layouts/15/appregnew.aspx>
(e.g. https://mycompany.sharepoint.com/_layouts/15/appregnew.aspx)For a specific SharePoint site (site collection):
<https://<site_name>.sharepoint.com/sites/<specific_site_name>/_layouts/15/appregnew.aspx>
(e.g. https://mycompany.sharepoint.com/sites/SCANNING/_layouts/15/appregnew.aspx)
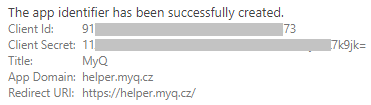
Fill in or generate the fields, and then click Create. You are informed that the app identifier has been successfully created.
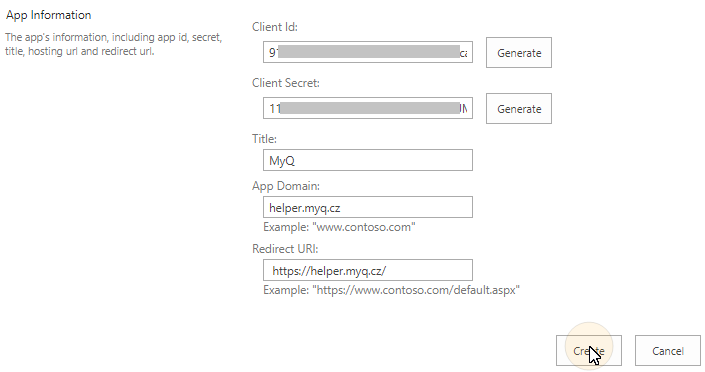
Client Id: You can generate it or use your own. Copy its value; it will be used later in the registration process.
Client Secret: You can generate it or use your own. Copy its value; it will be used later in the registration process.
Title: "MyQ"
App Domain: "helper.myq.cz"
Redirect URI: "https://helper.myq.cz/"
In the browser, enter one of the the following URLs:
For the root SharePoint site:
<https://<site_name>.sharepoint.com/_layouts/15/appinv.aspx>
(e.g. https://mycompany.sharepoint.com/_layouts/15/appinv.aspx)For a specific SharePoint site (site collection):
<https://<site_name>.sharepoint.com/sites/<specific_site_name>/_layouts/15/appinv.aspx
(e.g. https://mycompany.sharepoint.com/sites/SCANNING/_layouts/15/appinv.aspx)
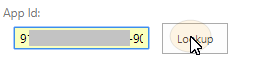
Fill in the App ID (the Client Id from step 2), and then click Lookup. This should fill all fields except for Permission Request XML.
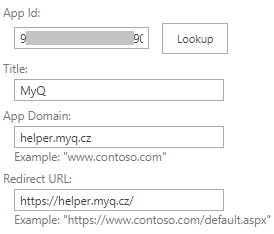
Copy the below string, paste it to the Permission Request XML field, and then click Create. You are asked if you trust the MyQ application.
<AppPermissionRequests AllowAppOnlyPolicy="true">
<AppPermissionRequest Scope="http://sharepoint/content/sitecollection/web"
Right="Write" />
</AppPermissionRequests>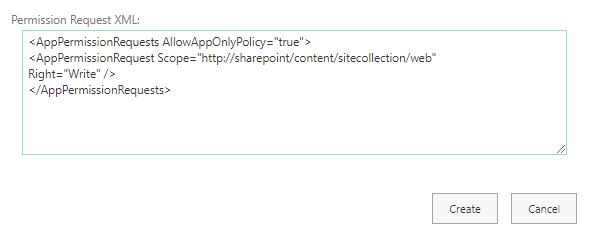
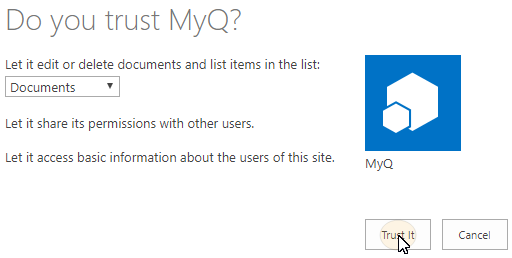
Make sure that the Documents option is selected under Let it edit or delete documents and list items in the list (it should be selected by default), and then click Trust It. Now you can leave the SharePoint settings and open the MyQ Web Interface to finish the setup.
Open the External Systems settings tab of the MyQ web administrator interface (MyQ, Settings, External Systems).
On the tab, under SharePoint Online, enter the Client ID and the Security key, and then click Save.
If MyQ is upgraded to version 10.1+, the SharePoint connector will have to be set up again.
Enabling access to SharePoint for MyQ Server 10.1+
To set up the access, you have to create a new Azure AD app registration to be used by MyQ, and enter the Azure AD Application ID and Secret on the Connections settings tab in the MyQ Web administrator interface.
In Azure AD, you need to create and set a new Azure Active Directory App registration to be used by MyQ. After the registration is created, you set permissions and create a secret key. You need the Tenant ID, the Application ID and the secret key value to create a Connection for SharePoint on the MyQ Web Interface. The secret key value populates the Security key field.
Go to https://portal.azure.com/ and log in with your global admin user account.
In the Azure dashboard, in the left navigation pane, click Azure Active Directory and on the left menu, click App registrations.
To create a new application, click New registration. The Register an application page appears.
In the Name box, type a name for the application.
Choose Supported account types.
In the Redirect URI box, choose Web and https://helper.myq.cz/.
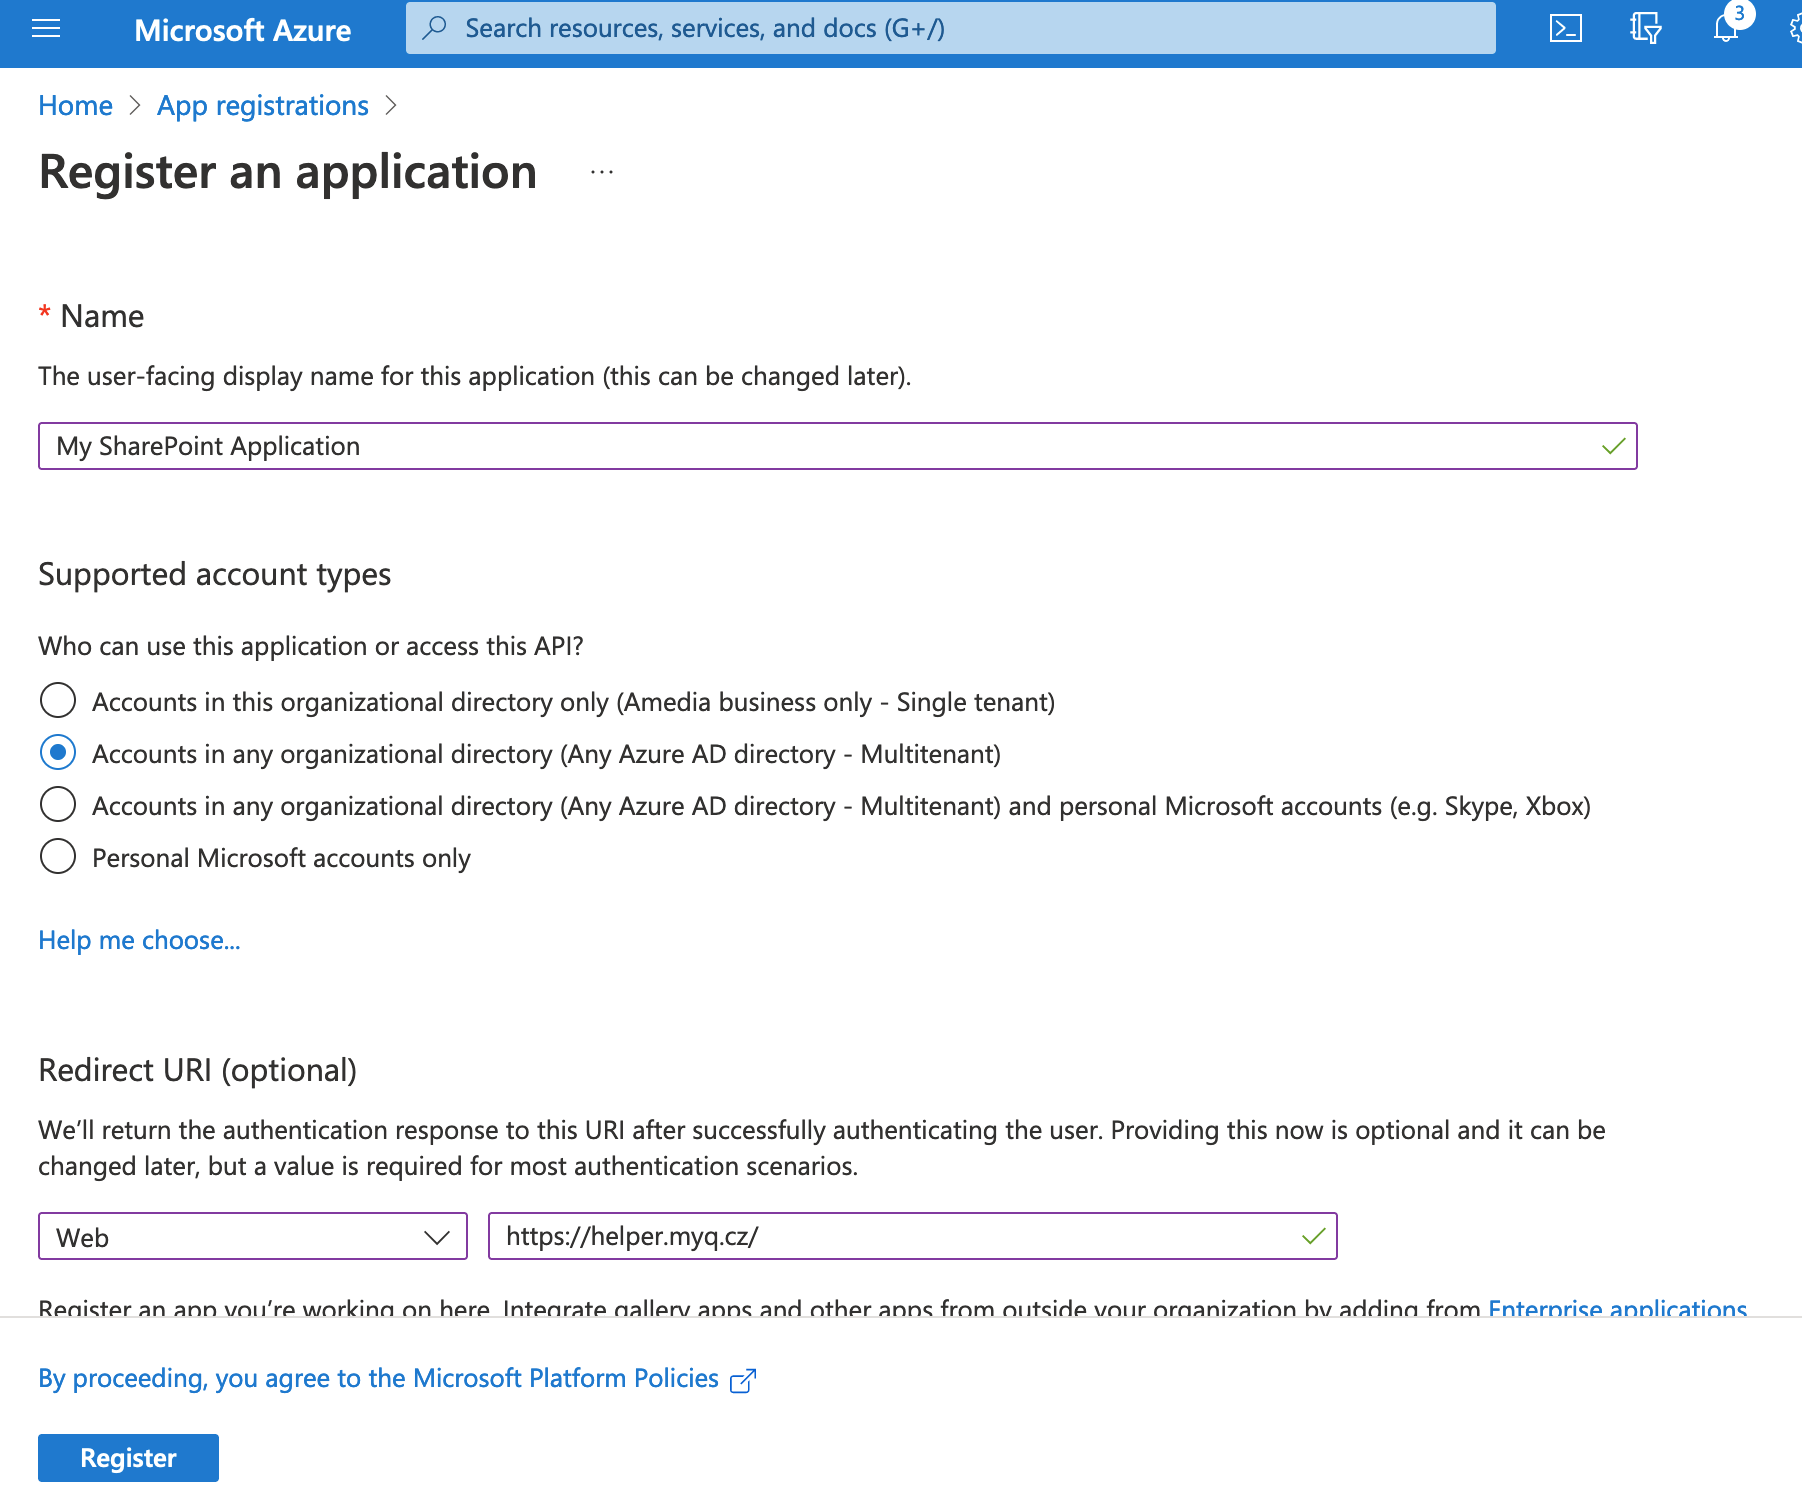
Click Register.
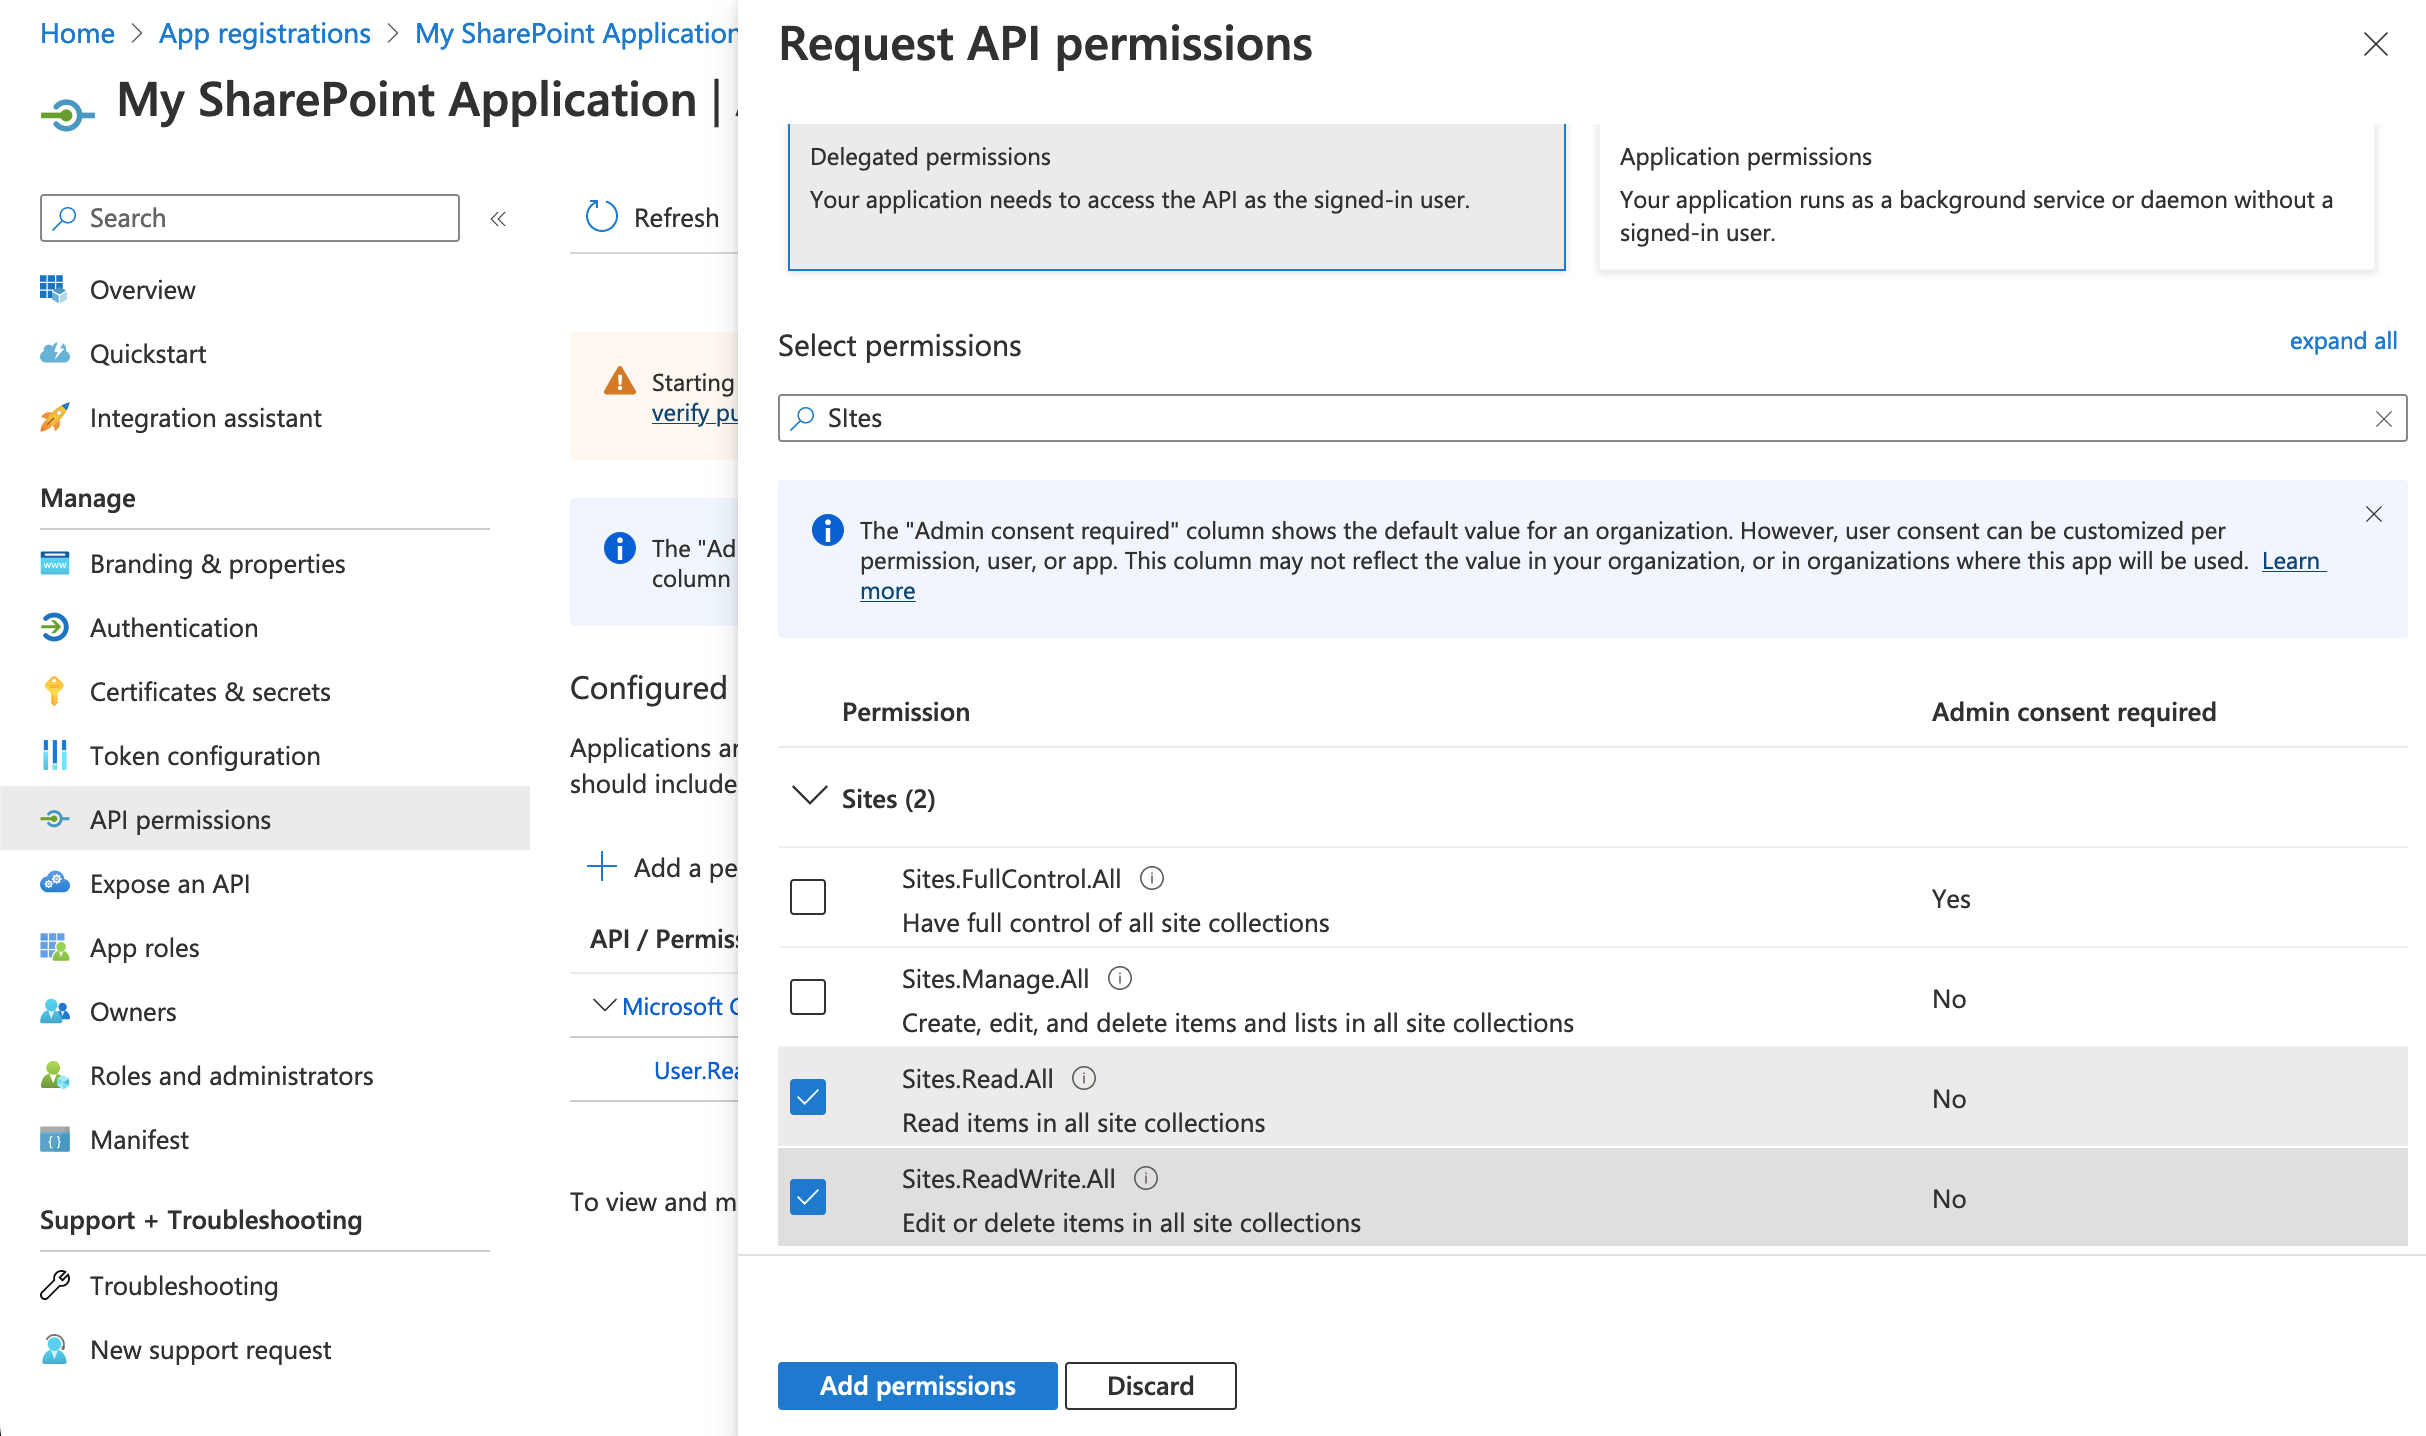
On the preview screen, click View API permissions. Click Add a permission. The Request API permissions pane appears. User.Read permissions are added by default. Add Delegated permissions to Files.ReadWrite for the Microsoft Graph.
Back on the preview screen, click Overview, and then copy and save the Application ID, because you need it in the next steps.
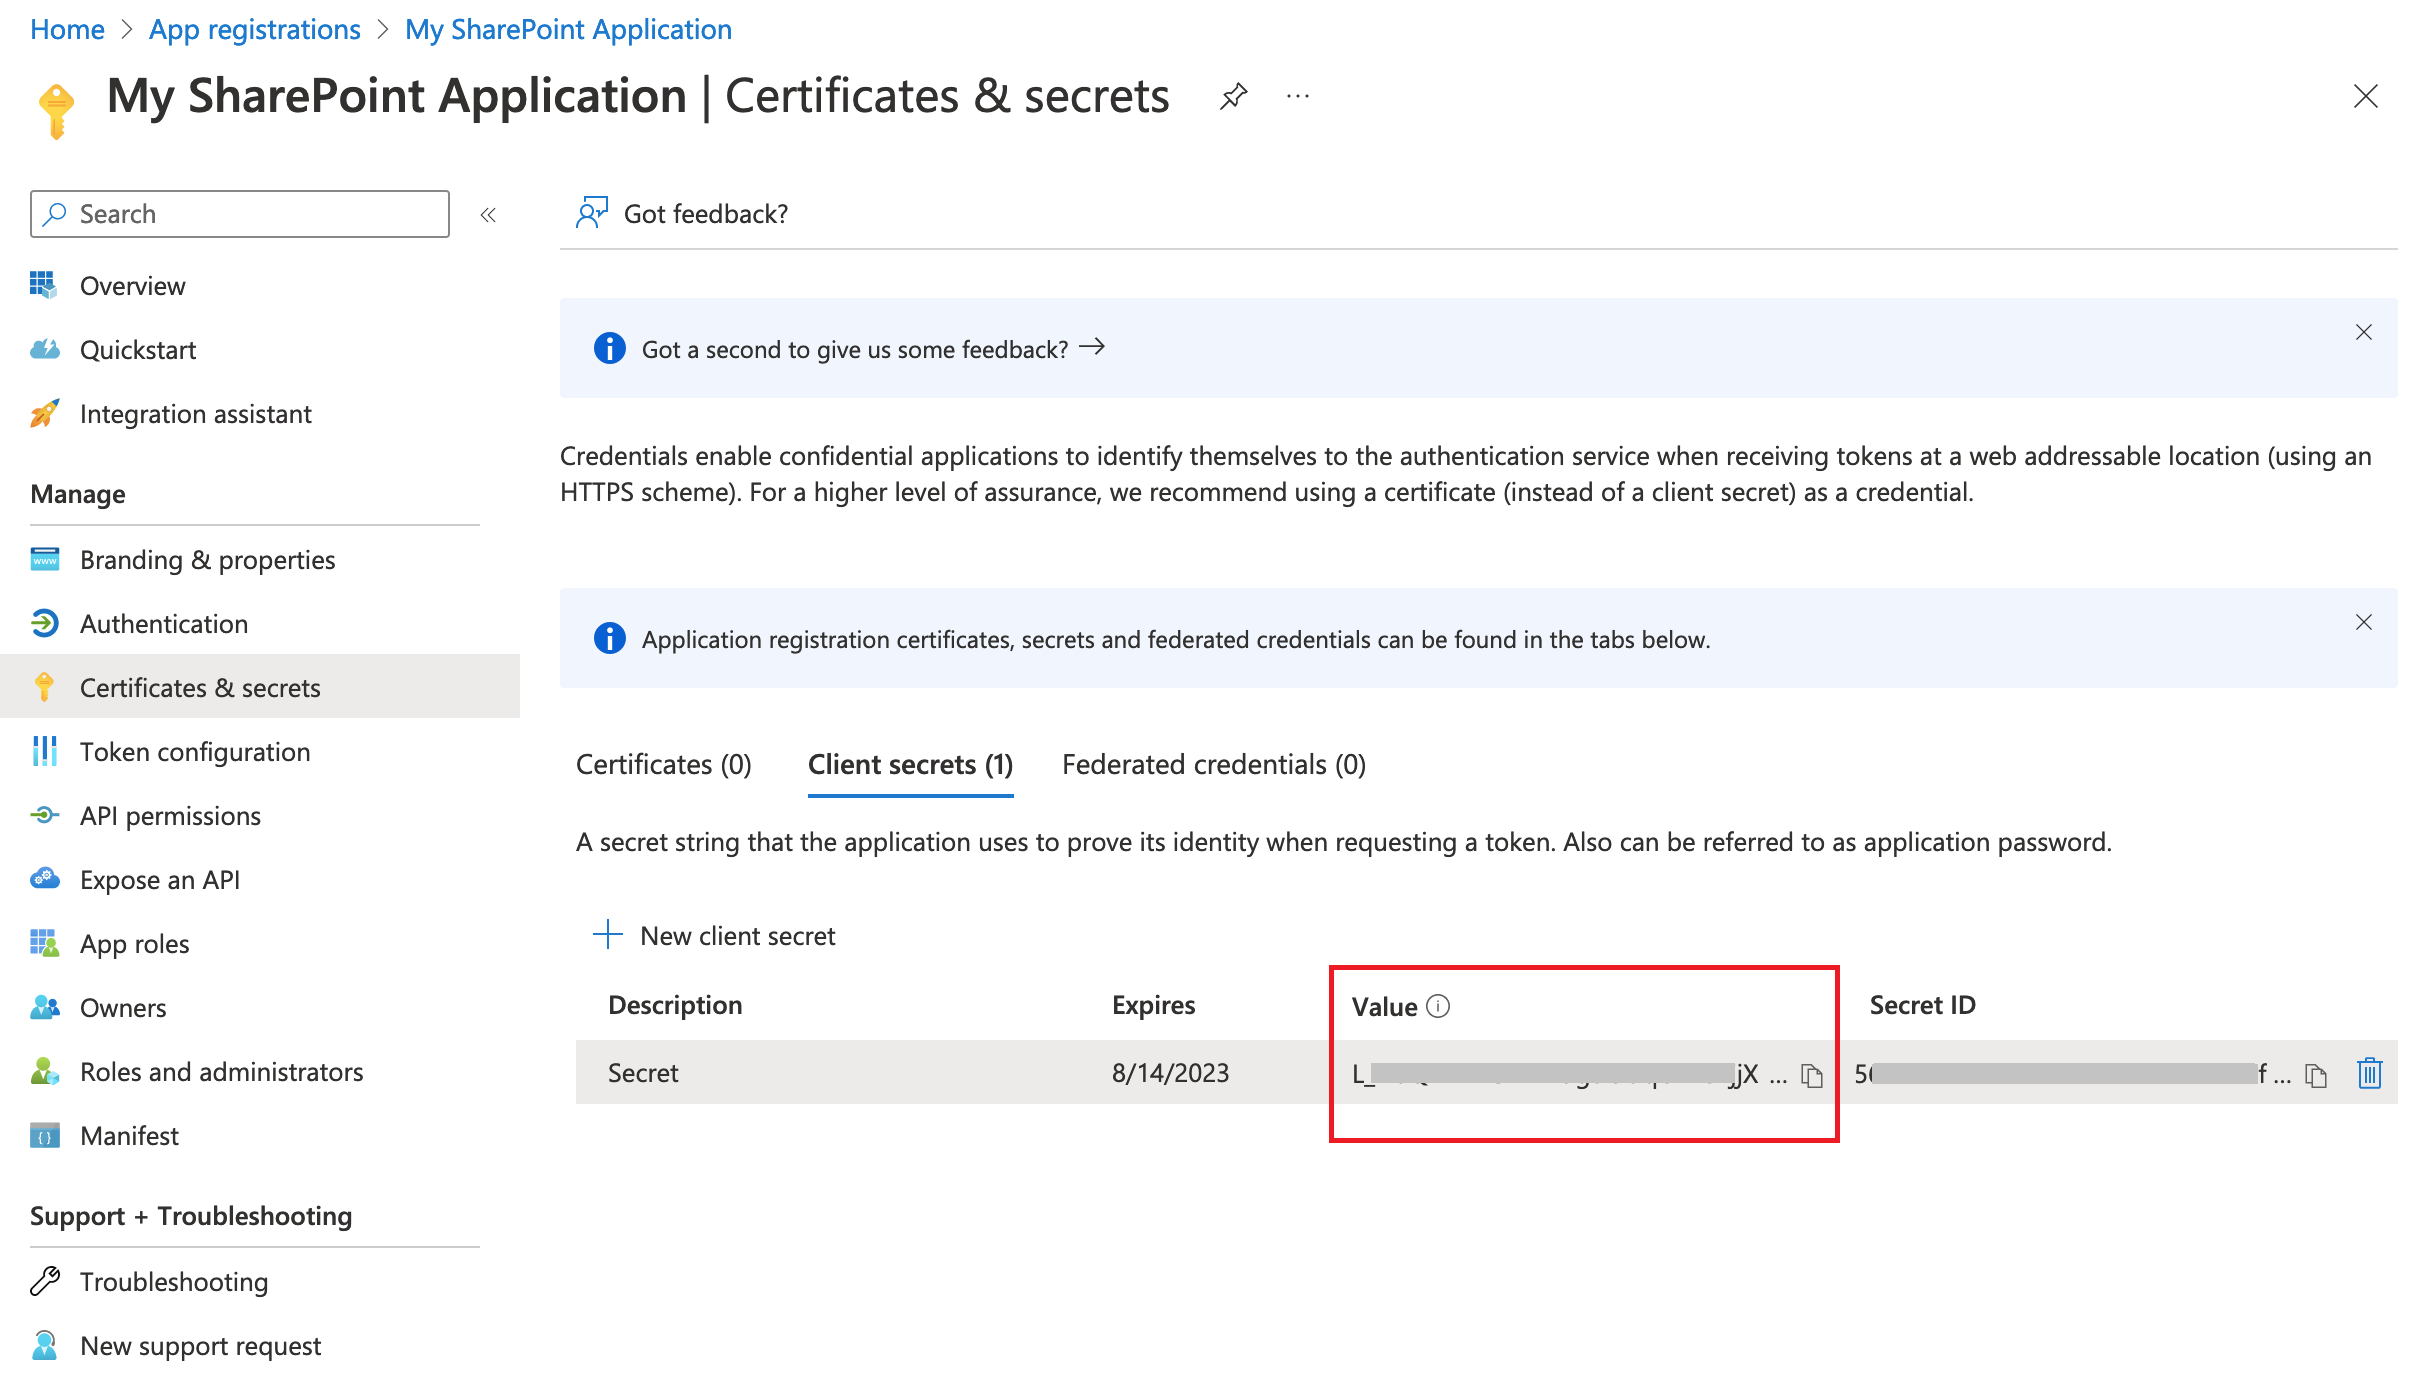
On the preview screen, click Certificates and secrets, and then click New client secret. Add a Description, set the expiry for the key to Never, and click Add.
Save the client secret key Value, because you need it in the following steps and you cannot retrieve it later.
Open the Connections settings tab on the MyQ Web Interface (MyQ, Settings, Connections).
Click +Add and select SharePoint Online from the menu.
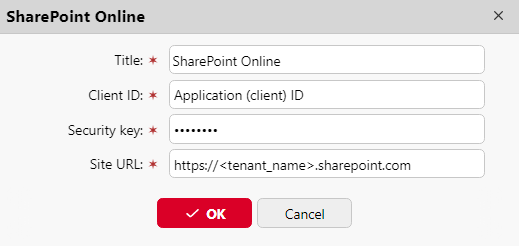
Add a Title. This will be used to identify the Cloud Storage Destination.
Add the Application ID and the client secret key value as Security key that you previously copied and saved.
Add the Site URL: https://<tenant_name>.sharepoint.com (to access the root SharePoint site) or https://<tenant_name>.sharepoint.com/sites/<site_name> (to access a specific site from the tenant’s collection) and click OK.
Create and set the SharePoint Online destination
Create a new destination (edit or create an Easy Scan terminal action; on its properties panel, in the Destinations tab, click +Add).
On the new destination's properties panel, under General, select the Cloud Storage option in the Type drop-down.
In the Parameters section, in the Type drop-down, select SharePoint Online, and click Save.
Connect a user’s MyQ account to SharePoint Online
If the following two conditions are met, the cloud storage widget is displayed on the Home screen of the user logged on the MyQ Web Interface:
There is at least one Easy Scan terminal action with this destination.
The user has rights to see the Easy Scan button or is connected to cloud drive.

To be able to store the outgoing scan file on SharePoint Online, the user has to be connected.
To connect to SharePoint Online, the user has to perform the following actions:
Log in to the MyQ Web User Interface with your user account.
On the Cloud storage widget, click Connect. The Cloud storage dialog box appears.
Click Login to the cloud storage.
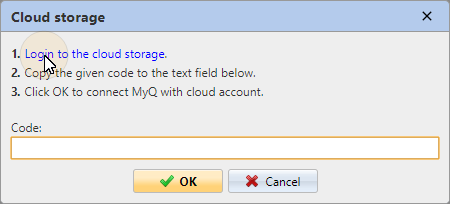
Sign-in to SharePoint Online and confirm permissions (when asked about the permissions, click Yes).
Copy the given code.
Paste the code to the MyQ Cloud storage login dialog.
Click OK to connect the cloud storage to MyQ. The SharePoint Online connection status changes to Connected.