.png)
Network Settings
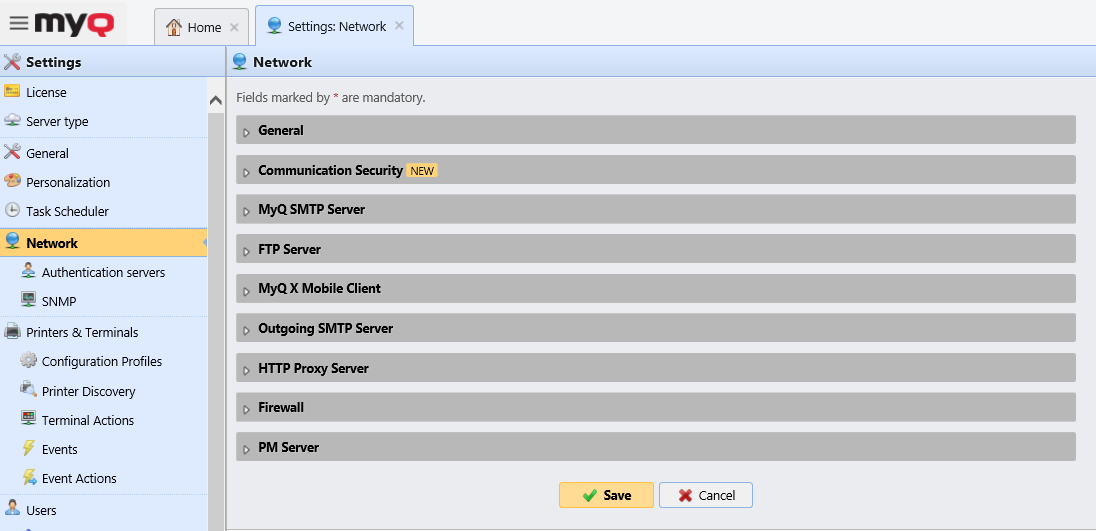
On the Network settings tab, you can manage the network communication between the MyQ server and other parts of the MyQ solution. It is divided into the following sections: General, Communication Security, MyQ SMTP Server, FTP Server, MyQ X Mobile Client, Outgoing SMTP Server, HTTP Proxy Server, Firewall, and PM Server.
General
In this section, you can enter the hostname of the MyQ Print server. This hostname is used by external components of the MyQ system, such as embedded terminals or MyQ Desktop Client, for communication with the MyQ server.

During remote setup, the server hostname should be a valid hostname or IP-address. A licenses update might change the hostname to myq.local. Then the remote setup will fail and result in an error message.
Communication Security
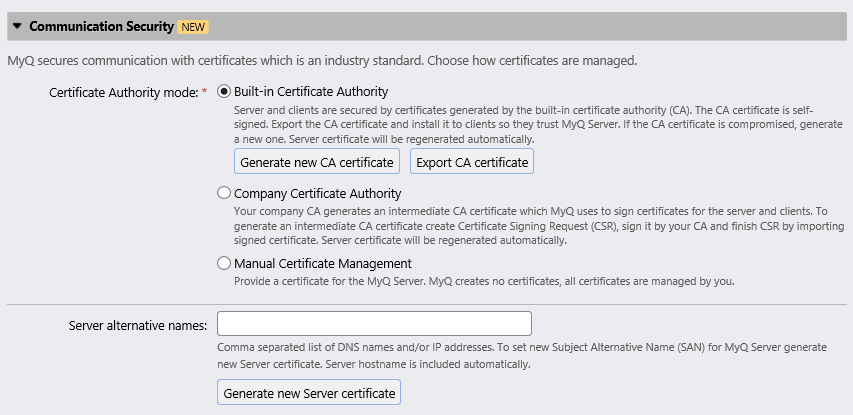
In this section, you can choose how your security certificates are managed.
MyQ offers three different certificate management modes:
Built-in Certificate Authority - This is the default mode for new installations. MyQ creates a self-signed CA certificate and uses it to sign server and client certificates. The public key of the CA certificate can be exported (click the Export button) to install it to clients, so they trust MyQ server. It is possible to specify the Subject Alternative Name (SAN), which is set as a comma separated list of domain names and/or IP addresses. In case the certificate is compromised, click the Generate new button, to generate a new one.
Company Certificate Authority - Your company CA generates an intermediate CA certificate which MyQ uses to sign certificates for the server and clients. To generate an intermediate CA certificate click Create CSR to create a Certificate Signing Request (CSR), sign it by your CA and click Finish CSR to finish CSR by importing signed certificate. If the intermediate CA certificate does not contain a CA root certificate in its chain, the administrator is prompted to upload the public key of the CA root certificate as well (the Import CA root certificate button appears).
Manual Certificate Management - Provide a certificate for the MyQ Server. MyQ creates no certificates; all certificates are managed by you. Click Import Server certificate to upload it. The certificate can be uploaded in PEM (public + private key separately) or in PFX format. The PFX format may be password encrypted. This mode is recommended only for expert users.
When upgrading an existing MyQ installation, the Certificate Authority mode is selected according to the existing server certificate:
if the certificate is not CA, then the mode is set to Manual Certificate Management.
if it was generated by MyQ before, then the mode is set to Built-in Certificate Authority.
in other cases, the mode is set to Company Certificate Authority.
MyQ SMTP Server
In this section you can view and modify the SMTP server settings.
SMTP (STARTTLS) - Enable when using unsecure communication or secure communication over STARTTLS. Port 25 by default.
SMTPS(SSL/TLS) - Enable when using secure communication over SSL/TLS. Port 587 by default.
If scanning to MyQ is enabled, set the port shown here in the device's SMTP settings.
FTP Server
In this section, you can set the FTP server port that terminals use when sending scan jobs to MyQ over the FTP protocol. The FTP port is 21 by default, and the range is 0 to 65535. If you click the Generate new password button, there is a confirmation pop-up informing that if a new password is generated, all the terminals need to be reconfigured.
MyQ X Mobile Client
In this section, you can set the server hostname or IP address and the communication port for using the MyQ mobile application. They may differ from the general settings because mobile devices connect via Wi-Fi.
Outgoing SMTP server
To send email reports, send error messages to users, send automatically generated PIN to users, and forward scanned documents, you have to configure the email server where all the emails are forwarded to.
To configure the server, do the following:
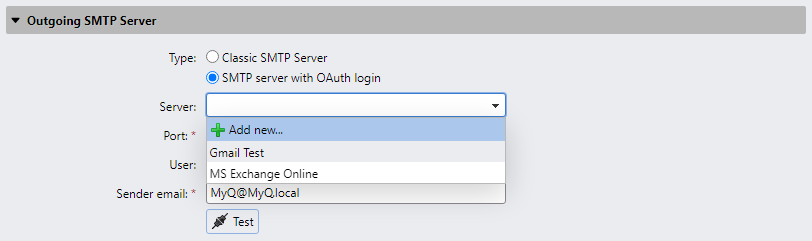
Select a Type from Classic SMTP Server or SMTP Server with OAuth login.
For Classic SMTP Server:
Enter the server hostname or IP address in the Server text box. If the email server listens to other than the 25 TCP port, change the Port setting to the correct value.
Choose between the None, SSL and STARTTLS Security options.
Optionally choose to Validate certificate or not.
If credentials are required, enter the User and Password.
Enter the address that you want to be displayed as the Sender email on PIN, alert and report messages.
After you enter the data, you can click Test to test the connection to the email server, and click Save to save your changes.
For SMTP Server with OAuth login:
If you have already set up a Microsoft Exchange Online server or a Gmail with OAuth2 server in the External Systems settings, those servers are available in the Server field drop-down. If not, you can click on the Server field and then click Add to add your Microsoft Exchange Online or Gmail server. For more information, check Microsoft Exchange Online Setup and Gmail with OAuth2 setup.
If the email server listens to other than the 25 TCP port, change the Port setting to the correct value.
Security is STARTTLS by default and cannot be changed.
If credentials are required, enter the User.
Enter the address that you want to be displayed as the Sender email on PIN, alert and report messages.
After you enter the data, you can click Test to test the connection to the email server, and click Save to save your changes.
HTTP Proxy Server
In this section, you can set up a MyQ Proxy server which can be used for activating a license. Mandatory fields are Server (name) and Port. After changing ports, restart all MyQ services.
Firewall
In this section, you can automatically open all the ports on the Microsoft Windows Firewall that are necessary to run the MyQ application.