.png)
Setting up Universal Print in MyQ
Log in to the MyQ web administrator interface, and go to MyQ, Settings, Connections.
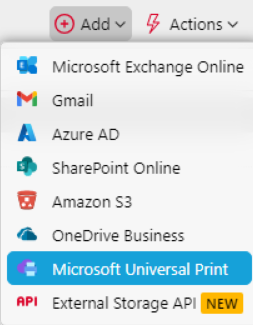
Click +Add and select Microsoft Universal Print from the list.
In the pop-up window, fill in the required fields:
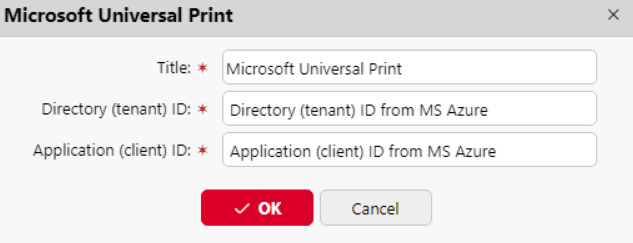
Title - add a name for your Microsoft Universal Print connection; for example, MS Universal Print.
Directory (tenant) ID - the Directory (tenant) ID you copied during the MS Azure setup.
Application (client) ID - the Application (client) ID you copied during the MS Azure setup.
Click OK.
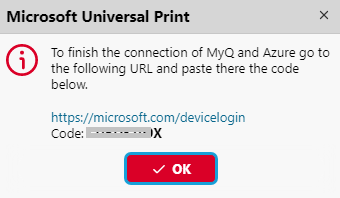
Copy the Code from the pop-up window, click on the URL, enter the code, and follow any other instructions. Once done, MyQ is connected to MS Azure Universal Print. (There is a 15-minute timeout for confirming the code. If it is not confirmed and a user tries to create a printer in Azure via MyQ, a message appears in the Issues column in the Queues section, that it is needed to confirm the code. If the time for confirming the code is up, then when a user is trying to create the printer, the device code request will be generated again and there will be a message with a new user code in the Issues column).
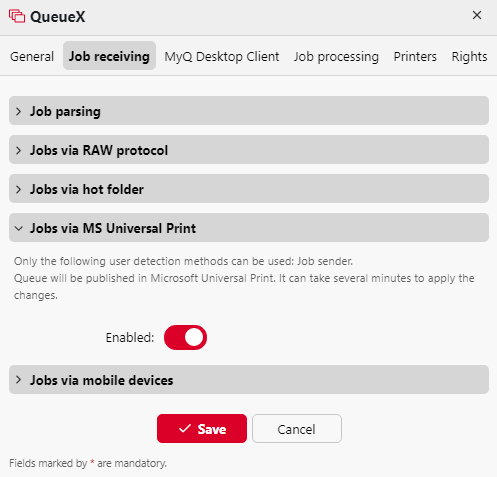
Go to MyQ, Queues and select the queue(s) you want to associate with Universal Print. Double-click on the queue (or right-click and edit, or select the queue, click Tools and edit), and on the queue properties, click on the Job receiving tab. In the Jobs via MS Universal Print section, set the option to Enabled, and click Save. After a few minutes, your queue will be available as a virtual printer in MS Azure Universal Print.