
To scan documents using OCR, create and configure Easy Scan actions that send scans to specific OCR profiles (or let users choose the output format).
Scanning to OCR with Easy Scan
To enable scanning to OCR, the MyQ administrator must first define a profile with the desired scan format in MyQ > Settings > Scanning & OCR.
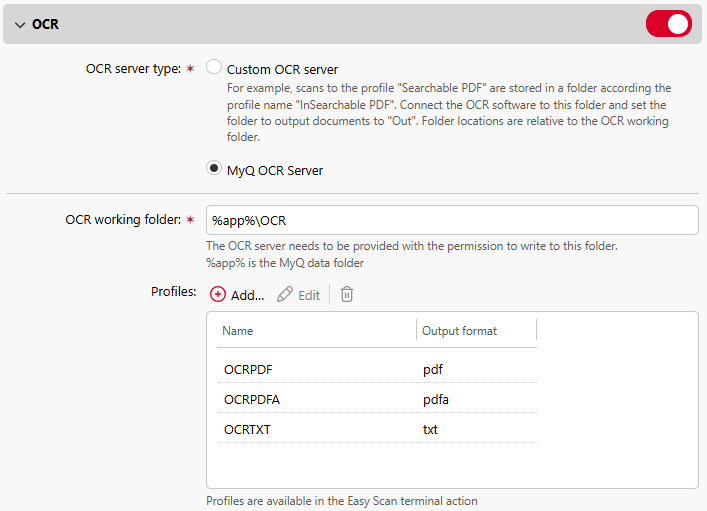
Then the administrator creates an Easy Scan terminal action for scanning to OCR. They can either create one Easy Scan action for each output or let the scanning user select the format themselves.
To always scan to a specific profile, select the profile as the Format parameter of the Easy Scan action and ensure Read Only is selected.
See also:
About OCR Processing
The OCR software listens to the document sub-folders of the \in folder (in\pdf, in\txt,...), processes the file that was sent there, saves the converted document to the \out folder and then deletes the source file from the \in folder.
MyQ listens to the \out folder, sends the converted file to the user and deletes it from the folder. The converted file is sent to the folder listed in the User's storage text box, in the user properties panel.
The file sent to the \out folder by the OCR software must have the same name as the source file in the \in*** folder. If the name of the converted file differs from the source file, it is deleted without being sent to the user.
Scan to OCR via Panel Scan (Deprecated)
Support for scanning to OCR via Panel Scan was removed in MyQ Print Server 10.2. Use Easy Scan instead.
To send the scanned document for processing by the OCR server, the user must type the receiver email address in the form: myqocr.*profilename*@myq.local, where *profilename* is the name of the profile (case sensitive) for the requested output.
The document is converted by the MyQ OCR Server and sent to the folder or email address that is set in the User's storage text box on the user’s properties panel in the MyQ web administrator interface.