Once the MyQ Chromebook Client extension has been added to Google Chrome, connected to a Print Server, and a user has signed in, printing is extremely simple. The Client allows you to use the native Google Chrome printing screen (accessed by right-clicking and selecting Print or pressing CTRL+P).
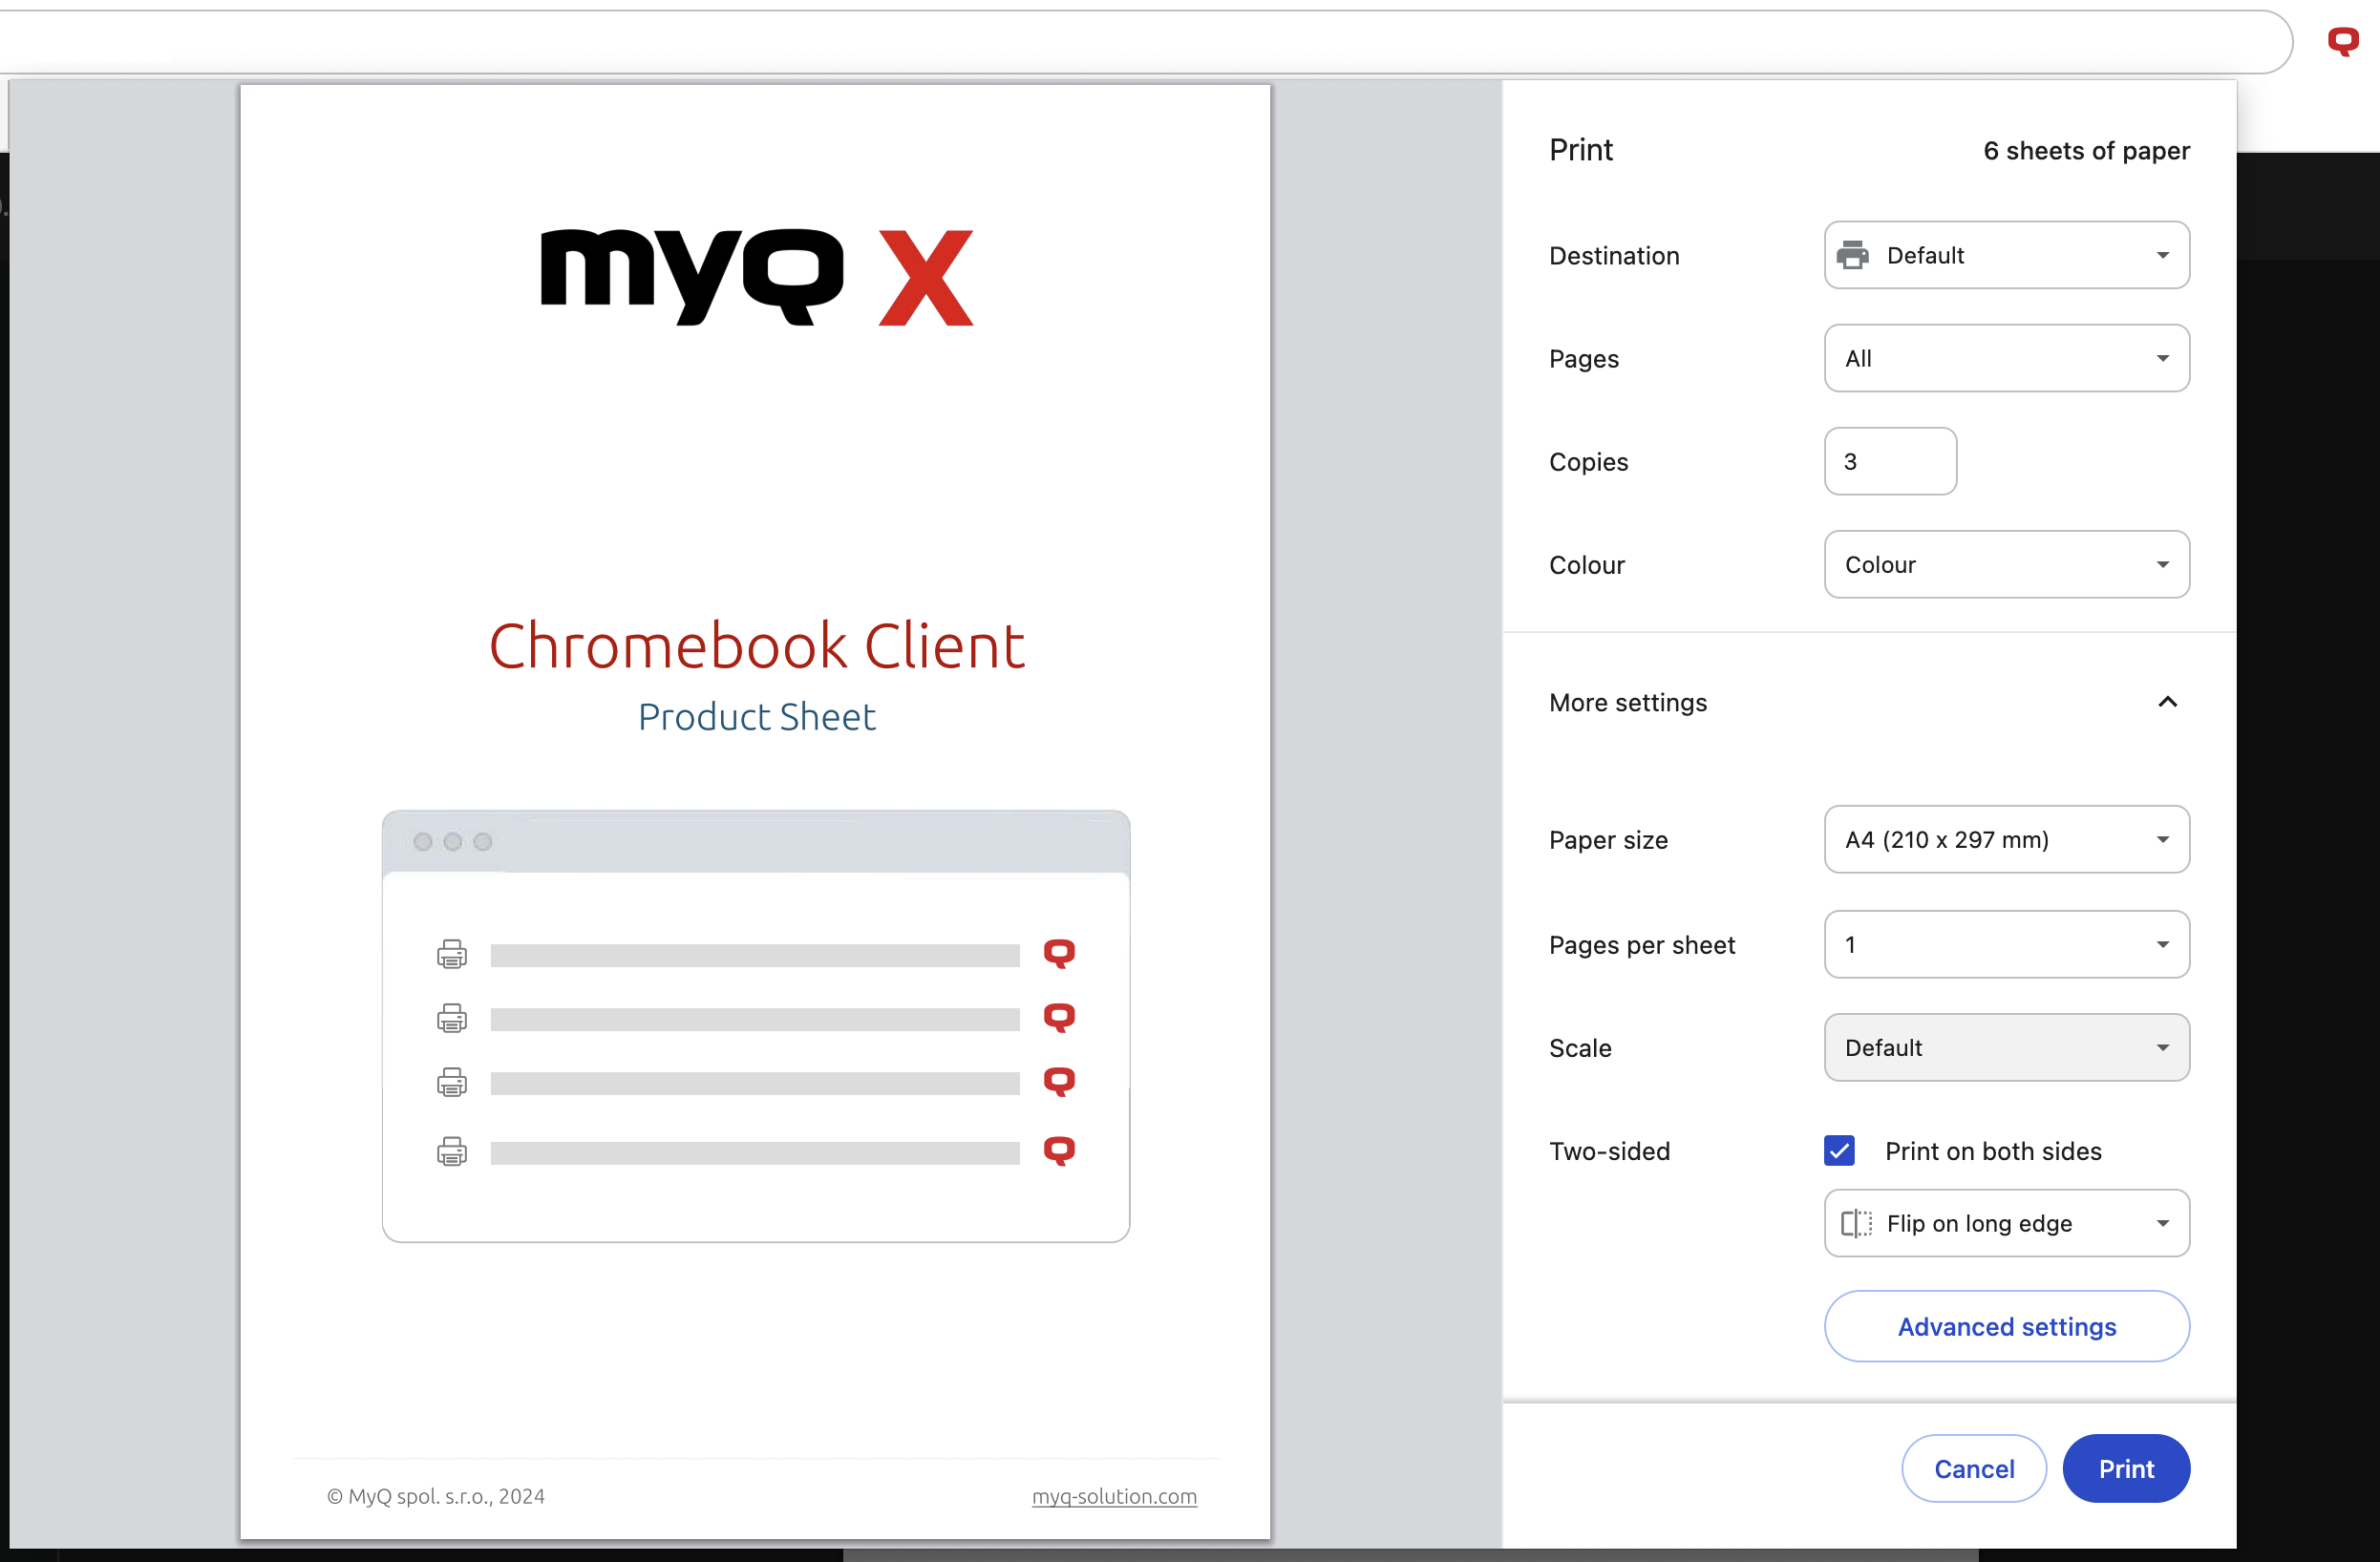
From this dialogue select Destination, See more…, and choose a MyQ queue to print your file. You can then alter the remaining printing settings:
-
Pages: select if you want to print all pages or only a selection.
-
Copies: select the number of copies to print.
-
Color: select color print or B&W.
-
Paper size: specify the paper size.
-
Pages per sheet: select the number of pages per sheet.
-
Scale: use the default scale or set adjustments.
-
Two-sided: choose to print on both sides, flipped on the short or long edge.
-
Advanced settings: contains Toner saving, Punching, and Stapling options.
Certain printing settings may be available in the Chrome printing interface but disabled on the queue you have selected. In these cases, the queue settings will override selections that have been made in Chrome.
Select Print, the job is sent to MyQ, accounted, and printed according to the process for the queue you have selected.