.png)
Manage Jobs
Tap Jobs to view the Jobs screen, which contains the following tabs:
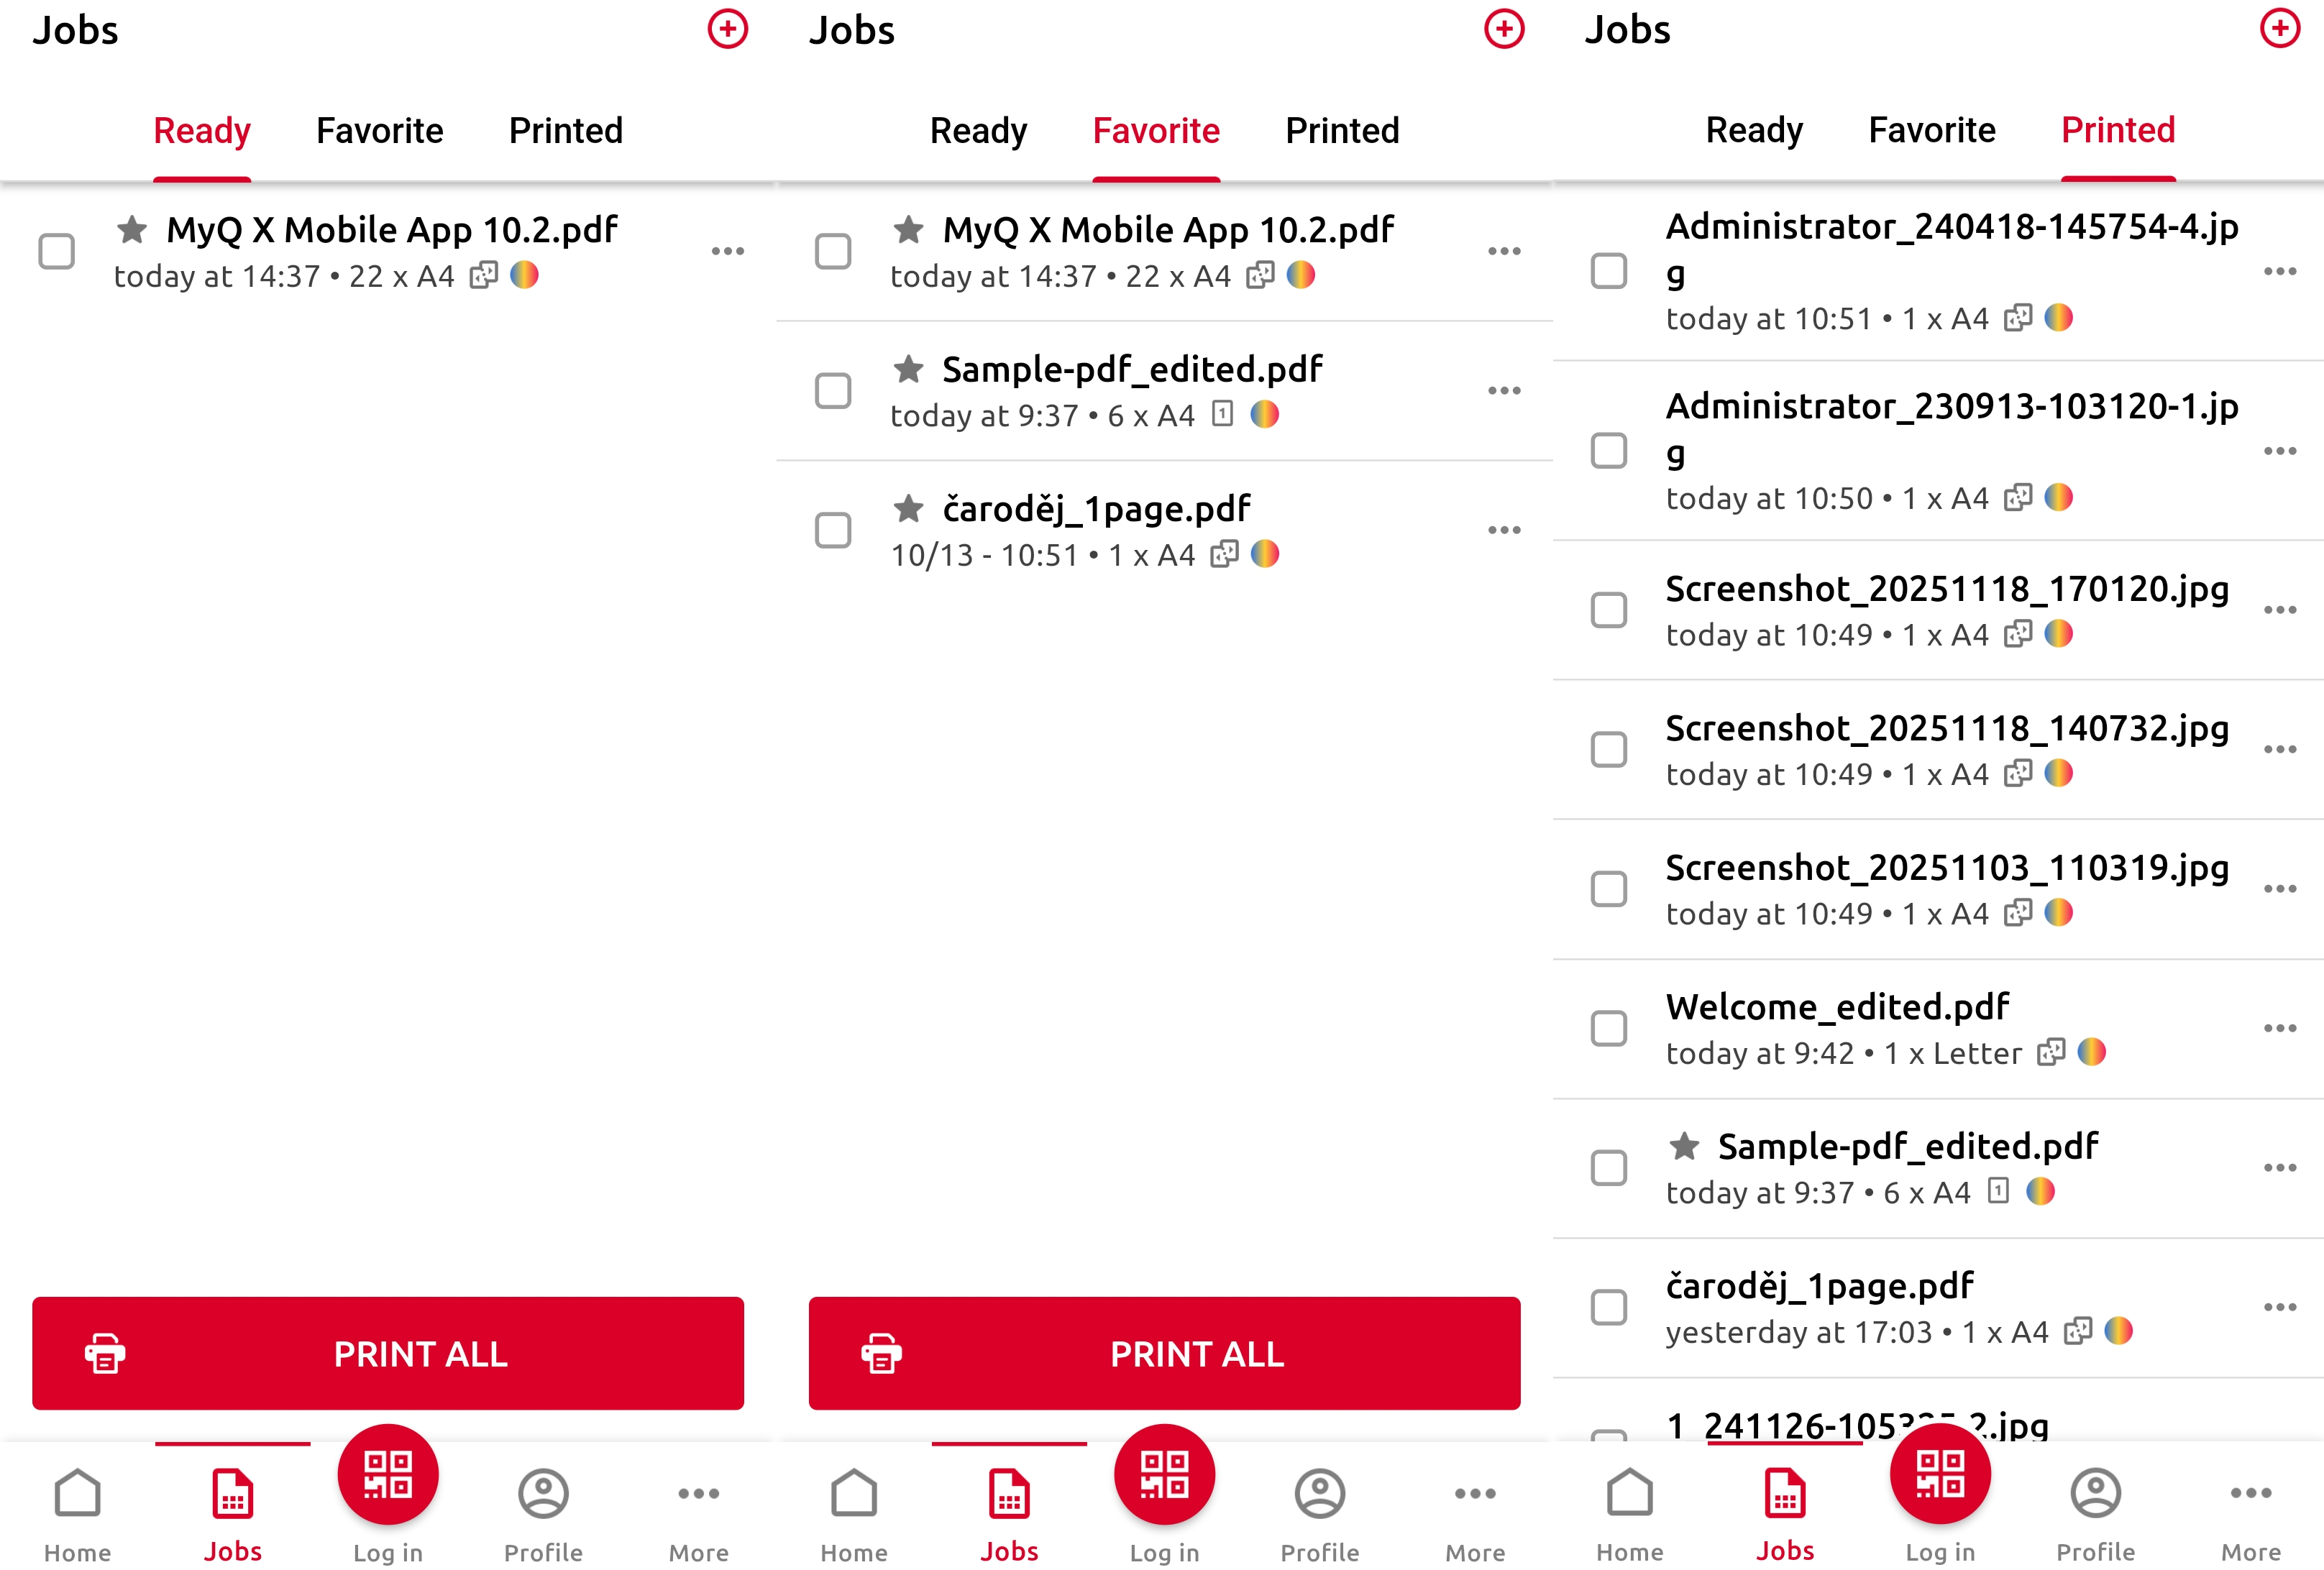
Ready
A list of print jobs that you have saved but not yet released on a printer.Favorite
A list of jobs that you have marked as favorites. Jobs remain on the Favorite tab even after they are printed.Printed
A list of your printed jobs.
Print All Jobs
To print all ready jobs, tap PRINT ALL.
Print Selected Jobs
To print a selection of jobs, tap the checkbox to select each job, then tap PRINT SELECTED.
Add a Print Job
To add a new print job (from your device or cloud storage), tap the + plus icon at the top. Then set your printing options:
Number of copies (1-99)
B&W
Duplex printing
Toner saving (Eco mode)
Finishing options
Staple
Punch
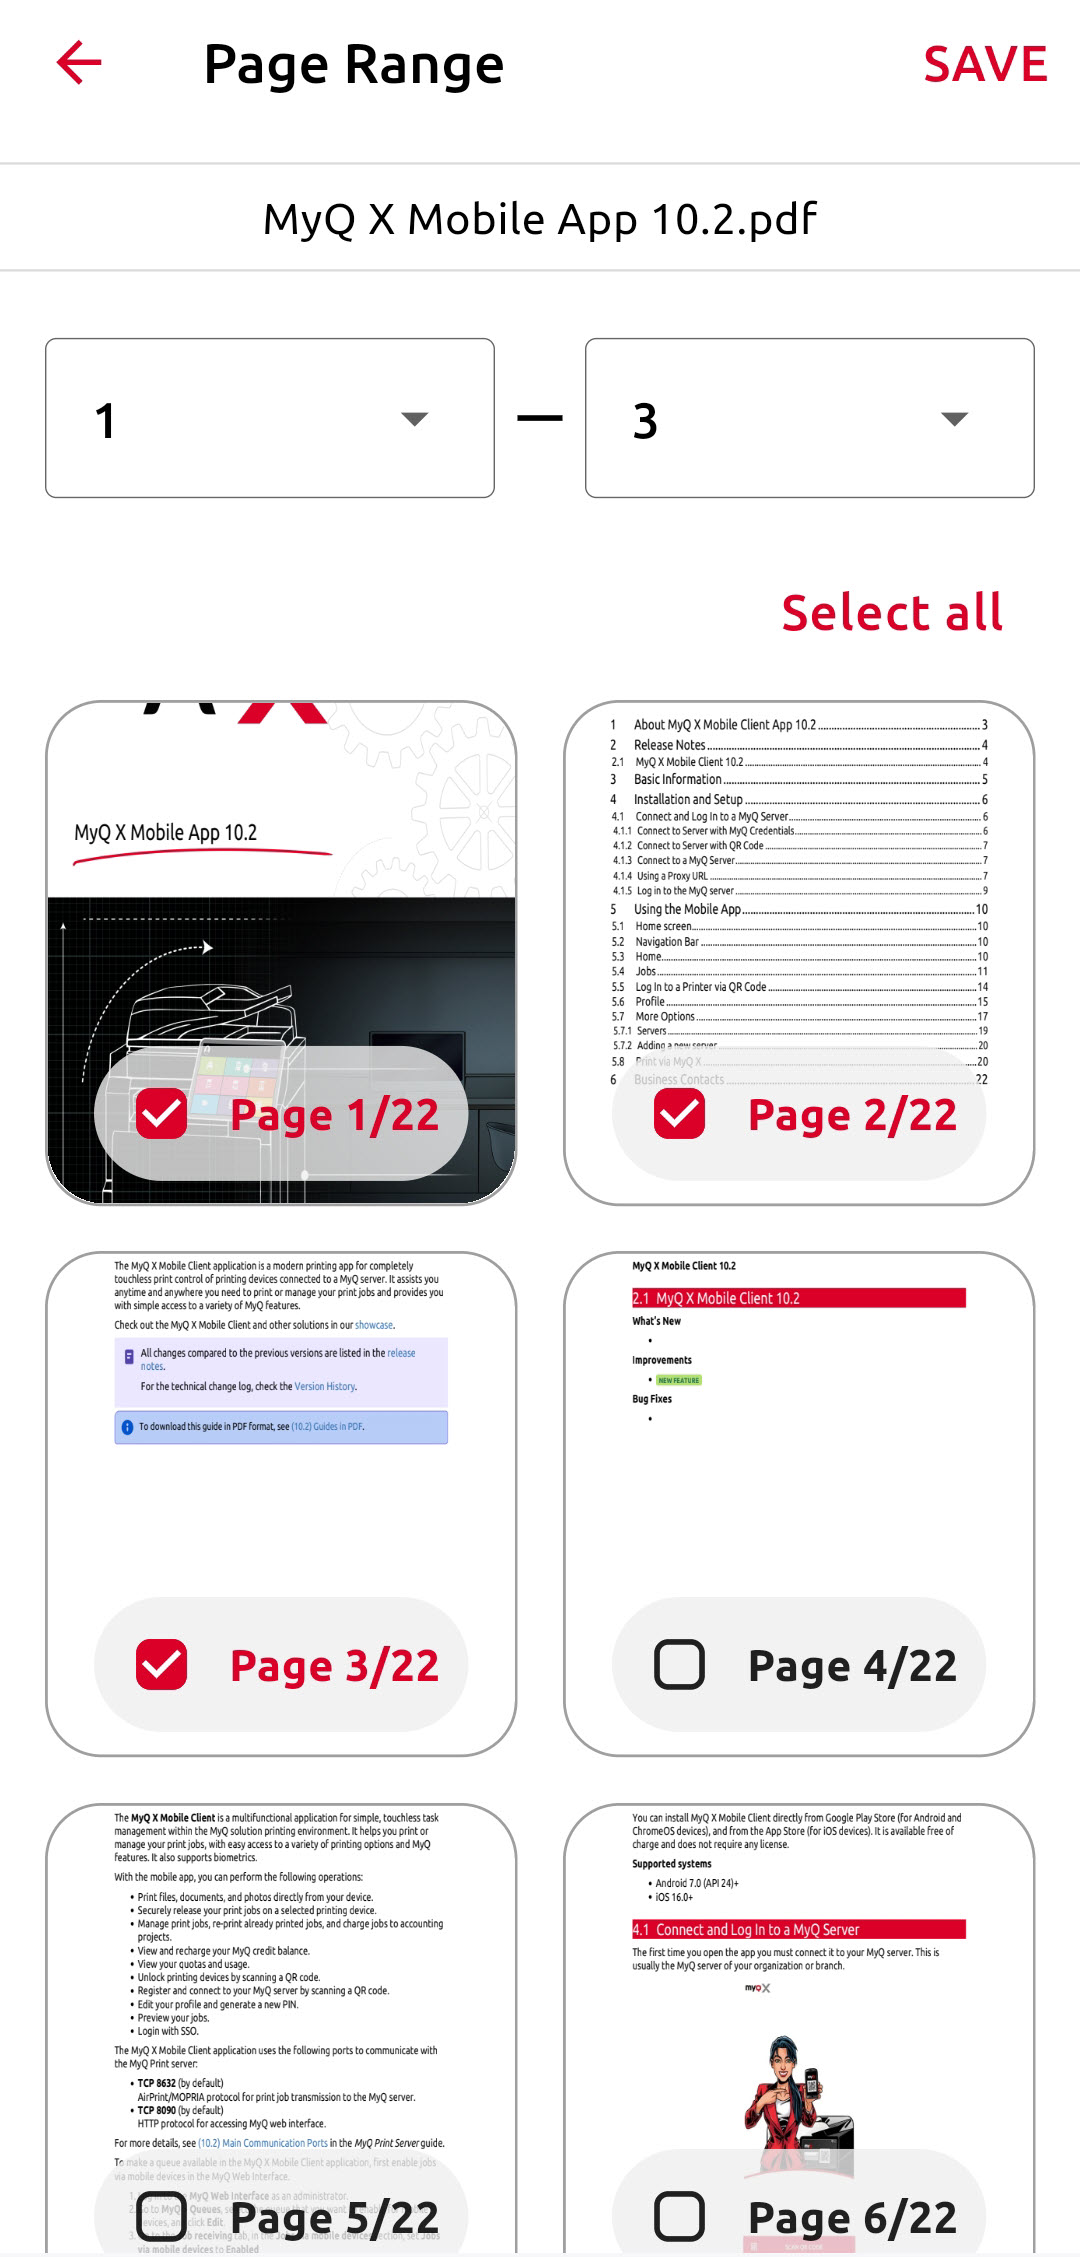
Page Range
To print a selection of pages, tap the gear icon for the file. Then set the start and end of the page range, or toggle the pages that you want to print.
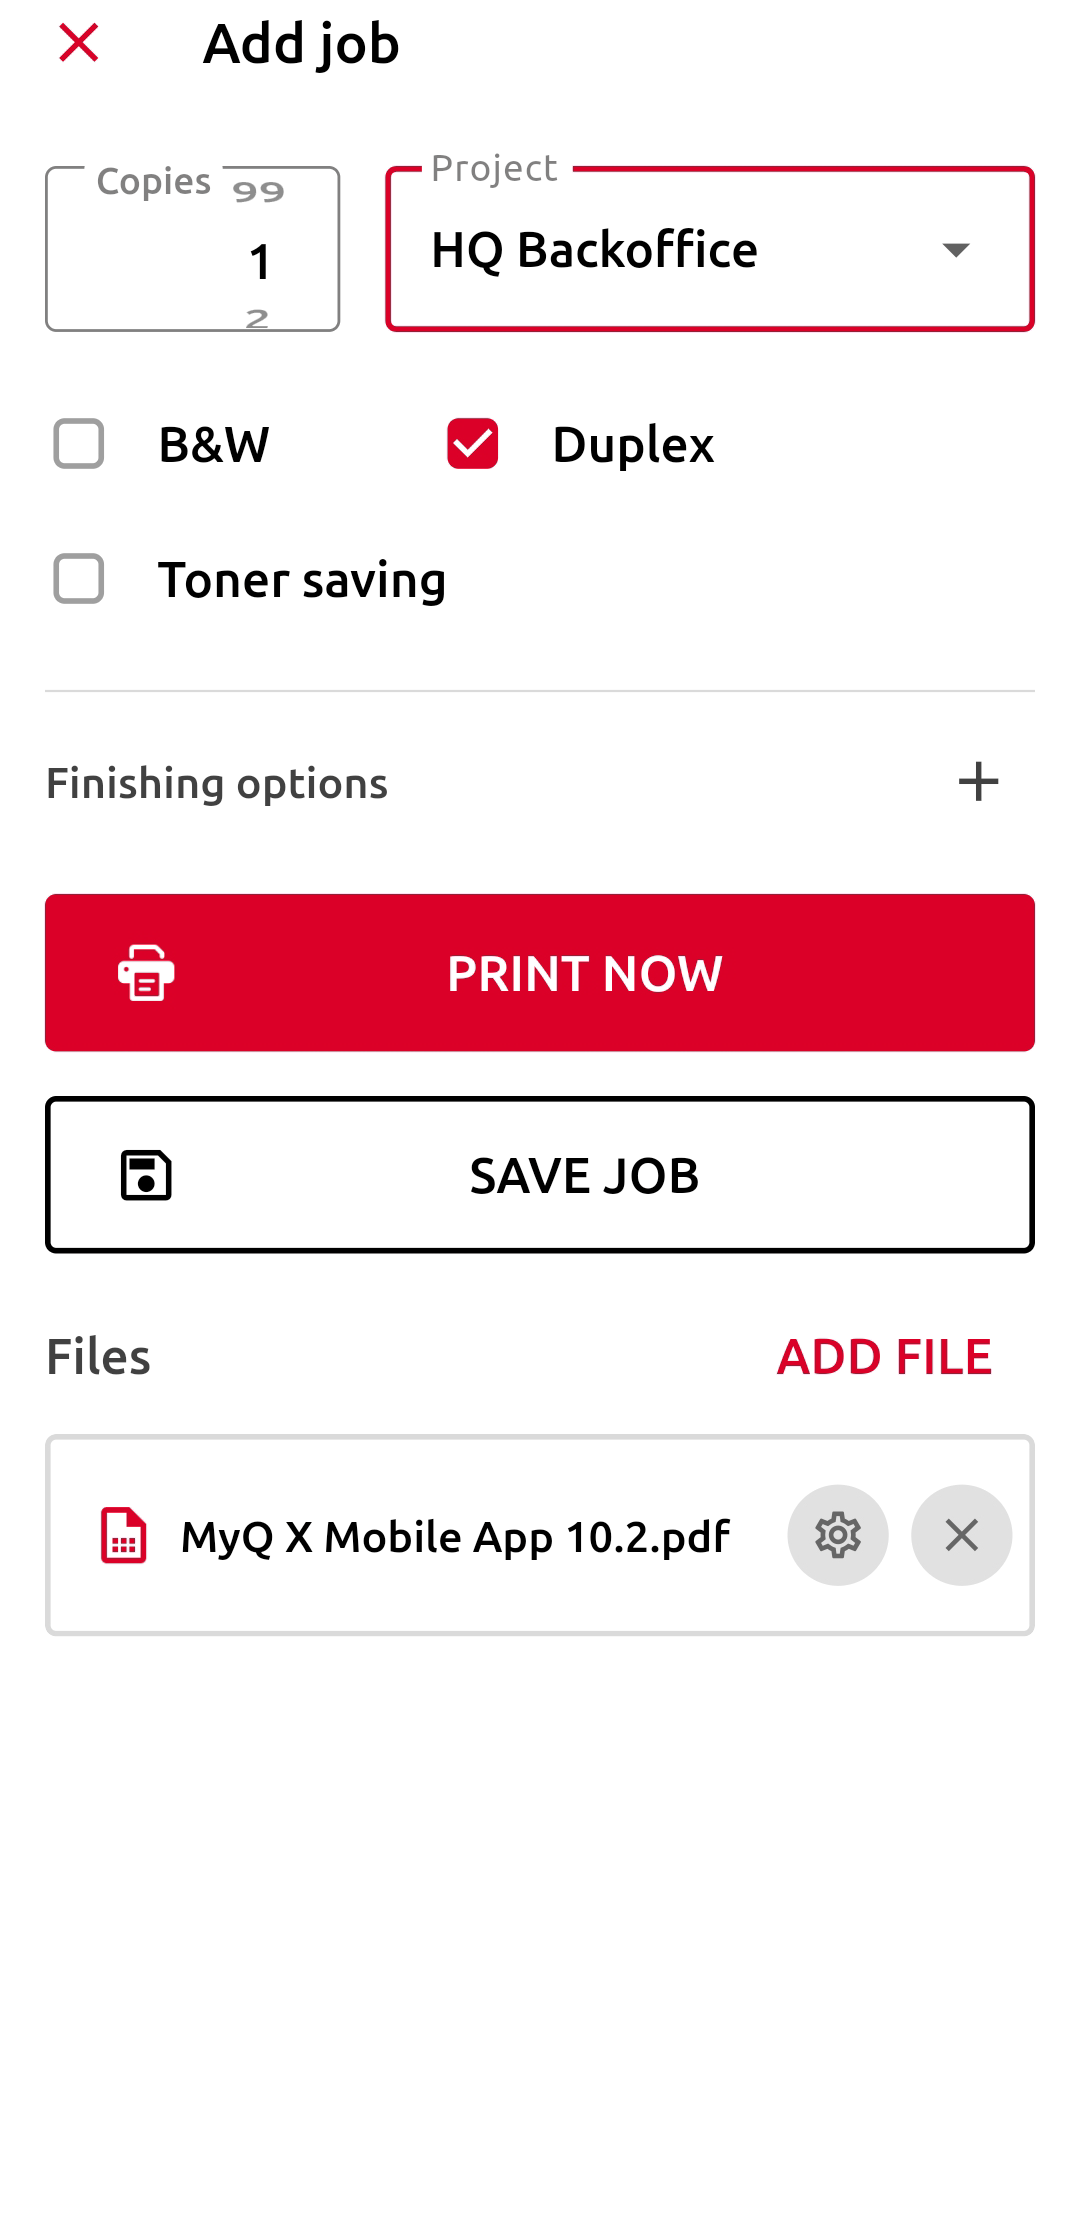
If project accounting is enabled on the MyQ Server, you can assign a project to the job. You can also specify the job’s queue:
Direct
The job is immediately printed to the printer assigned to the queue.Pull Print
You are asked to scan the QR code of the printer where you want the job to be printed (Pull Print queues require MyQ embedded terminals).
If you select PRINT NOW, the QR Code scanner opens to let you unlock a terminal and release the job.
If you select SAVE JOB, the job is saved to your Ready jobs, and you can print it later.
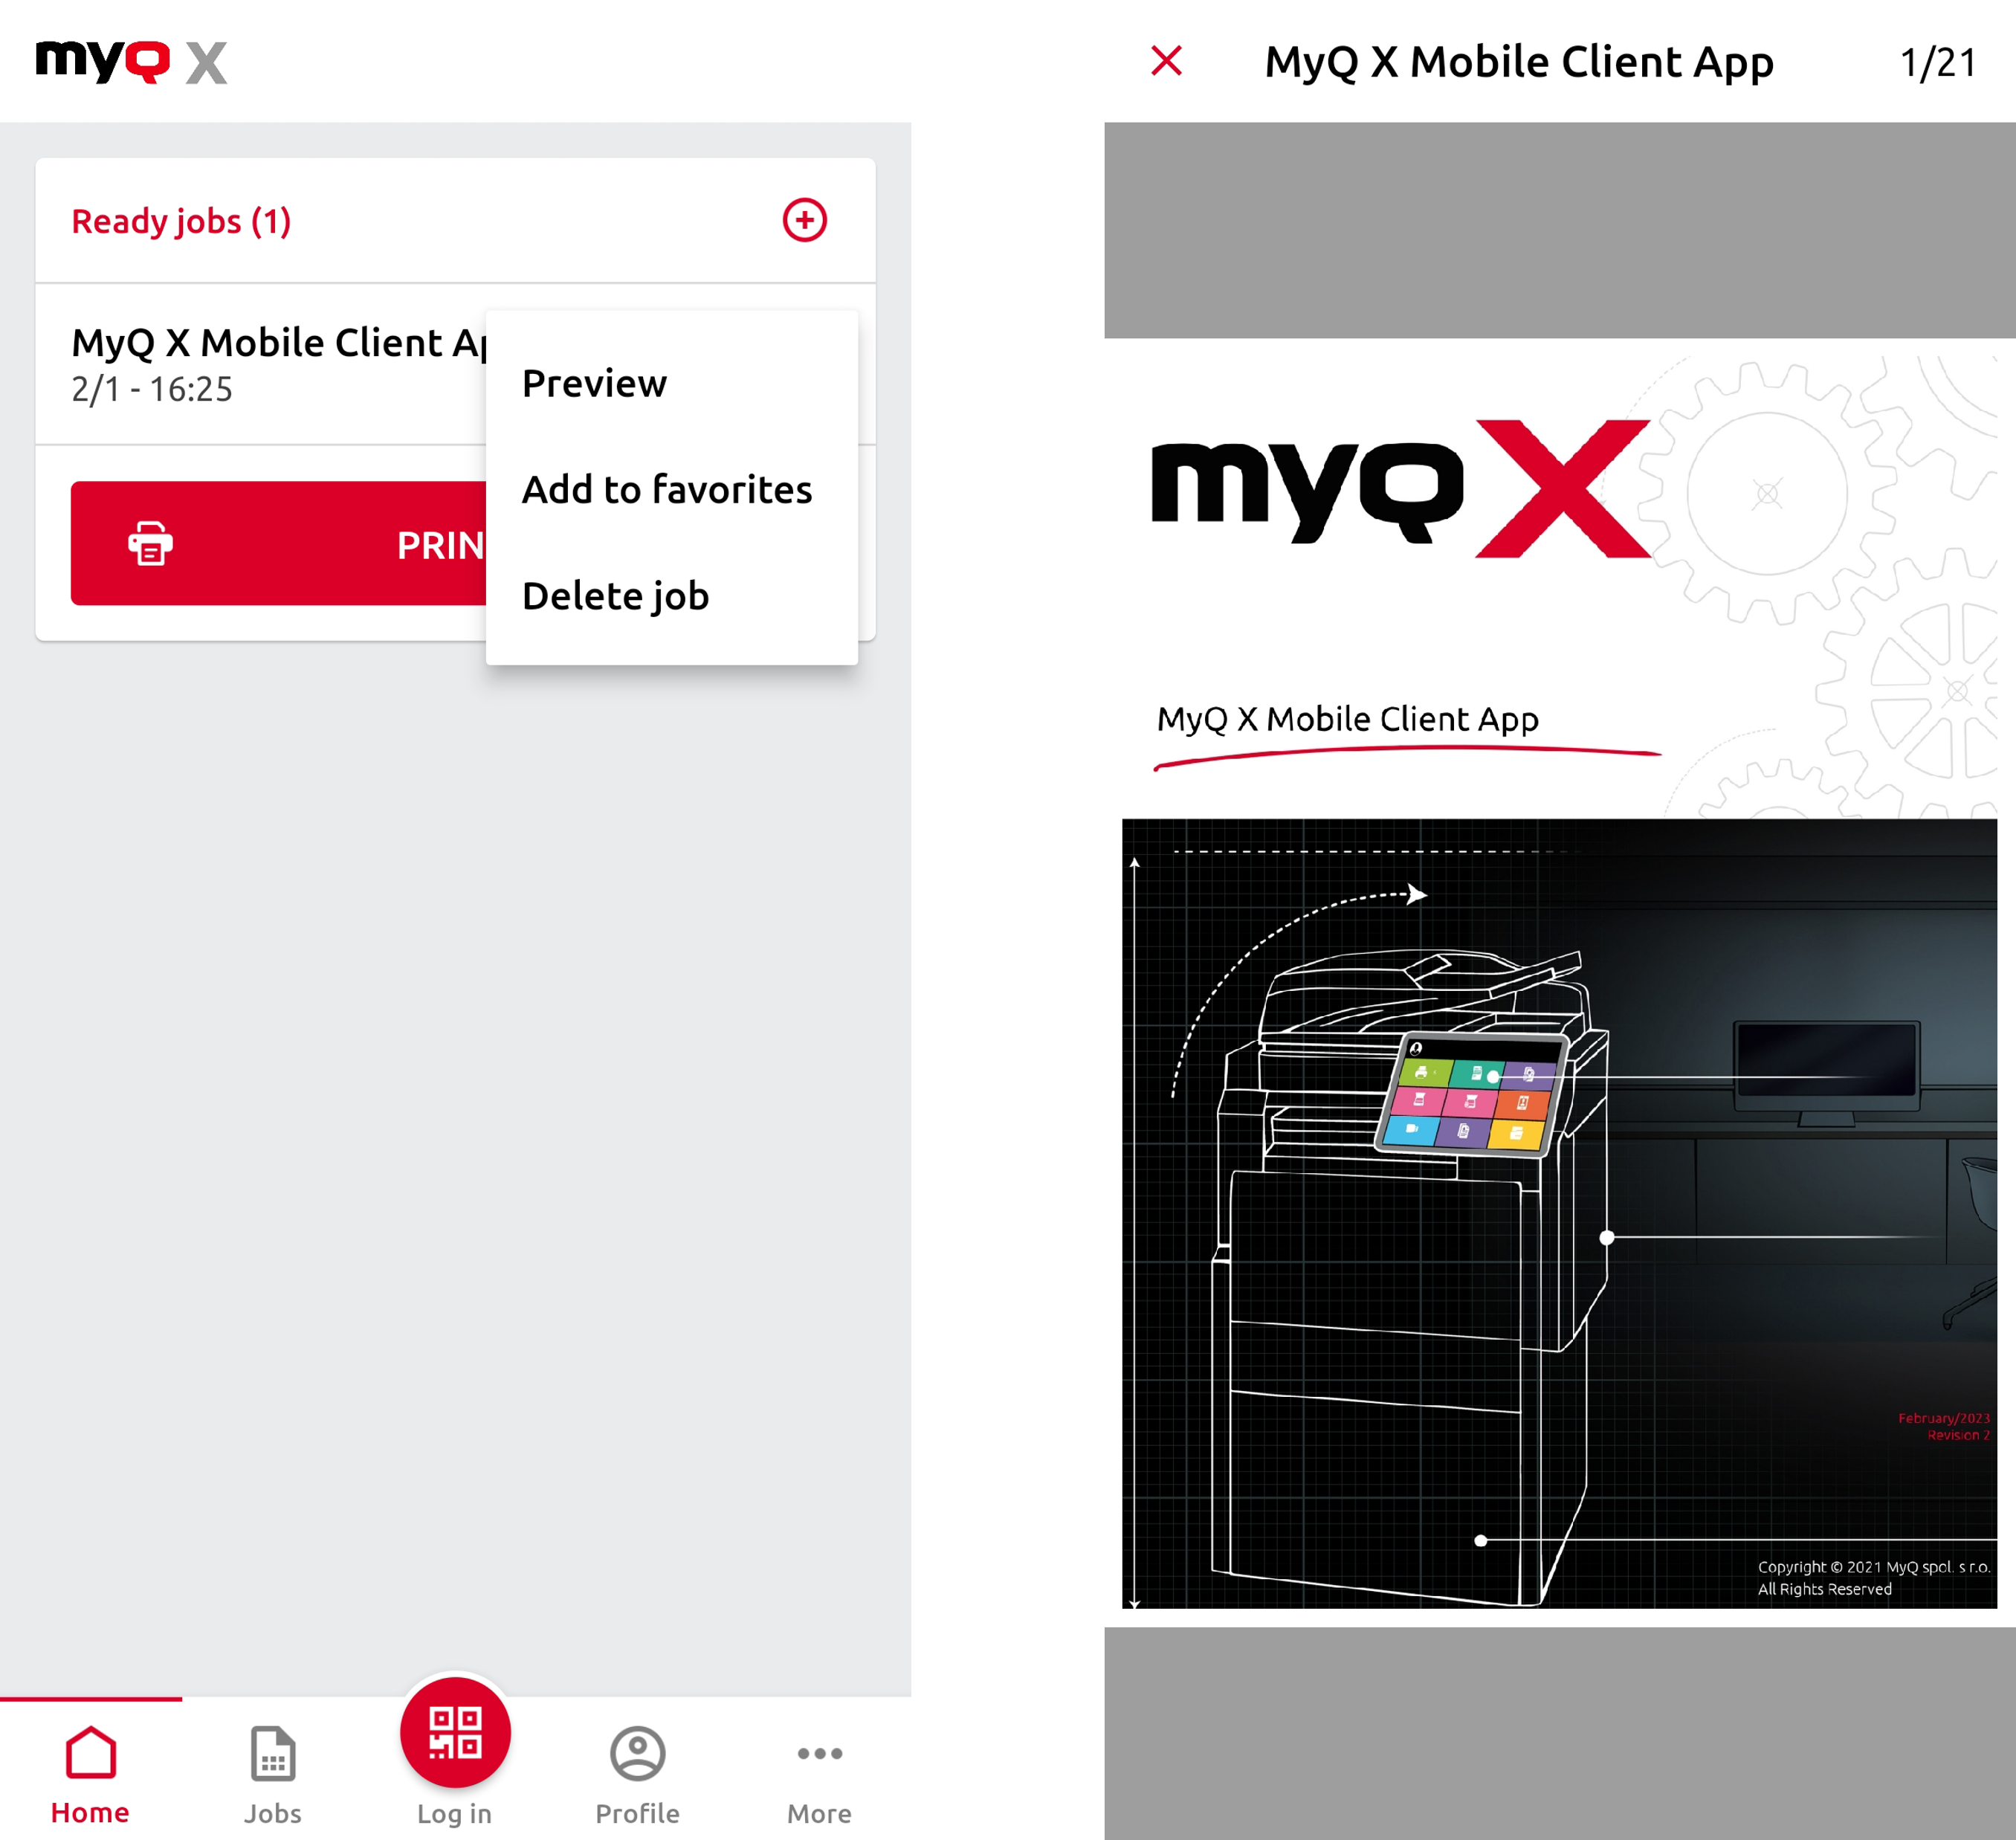
View Job Preview
The Job Preview feature must first be enabled in the MyQ Print Server (10.1+). Go to MyQ > Settings > Jobs, and set Job Preview to Enabled. You can also set the Number of pages that are shown in the preview.

Once enabled, jobs waiting on the server can be previewed in the mobile application via the ••• (three dots) menu for that job on the Jobs tab.