You can install the MyQ Desktop Client via the setup wizard, with a customized configuration file, or with a command line with parameters. While you can install Desktop Client on a single machine, it is typically deployed across managed environments. Desktop Client support these deployment methods:
-
Deployment with Intune
-
Deployment with Microsoft Endpoint Management
Before Installation
Customize your installation so that once installed, Desktop Client automatically connects to your server. You can perform a customized installation in these ways:
-
Customize the installation package filename.
-
Edit the
preference.plistfile, then run the installer. -
Install Desktop Client manually and connect to the server later.
Customize the Installer Filename
Edit the installation filename to include your server address, server port, and security mode. The installer can be named with following the structure:
(MyQ-)DesktopClient ServerAddress-ServerPort(-Normal|Strict).pkg
Notes
-
Values for
ServerAddressandServerPortare required. -
A value for
Normal|Strictis optional (defaults toStrictwhen omitted). -
You must include a space before ServerAddress!
Examples
-
Desktop Client 10.2 contoso.myq.com-443.pkg
-
Server Address: contoso.myq.com
-
Server Port: 443
-
Security Mode: Strict
-
-
Desktop Client 10.2 (Patch 2) acme.com-8090-Normal.pkg
-
Server Address: acme.com
-
Server Port: 8090
-
Security Mode: Normal
-
Edit the preference.plist File
The Server Address, Server Port, Security Mode, and default system browser can be set by editing the preference.plist included in the installation package. The available security modes are Strict and Normal.
The preference.plist must be in the same directory as the installation package when the installer runs. The configuration is applied upon startup.
Manual Installation
You can allow users to manually install Desktop Client on their machines.
In this scenario, preferences are handled by configuration profiles defined on the server.
-
Download the latest available version of the installation file from the MyQ Community portal.
-
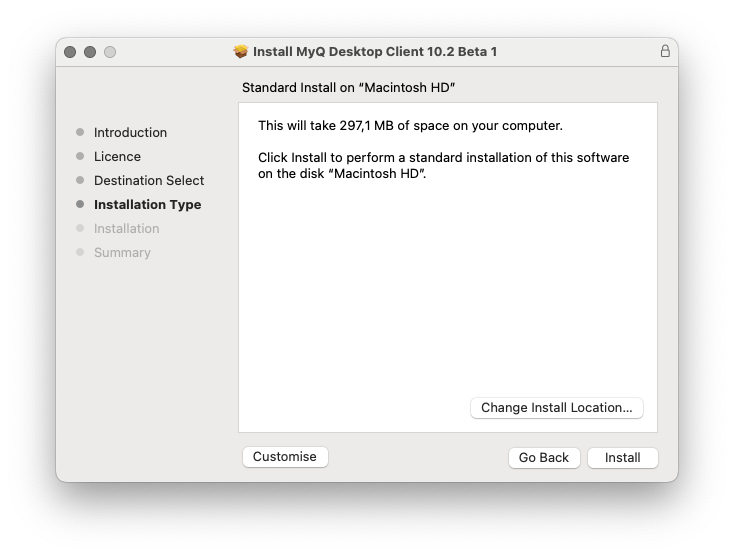
Double-click on the installation file, and proceed through the installation wizard.
-
Desktop Client is now installed and open.
Desktop Client runs as an application and background service.
If the security mode is set to Normal, a connection privacy warning appears after installation.
For information about how to configure Desktop Client, Configuration Profiles and Configure Printers and Job Processing.
Remote Installation with Apple Remote Desktop
It is highly recommended to go through the manual installation in one workstation before deploying the app to multiple workstations. This way, the administrator can make sure that the installation and configuration is successful. Another advantage is that the administrator can copy the settings file of this manual installation and deploy it to the other workstations before remotely installing Desktop Client. The settings then are applied to all the workstations, without the need to set them up individually after the installation.
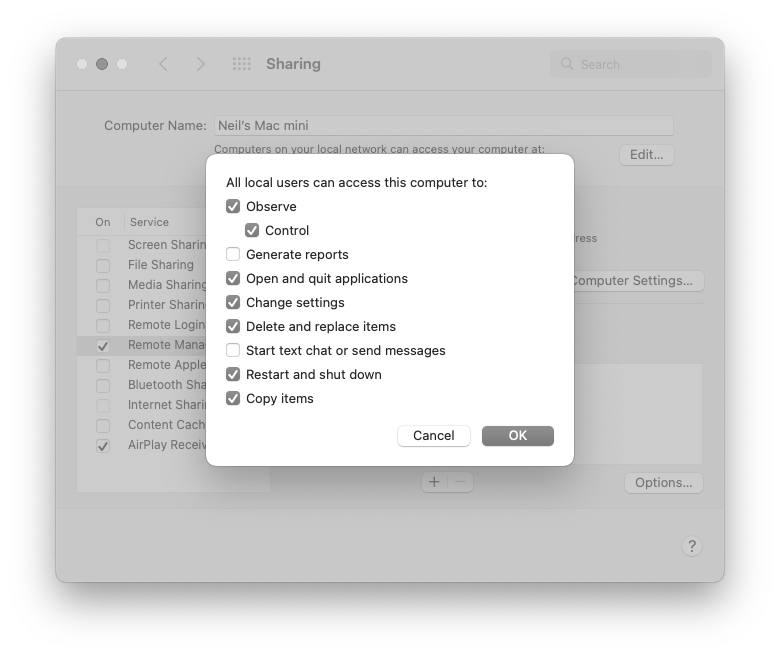
The followings options must be enabled in the macOS workstations to allow the remote installation from the Apple Remote Desktop tool:
-
In OS X, open System Preferences and click Sharing.
-
In the Service list, select Remote Management and then click Options.
-
Select the following options:
-
Observe
-
Control
-
-
Open and quit applications
-
Change settings
-
Delete and replace items
-
Restart and shut down
-
Copy items.
-
-
Click OK.
Deploying the Settings File
If you have manually installed and setup Desktop Client, you can copy the settings file (available in /Users/<MacOSUserName>/Library/Preferences/cz.myq.Desktop Client.plist) to the System Preferences Folder, and those settings will be applied to all the users in the Mac workstations.
-
On the administrator Mac, open Finder and click Applications > Remote Desktop to display the main window of Apple Remote Desktop (ARD).
-
Click All Computers in the left section of the ARD main window. The macOS computers connected to your network are displayed in the right pane of the window.
-
Select the desired destination computers and click Copy in the ARD toolbar (or select Manage > Copy Items menu). The Copy Items window opens.
-
Click Copy to copy the items to selected computers. The progress is displayed in the main window. The result of the copy to each computer is displayed in the Status column.
-
The settings file is copied in:
/Library/Preferences.
If the settings file is not copied, after the package installation finishes the user can customize Desktop Client manually. The settings file will be created under the user’s home folder: /Library/Preferences. See Configure Printers and Job Processing for more information.
Deploying the Package
To deploy the package to multiple macOS workstations:
-
On the administrator computer, open Finder and click Applications > Remote Desktop to display the main window of Apple Remote Desktop (ARD).
-
Click All Computers in the left section of the ARD main window. The macOS computers connected to your network are displayed in the right pane of the window.
-
Select the desired destination computers and click Install in the ARD toolbar (or select Manage > Install Packages menu). The Install Packages window opens.
-
Add the
MyQ Desktop Client.pkgfile (available for download in the MyQ Community portal) to the Packages list either by drag-and-drop or by locating the package using the plus (+) button. -
Click Install to distribute the package to the selected computers. The installation progress is displayed in the main window. The result of the package distribution to each computer is displayed in the Status column.
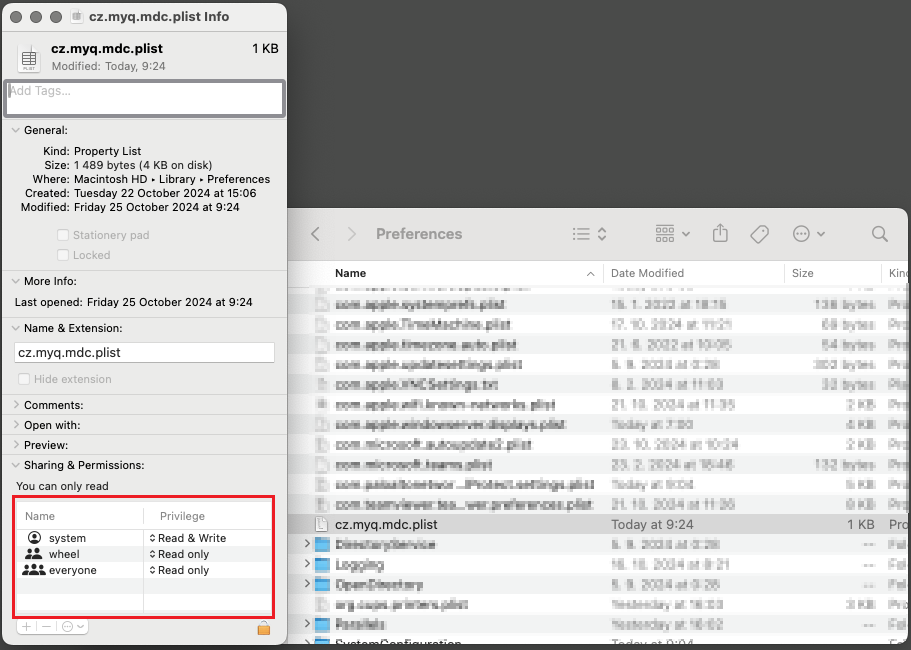
Installation by Admin for Normal User on the same Device
After installation of the Desktop Client, set up the connection to the MyQ server and save it with the admin user. Then navigate to \Library\Preferences and find cz.myq.Desktop Client.plist.
Modify the permissions on the file - either add the other, non-admin MAC user(s) with Read & Write permissions or change rights of everyone from No access to Read & Write. After this, when logging in as the non-admin user, they will be connected to the MyQ server and after authentication, they can use Desktop Client.