Easy Scan allows you to scan with a single touch. After you tap this action, the page is immediately scanned to a predefined destination. Your administrator can define multiple destinations where the scanned document can be sent to by setting up multiple Easy Scan actions (e.g. Easy Scan to Email, Easy Scan to Folder, Easy Scan to OneDrive, etc.).
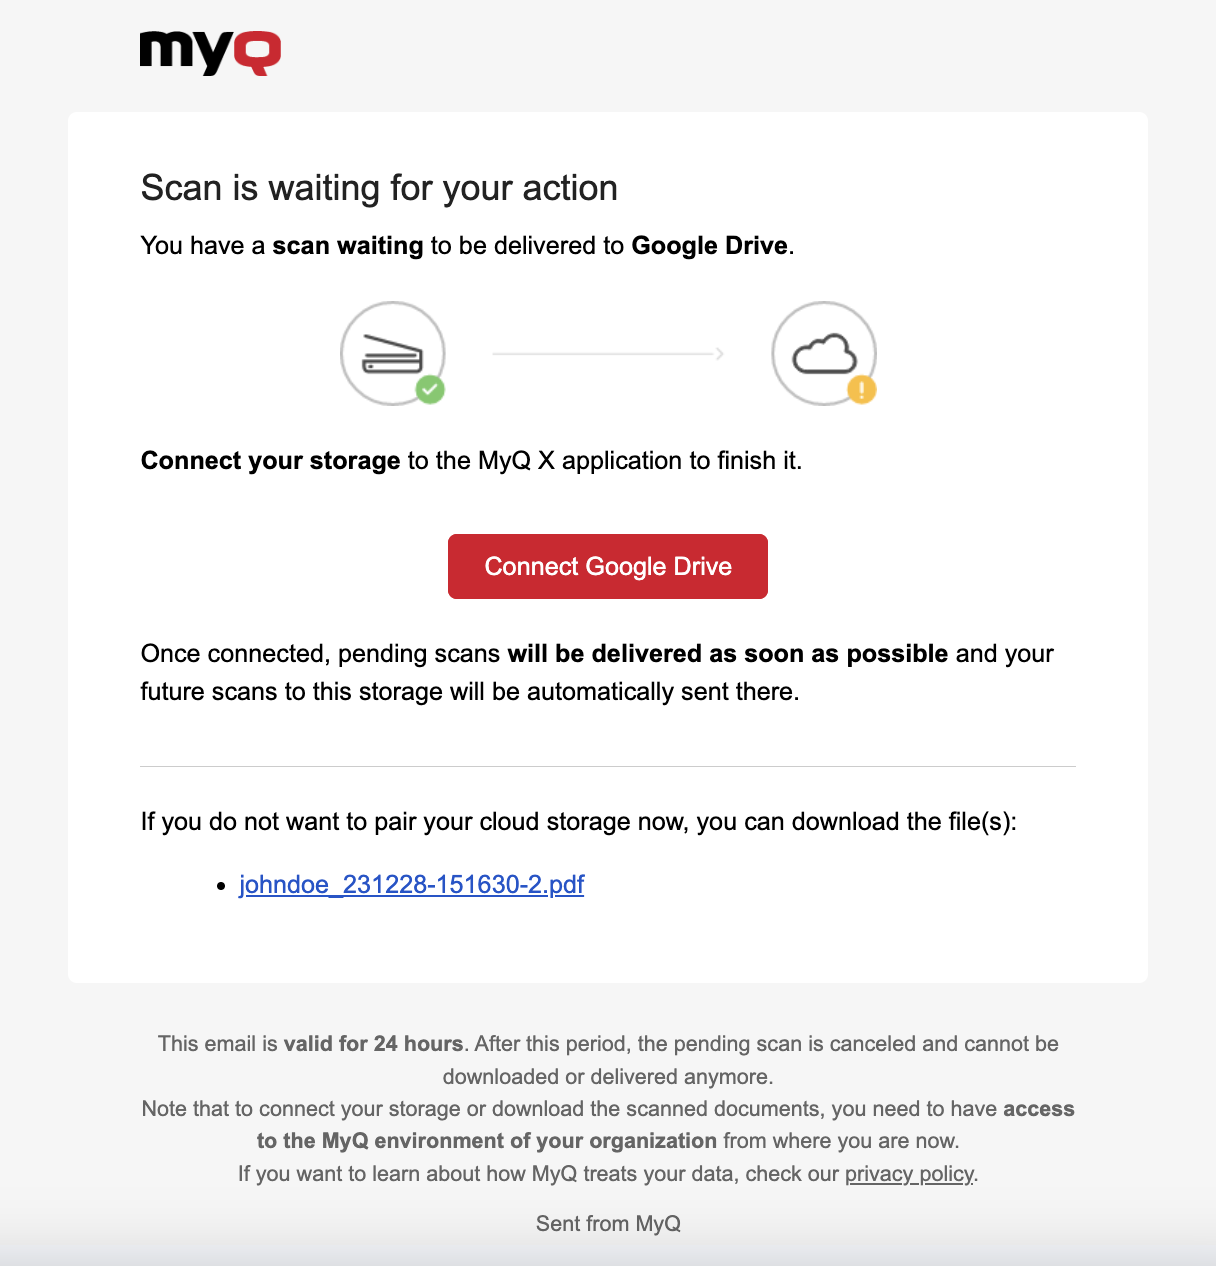
Once your administrator has defined destinations you can use for Easy Scan, you will see these destinations listed on the Home screen of your MyQ Web Interface, with an indication of whether or not the storage location is Connected. If the location is not yet connected, simply click Connect and follow the prompts to enter the storage’s password and complete the connection.
Alternatively:
If your admin has connected a storage destination to Easy Scan, but you have not yet connected your personal account by entering a password, you can still use Easy Scan with this storage set as the destination.
An email will be sent to your email address allowing you to connect to the destination, after which your scanned document/s will be delivered there. This email is valid for 24 hours after the scan has taken place. This email also contains a secure link to directly download the scanned document/s.
The administrator can also set the scan’s parameters and may allow you to change them before scanning.
Some parameters (e.g. resolution, color) significantly influence the scanned file's size. For example, a combination of higher resolution and full color will dramatically increase the file size.
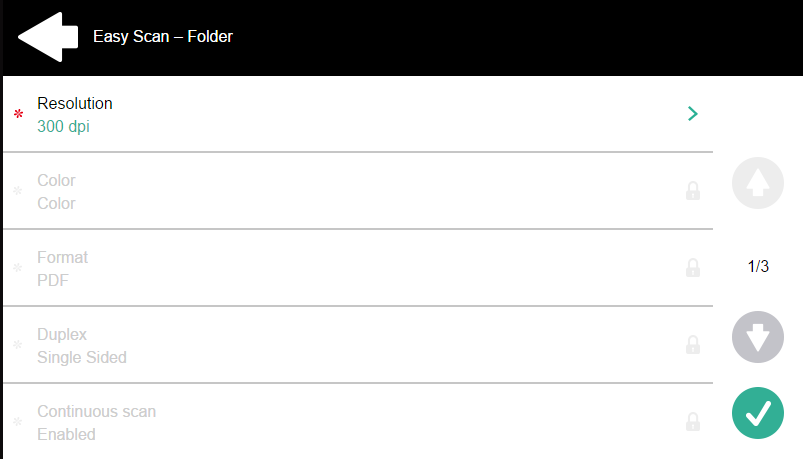
Easy Scan Parameters
Each parameter has a Default option. If selected, the actual values are taken from the default scan settings of the printing device.
-
Resolution - The outgoing file's resolution. You can select from the following options:
-
100 dpi
-
200 dpi
-
300 dpi
-
400 dpi
-
600 dpi
-
1200 dpi
-
Default
-
-
Color - The outgoing file's color scale. You can select from the following options:
-
Color
-
Grayscale
-
B&W (two tones)
-
Automatic
-
Default
-
-
Format - The outgoing file's format. You can select from the following options:
-
PDF
-
JPEG
-
TIFF
-
XPS
-
HCPDF
-
Default
-
-
Duplex - Simplex and Duplex scanning options. You can select from the following:
-
Single Sided
-
Duplex - binding on top
-
Duplex - binding on side
-
Booklet - binding on left
-
Booklet - binding on right
-
Default

-
-
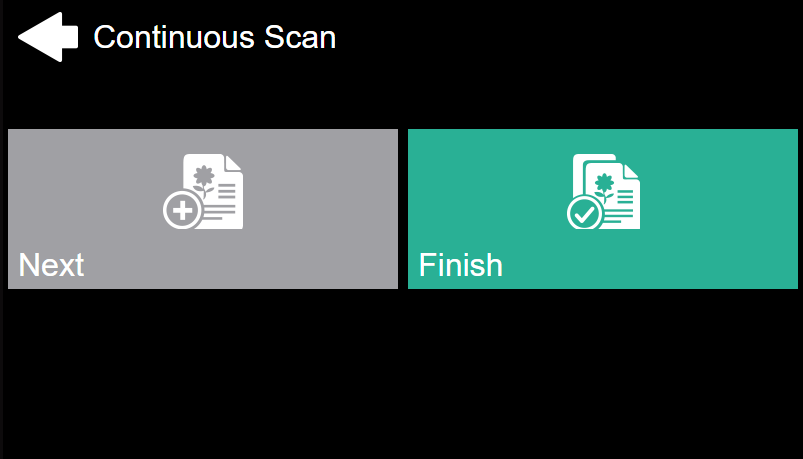
Continuous scan - With the continuous scan option Enabled, scan jobs are not sent until Done is tapped. After clicking Scan, the printing device scans another page.
You can select from the following:
-
Disabled
-
Enabled
-
Default
-
-
Scan separation - If a document with multiple pages is scanned, scanned pages can be stored either separately (each page in a separate file) or all together in one file. You can select from the following options:
-
All pages together
-
Separate each page
-
Default
-
-
Original Image - Determines the way in which the printing device is going to process the scanned page. You can select from the following options:
-
Text + Photo
-
Photo
-
Text
-
Default
-
-
Original Orientation - Determines the scanned page's orientation in the outgoing file. The paper's position is relative to the person standing at the printing device. You can select from the following options:
-
Top Edge on Top: The page is displayed in a horizontal position (top edge of the page opposite to the person)
-
Top Edge on Left: The page is displayed in a vertical position (top edge of the page on the left-hand side of the person)
-
Default
-
-
Density - The picture's density in the outgoing file. The higher it is, the darker the resulting picture is. You can select from the following options:
-
Automatic
-
Lowest
-
Lower
-
Low
-
Normal
-
High
-
Higher
-
Highest
-
Default
-
-
Size - The scanned output's size. This determines the size of the scanning area, therefore it should correspond to the actual size of the scanned paper. You can select from the following options:
-
Automatic
-
A3
-
A4
-
A5
-
A6
-
Folio
-
Ledger
-
Letter
-
Legal
-
Oficio II
-
Statement
-
Default
-
-
Skip blank pages - With this parameter, you can choose to skip blank pages in the scanned document. You can select from the following options:
-
Default
-
Yes
-
No
-