With the Client Spooling feature enabled, users' print jobs are not sent to the MyQ server, but stay stored at the users' computer. After they authenticate themselves at a printing device and select the jobs to be printed, the jobs are released from the computer directly to the device. This method dramatically decreases traffic to MyQ server and is suitable especially for small offices with limited network connection to the MyQ server.
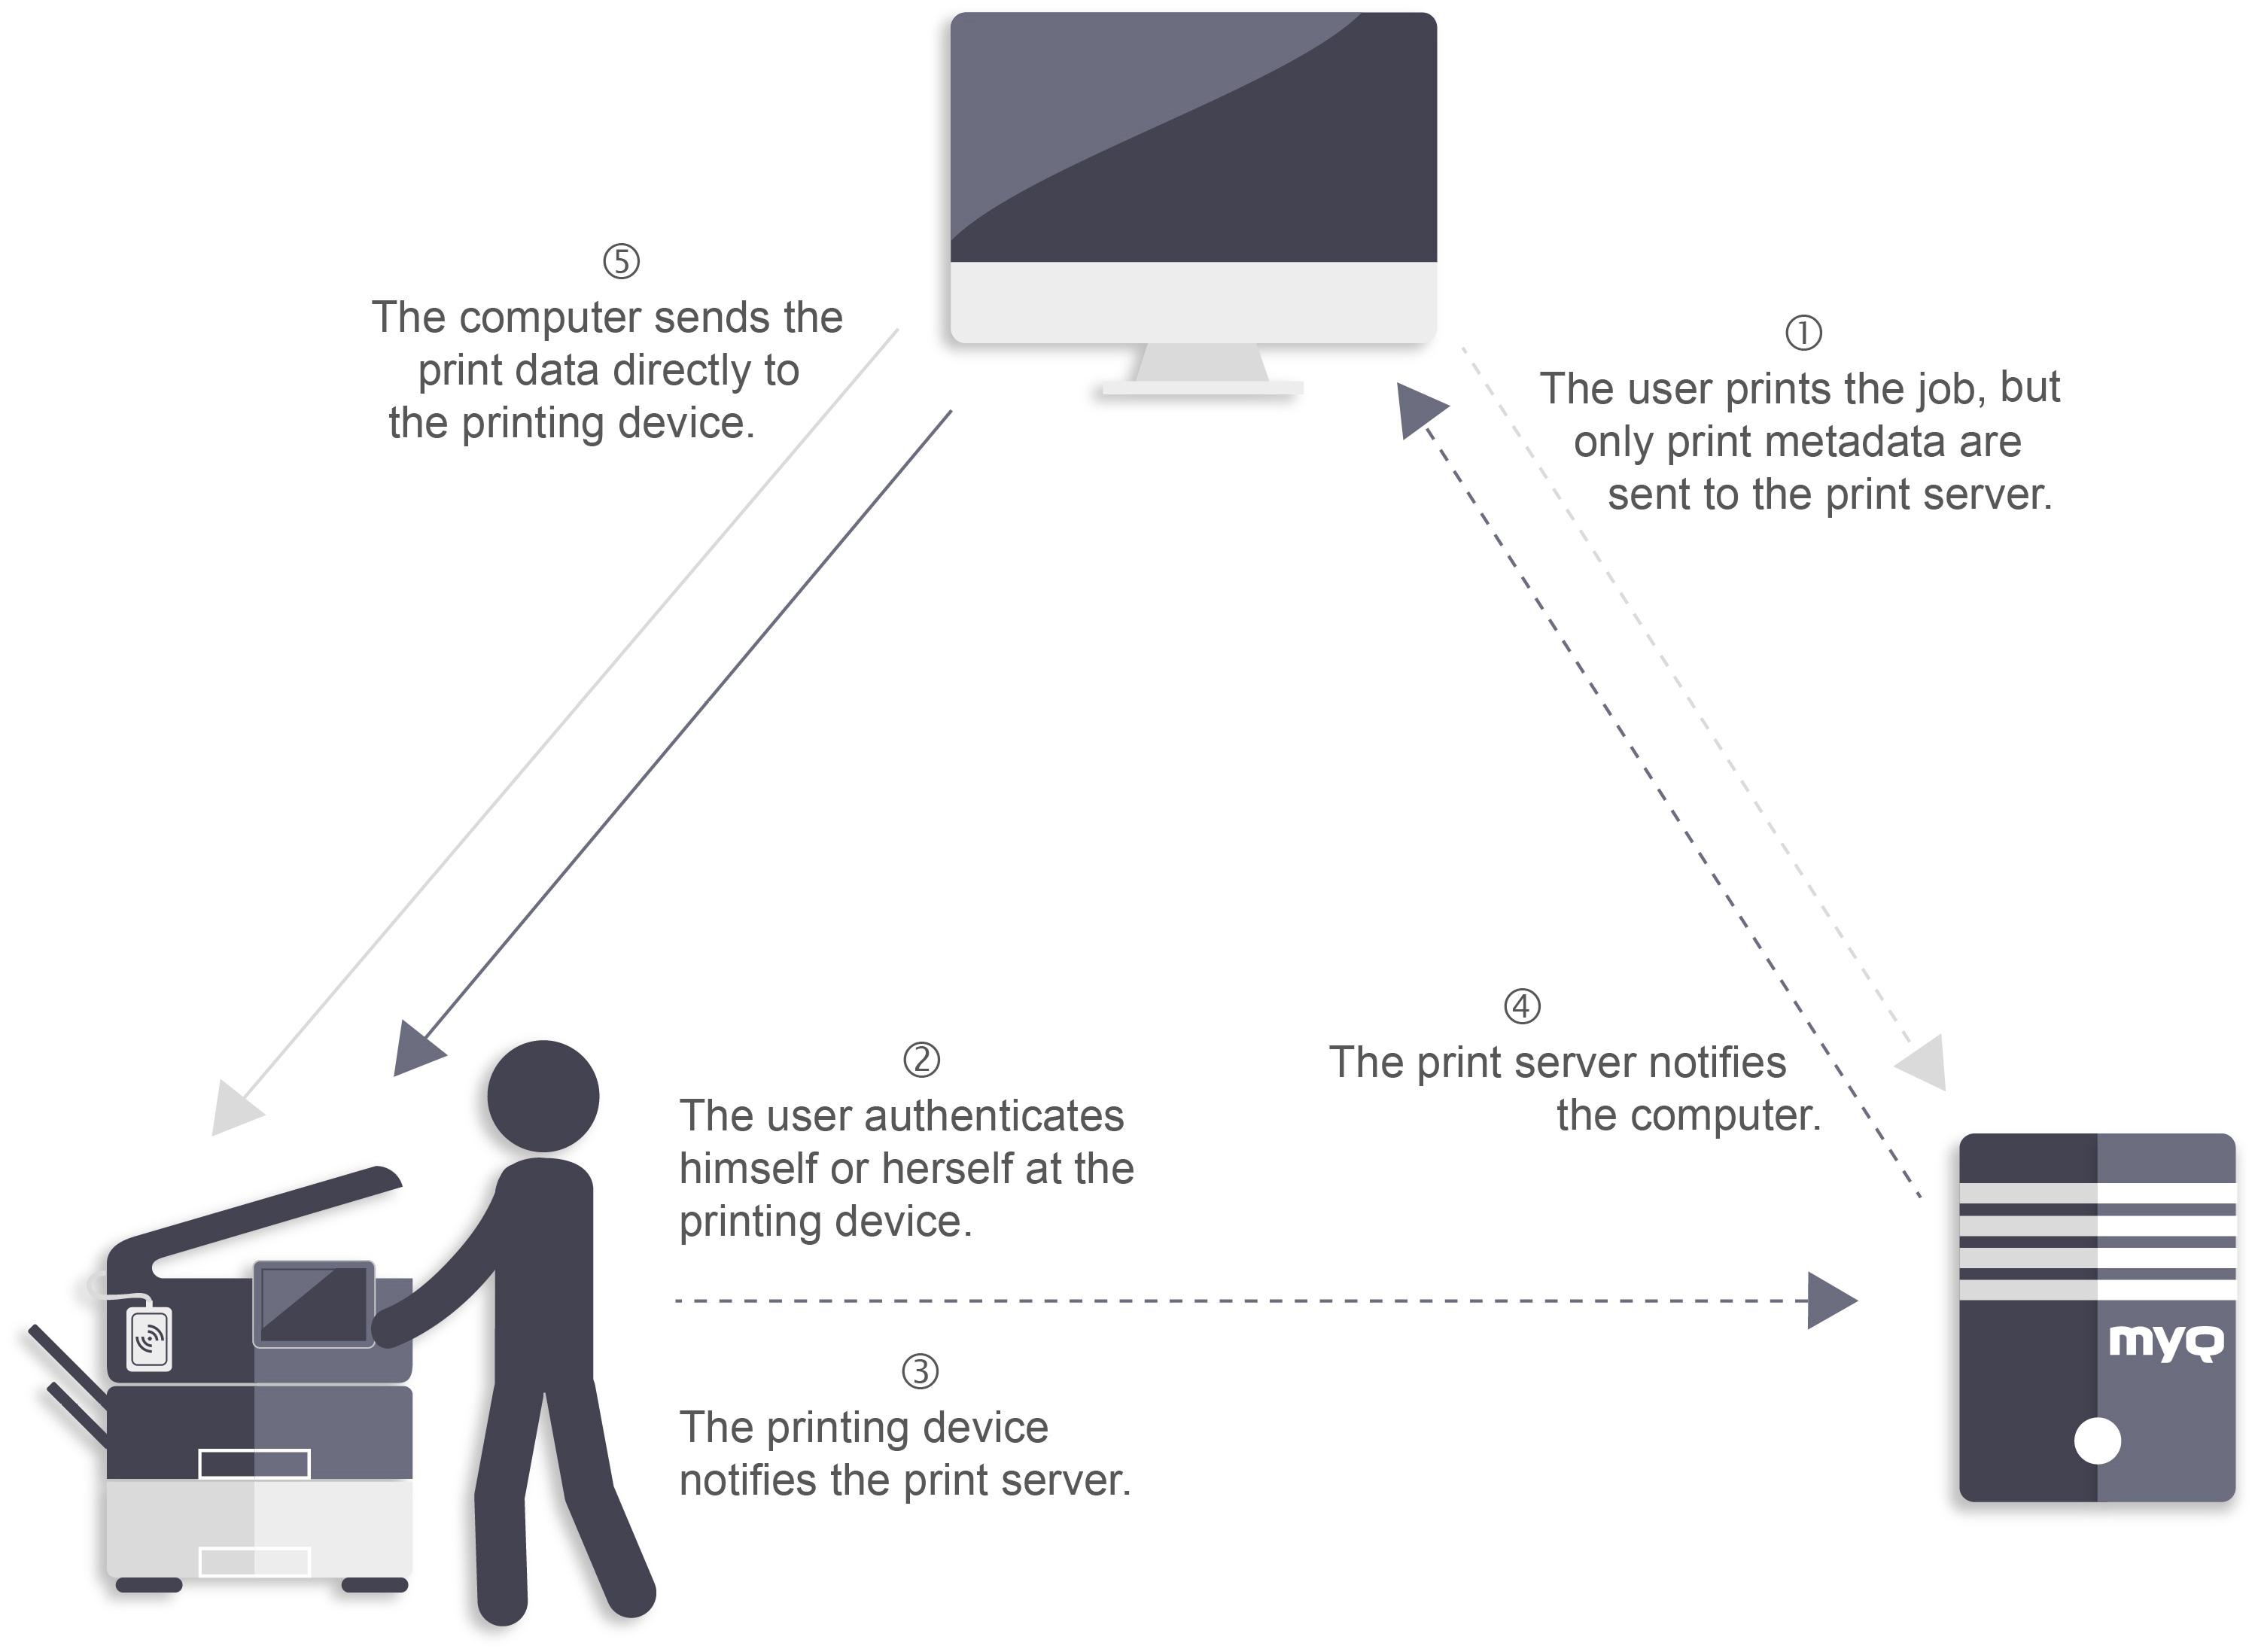
When a user prints their job while this feature is activated, only the print metadata are sent to the server and the actual print job does not leave the computer (it is stored there as a RAW file). It waits until the user authenticates themselves at a printing device and selects to print the job there. After that, the printing device notifies the server, the server notifies the computer and the computer sends the job directly to the printing device, where it is printed.
To enable this feature, you have to set a TCP/IP port for the service, install the MyQ Desktop Client application on the client's computer and enable the Client Spooling feature. (For information on how to install and set up MyQ Desktop Client on client's computers, see the MyQ Desktop Client for Windows guide).
If the computer of the user is switched off during the sending of the job, the job is Paused on the server. The administrator can release the job once the user has switched on their computer again.
MyQ Print Server 8.2 is also compatible with MyQ Smart Print Services 7.6 with all the client features (Client Spooling: ON/OFF and LPM), however the compatibility to use SPS 7.6 is not available on MyQ Print Server higher versions (10/10.1+).
It is highly recommended to upgrade your SPS clients to MyQ Desktop Client 8.2+.
Windows settings
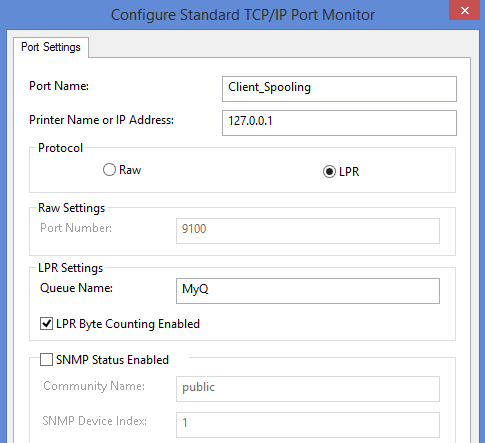
The settings in the Configure Standard TCP/IP Port Monitor dialog box (in the printer’s settings) must have the following values:
-
Printer Name or IP Address: 127.0.0.1 (IP address of the localhost in Windows) or localhost
-
Protocol: Select LPR
-
Queue Name: queue name according to the MyQ server setting (same as if printing to the MyQ server)
-
LPR Byte Counting Enabled: Selected
-
SNMP Status Enabled: Deselected
MacOS settings
-
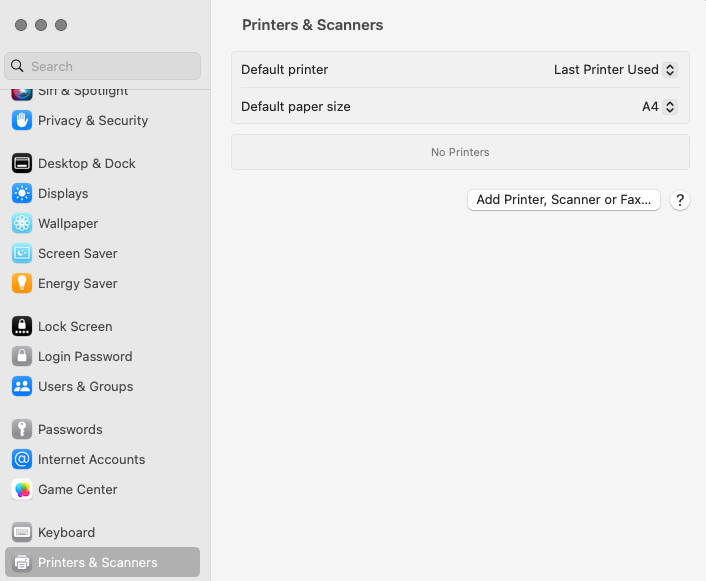
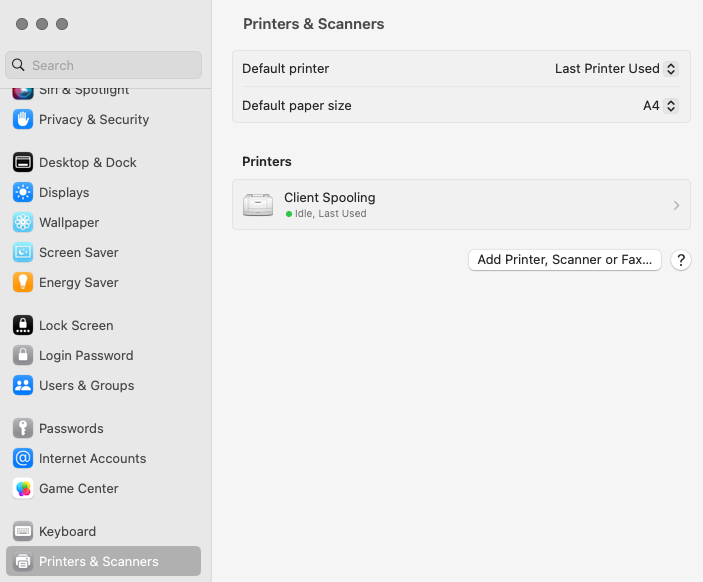
Go to Apple menu > System Preferences, and then click Printers & Scanners.
-
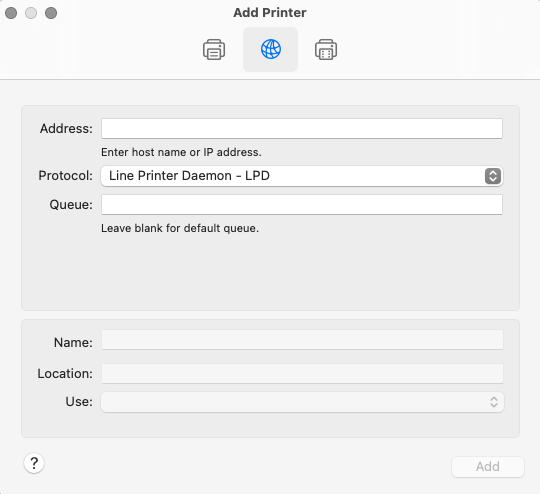
Click Add Printer, Scanner or Fax to add a new printer.
-
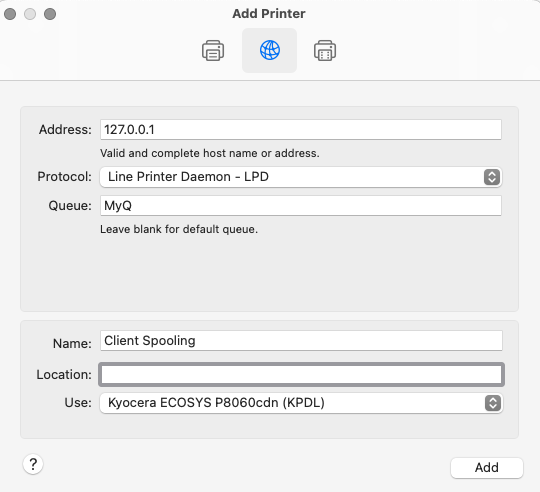
In the ribbon, select the IP icon. In the Protocol field, select Line Printer Daemon - LPD from the list.
-
In the Address field, add the IP address or hostname of the localhost. In the Queue field, add a queue name according to the MyQ server setting. Add a Name, and optionally a Location for your printer. In the Use field, select a printer driver from the list. Click Add to setup the printer.
-
Once the printer is set up, it appears on the Printers & Scanners list.
For a description of how Client Spooling works and its known limitations, see the MyQ Desktop Client guide: