.png)
Fallback Printing
With MyQ Desktop Client installed and running on the end user's workstation, you can select a backup printing device to be used for print when connection to the MyQ server is lost. The Fallback printing feature serves as an important backup tool in case of a server outage. Furthermore, it can be combined with the Client or Device Spooling and the Offline login features on MyQ embedded terminals to enable using hold print, pull print, and delegated print on the printing device.
For information on how to install and set up MyQ Desktop Client on client's computers, see the MyQ Desktop Client for Windows guide.
For information about support and setup of the Device Spooling and the Offline login features on a particular MyQ embedded terminal, see the respective MyQ embedded terminal manual.
After the installation, you need to configure the print driver port to send print files to MyQ Desktop Client, which then sends them either to the MyQ server or directly to the printing device, depending on the availability of connection to the MyQ server.
The compatibility of fallback printing is vendor and device dependent. Some devices may reject print jobs from outside their accounting server or the application operating the device. In some cases, devices may have the option to accept unauthorized jobs or jobs from unknown sources. Make sure this option is enabled on devices you plan to use as fallback. Always test your setup before you roll out fallback printing into production. Ask your MyQ provider for details and support.
Windows Settings
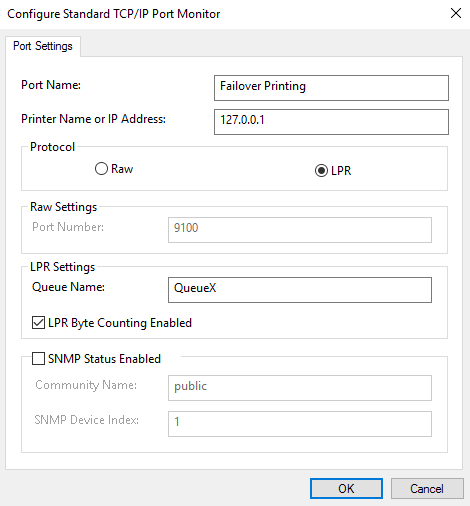
The settings in the Configure Standard TCP/IP Port Monitor dialog box must have the following values:
Printer Name or IP Address: 127.0.0.1 (IP address of the localhost in Windows) or localhost
Protocol: LPR
Queue Name: queue name according to the MyQ server setting (same as if printing to the MyQ server)
LPR Byte Counting Enabled: Selected
SNMP Status Enabled: Deselected
MacOS Settings
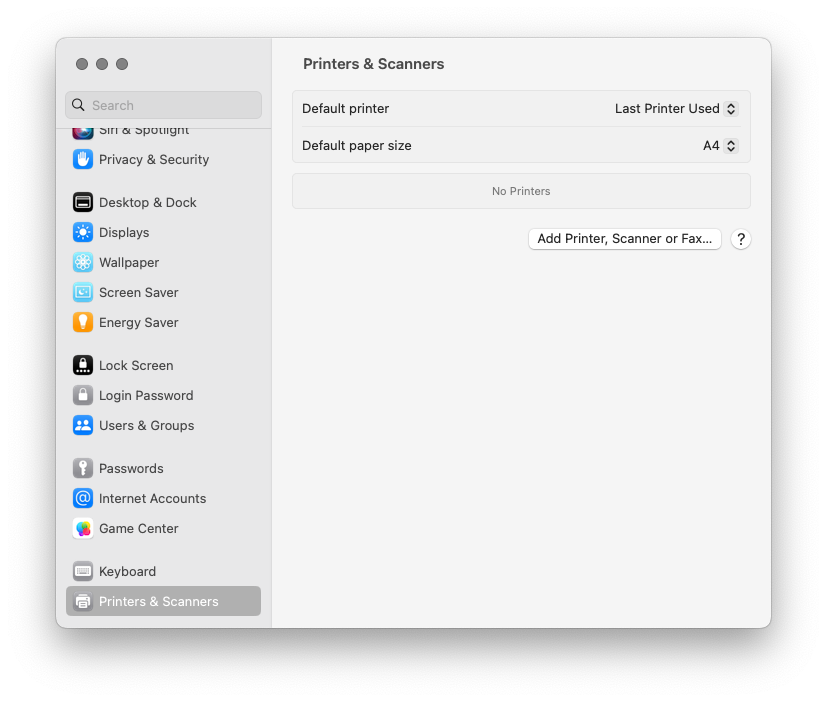
Go to Apple menu > System Preferences, and then click Printers & Scanners.
Click Add Printer, Scanner or Fax to add a new printer.
In the ribbon, select the IP icon. In the Protocol field, select Line Printer Daemon - LPD from the list.

In the Address field, add the IP address or hostname of the localhost or MyQ server’s IP address. In the Queue field, add a queue name according to the MyQ server setting. Add a Name, and optionally a Location for your printer. In the Use field, select a printer driver from the list. Click Add to set up the printer.
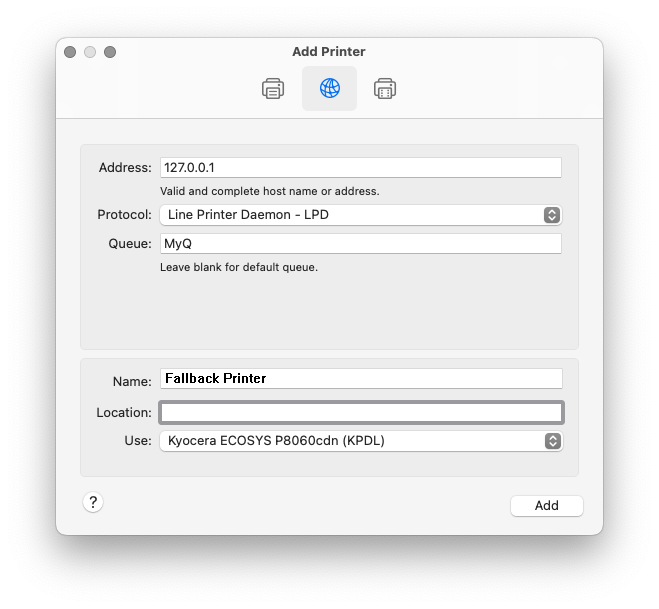
Once the printer is set up, it appears on the Printers & Scanners list.