As an administrator, you can manage multiple configuration profiles for MyQ Desktop Client in MyQ, and deploy them according to your needs. For example, you might want to specify fallback printers per office location, or you might choose to enable client spooling for selected workstations only.
You can configure profiles before deploying Desktop Client 10.2+. Once Desktop Client connects to the server, it automatically uses settings from applicable profiles if this feature is enabled.
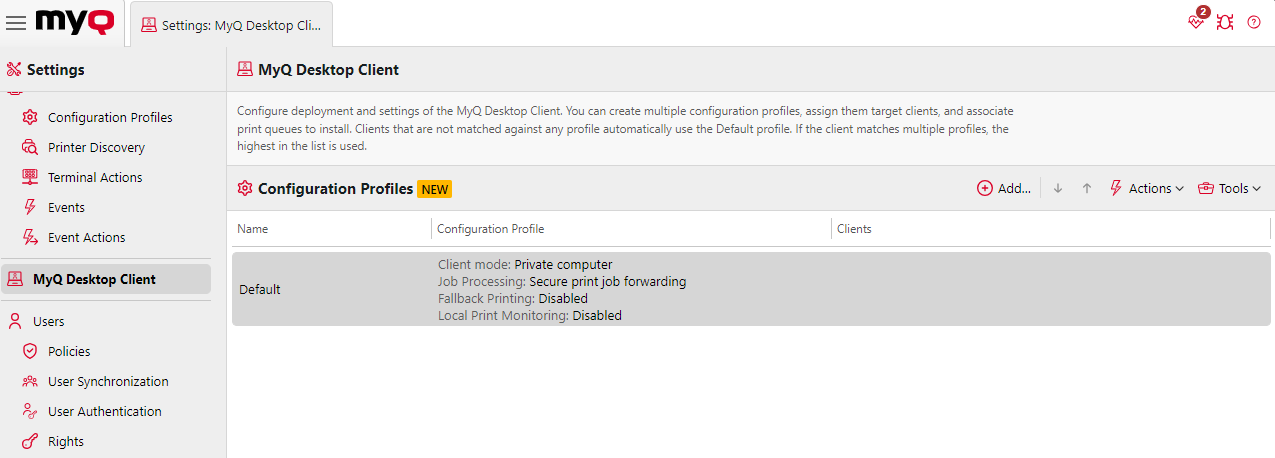
Desktop Clients that are not matched in any of the configuration profiles will use settings from the Default profile. If the client matches multiple profiles, the highest-matched profile in this list will be used.
Create a Configuration Profile for Desktop Client
-
Go to MyQ > Settings > MyQ Desktop Client, click Add in the Configuration Profiles section.
-
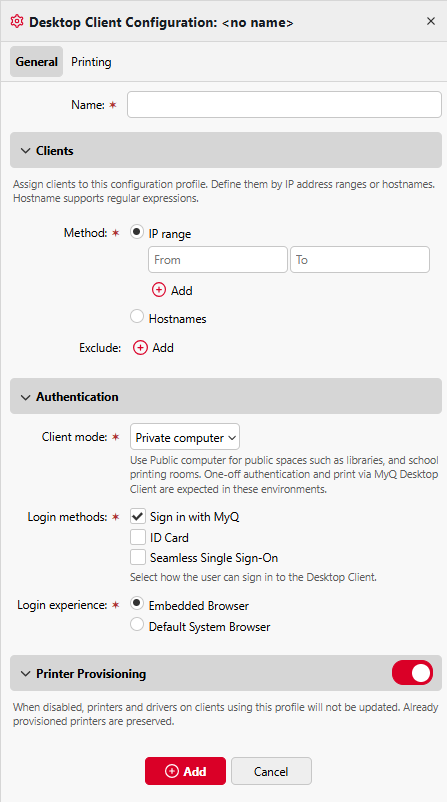
On the General tab enter a Name for your configuration profile.
-
In the Clients section specify which clients this configuration profile should apply to, either using an IP range or Hostnames regex. You can also add exclusions.
-
In the Authentication section select a Client mode.
-
Private mode: Desktop Client offers a more lenient authentication and session management approach, acknowledging the trust level of a personal or assigned device.
-
Public mode: designed with communal device security in mind, ensuring that print jobs and user sessions are managed to prevent unauthorized access.
For more information, see Public vs Private Mode.
-
-
In the Authentication section choose an appropriate Login method:
-
Sign in with MyQ
-
ID Card (requires a card reader on the user's device)
-
Seamless Single Sign-On (Seamless SSO uses Microsoft Entra ID Single Sign-on. This feature is supported on Windows only.)
-
-
In the Authentication section, chose which browser to use for client authentication:
-
Embedded Browser
Use the built-in browser of the Desktop Client application. -
Default System Browser
Use the default browser of the client OS.
Important: When using Default System Browser on clients in public mode, the administrator must ensure that browser data and cookies are cleared after each user session to prevent unauthorized access.
-
-
In Printer Provisioning choose to enable or disable Printer Provisioning. When disabled, printers and drivers on clients using this profile will not be updated, which can be helpful to prevent unwanted changes, while preserving past ones.
-
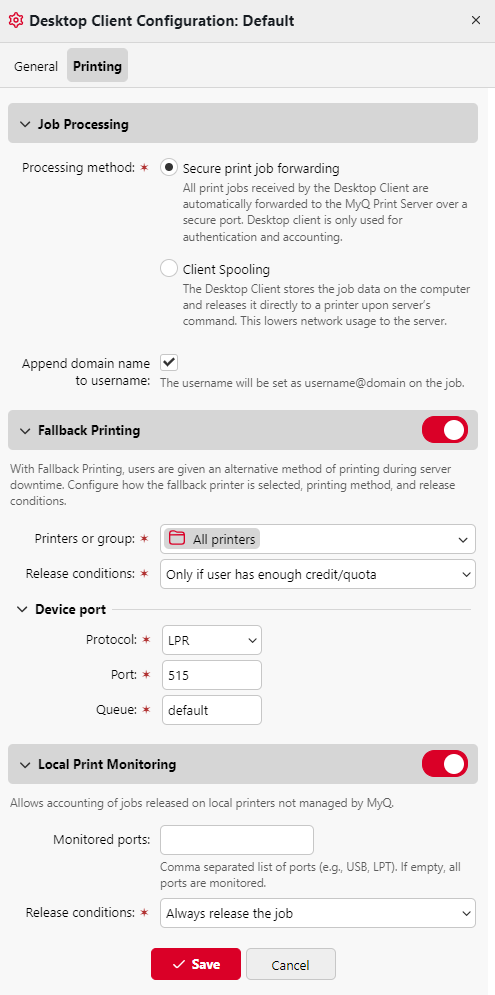
On the Printing tab in the Job Processing section select a Processing method from:
-
Secure print job forwarding: All print jobs received by the Desktop Client are automatically forwarded to the MyQ Print Server over a secure port. Desktop client is only used for authentication and accounting.
-
Client spooling: The Desktop Client stores the job data on the computer and releases it directly to a printer upon server’s command. This lowers network usage to the server.
-
-
Choose if you want to Append domain name to username, if enabled the username will be set as username@domain on the job.
-
Enable or disable Fallback Printing, which allows users to be given an alternative method of printing during server downtime. Configure how the fallback printer is selected, the printing method, and release conditions.
-
Enable or disable Local Print Monitoring, which allows the accounting of jobs released on local printers not managed by MyQ.
-
Local Print Monitoring: If enabled, jobs on printers not managed by MyQ server will be accounted.
-
Monitored ports: Enter the names of the ports that you want to monitor, separated by comma (,). You can use '*' to monitor all name-related ports (i.e.: USB* for ports USB1, USB2, etc.). Leave the field empty to monitor all ports.
-
Release conditions: Select one of the available options - Always release the job, Only if user has enough credit/quota, Only if print server is online.
-
-
Click Save. Your configuration profile is created and automatically applied.
Connect to a Central Server
It is also possible to connect Desktop Client to a site via a Central Server.
-
Edit the installer name or config file as described above to correspond to the Server Address and Server Port of the Central Server.
-
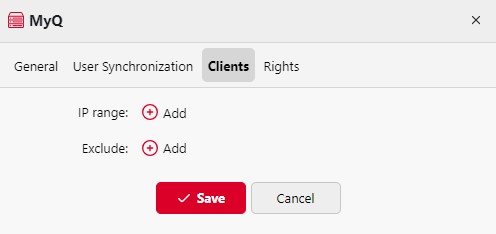
Navigate to Sites, Edit the relevant site, and enter the IP range of the devices to be connected to this location with Desktop Client (it is also possible to create exclusions).
-
Desktop Client will now connect to the specified Site server.