The easiest way to install the MyQ Canon Embedded terminal is via remote installation from the MyQ Web administrator interface. This method is very simple and it is preferable, especially when you need to install the terminal on a large number of printing devices, since you can install multiple devices in a batch.
You do this by creating separate printer discoveries and adding a configuration profile to any one of them. At the same time, you can assign the discovered printers to a group and/or queue.
Before the installation, make sure that the server hostname/IP address in MyQ, Settings, Network is correct. If it’s not, which could happen after a license update or upgrade, the remote setup will fail.

Remote Installation via Printer Discovery
-
Follow the instructions in the MyQ Print Server guide to create and configure a Printer Discovery.
-
Then, you should create a configuration profile to attach to your Printer Discovery.
-
The Canon section is displayed when the Canon terminal package is installed on the MyQ server.
Installation Initiated by the Terminal
Another method of installing an embedded terminal is to use Installation initiated by the terminal. The application has to be installed on the device (Package Installation on the Device). Install the application on the printing device system menu and then install the package on the server, create a Printer Discovery with Installation initiated by terminal and use this Printer Discovery. This may be convenient if you need to install the terminal to a small number of devices that you have physical access to.
-
Install and activate the package on the server:
-
Go to MyQ, Settings, Printers & Terminals; Under Terminal Packages click +Add and upload the MyQ Canon Terminal x.x.x.pkg package file.
-
Create a Configuration profile.
-
-
Create a Printer Discovery and activate the printer:
-
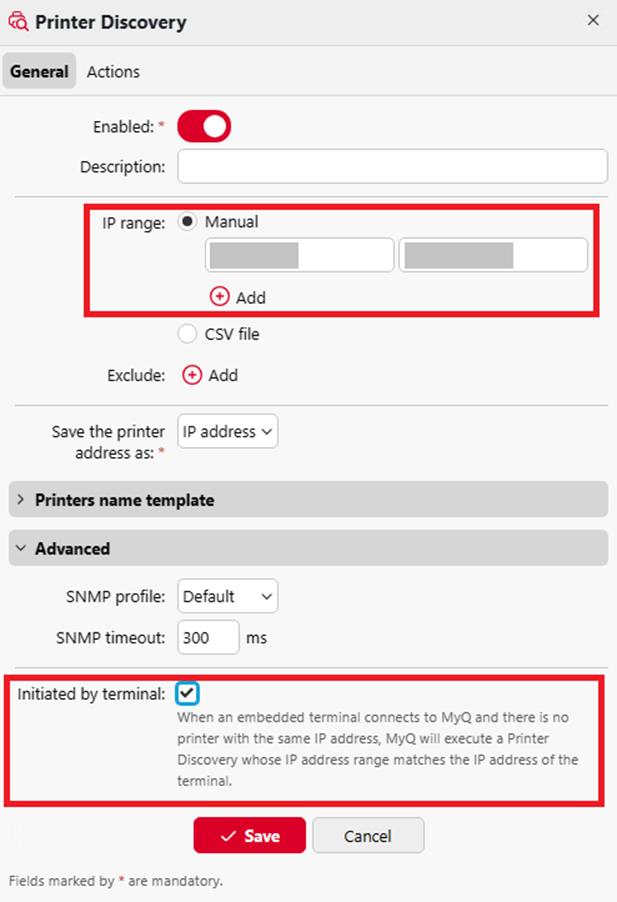
Create a Printer Discovery, specify the IP range and enable the option Initiated by terminal in the Advanced section.
-
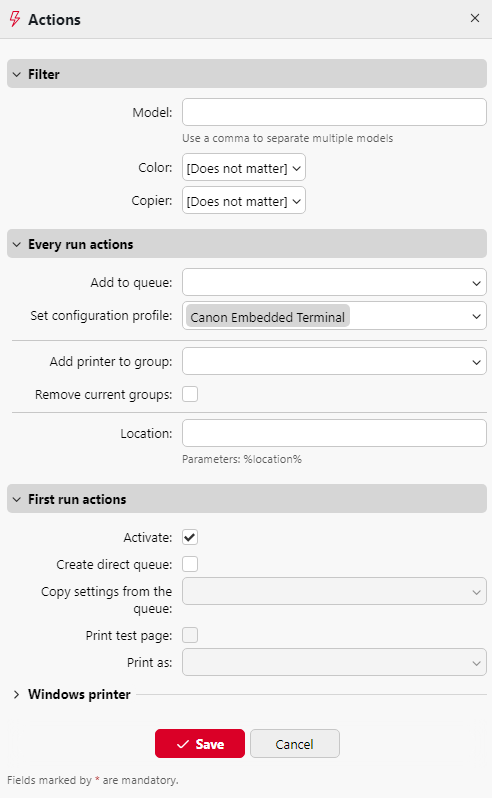
In the Printer Discovery’s Actions tab, add a new Action. In the Actions properties, in the Set configuration profile select the Configuration profile assigned to the terminal package. In the First run actions section, enable the Activate option.
-
-
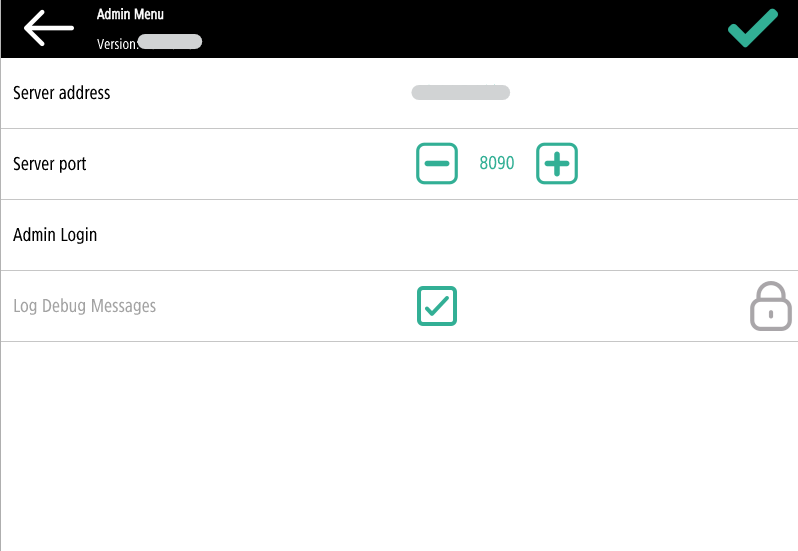
Log in to the Admin menu.
-
Specify the Server address (Hostname or IP address of the server) and the Server port and Save the configuration.
-
-
After saving the configuration in the Admin menu and leaving the Admin menu, the activation of the embedded terminal should start automatically. On the device, the “Connected to server - Configuring” message is displayed.

Running Multiple Package Versions
In certain situations, it may be necessary or helpful to utilize multiple terminal packages from the same vendor, for example, when staggering updates to a large fleet, or because certain devices are not compatible with the latest terminal packages.
Supported Versions
-
Print Server: Version 10.2 and above
-
EMB Canon Terminal: Version 10.1 Patch 4 and above
To add and run multiple package versions, see the guide to Using Multiple Terminal Packages for the Same Vendor.