Before you can start using the terminal, you need to change the following settings on the printing device:
-
Set the screen startup mode
-
Set printing limits
Setting the screen startup mode
To do this, you need to unlock the device’s Android panel screen, open the printing device system settings and set the Screen Startup Mode.
-
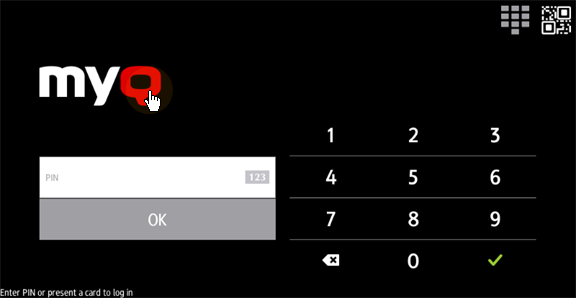
On the initial screen of the MyQ Embedded application, tap MyQ to open the admin login screen.
-
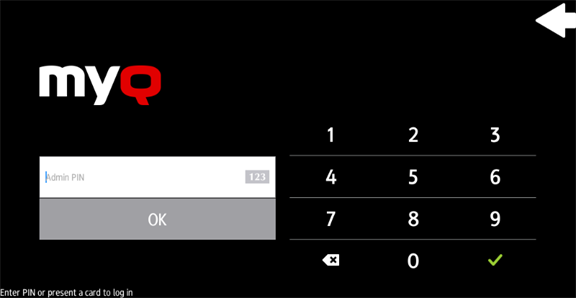
On the admin login screen, enter the admin password (the default password is 1087), and then tap OK. The Admin menu opens.
-
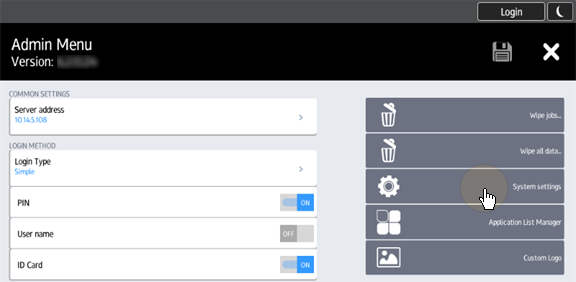
Tap System settings in the menu on the right side of the screen. The device’s panel screen opens.
-
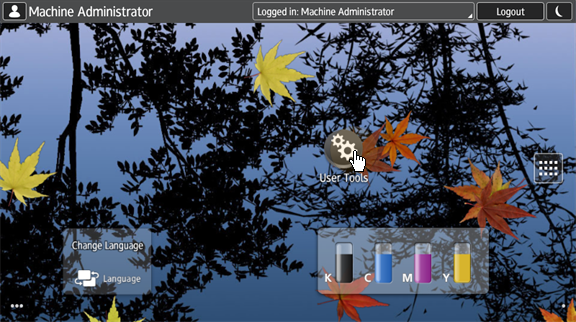
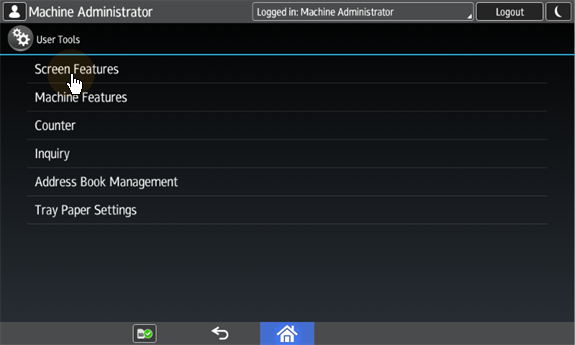
On the screen, tap User Tools. The User Tools screen opens.
-
Tap Screen Features. The Screen Features screen opens.
-
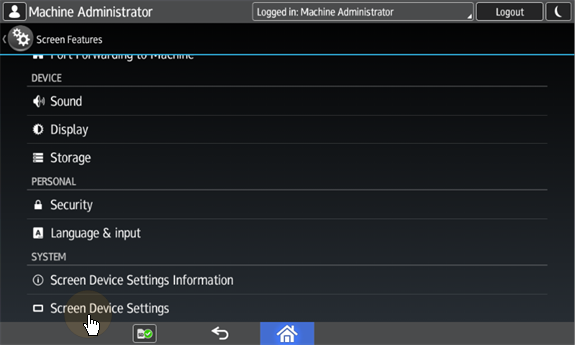
Tap Screen Device Settings. The Screen Device Settings screen opens.
-
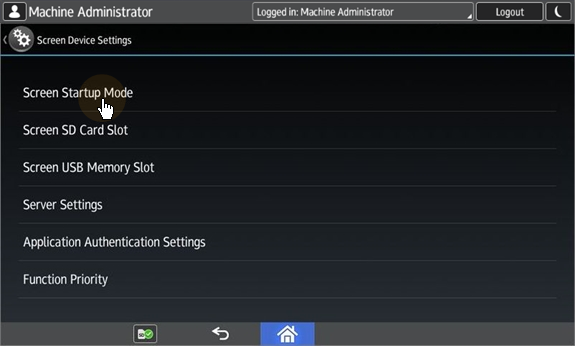
Tap Screen Startup Mode. The Screen Startup Mode widget opens.
-
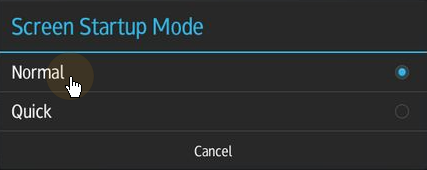
On the widget, tap Normal.
Setting printing limits
To do this, you need to unlock the device’s Android panel screen, open the printing device system settings and and change two settings there: the Machine action when limit is reached setting, and the Enhanced Print Volume Use Limitation setting.
-
On the initial screen of the MyQ Embedded application, tap MyQ to open the admin login screen.
-
On the admin login screen, enter the admin password (the default password is 1087), and then tap OK. The Admin menu opens.
-
Tap System settings in the menu on the right side of the screen. The device’s panel screen opens.
-
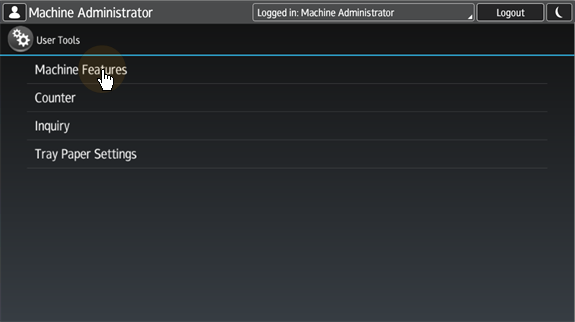
On the screen, tap User Tools. The User Tools screen opens.
-
Tap Machine Features. The Machine Features screen opens.
-
Tap System Settings. The System Settings screen opens.
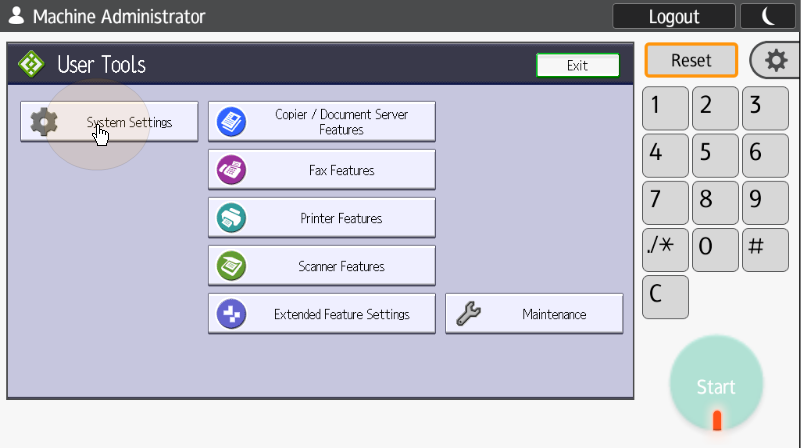
-
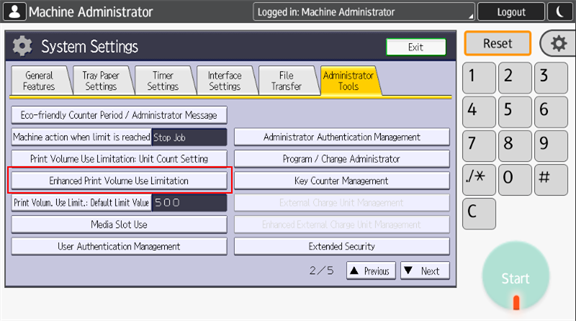
Tap Administrator Tools. The Administrator Tools tab opens.

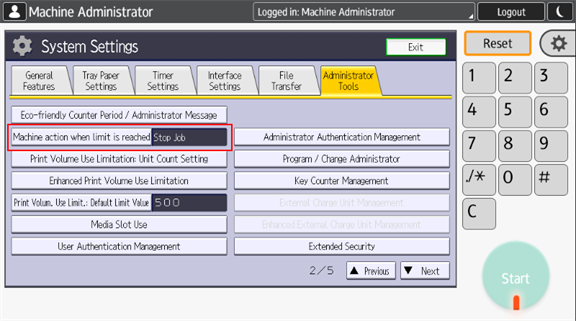
-
Tap Machine action when limit is reached. The Machine Action When Limit is Reached dialog box appears.
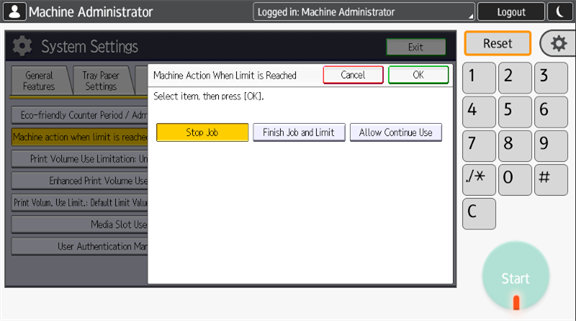
-
In the dialog box, select the Stop Job option, and then tap OK at the top-right corner of the screen. You are returned to the Administrator Tools tab.
-
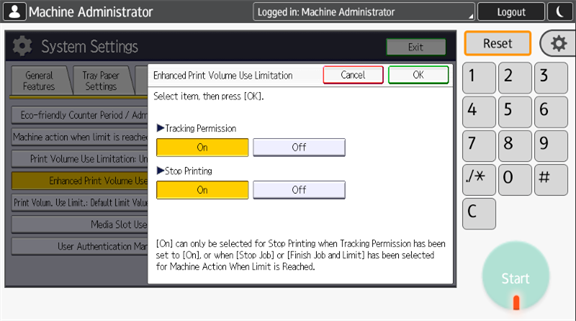
On the tab, tap Enhanced Print Volume Use Limitation. The Enhanced Print Volume Use Limitation dialog box appears.
-
In the dialog box, set Tracking permission and Stop Printing to On, and then tap OK at the top-right corner.
-
Restart the printing device.