.png)
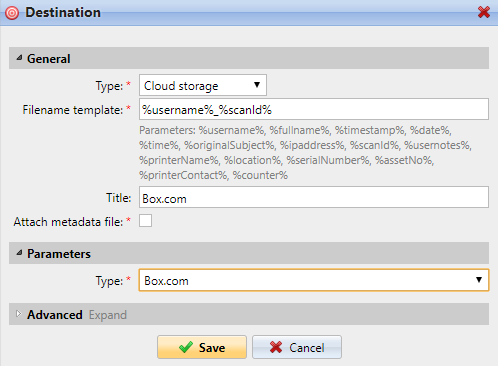
Scan to Box.com
To enable scanning to Box.com:
Select the Cloud Storage option in the Type drop-down.
Select the Box.com option in the Type drop-down in the Parameters section, and then click Save.
If the following two conditions are met, the cloud storage widget is displayed on the Home screen of the user logged on the MyQ Web Interface:
There is at least one Easy Scan terminal action with this destination.
The user has rights to see the Easy Scan button or is connected to cloud drive.

To be able to store the outgoing scan file on Box.com, the user has to be connected.
To connect to Box.com, the user has to perform the following actions:
Log in to the MyQ Web user interface with your user account.
On the Cloud storage widget, click Connect. The Cloud storage dialog box appears.
Click Login to the cloud storage.
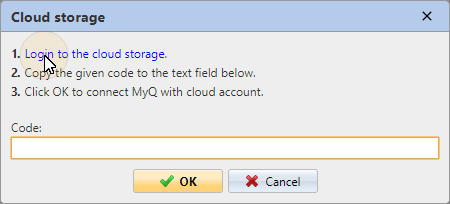
Sign-in to Box.com and confirm permissions (when asked about the permissions, click Yes).
Copy the given code.
Paste the code to the MyQ Cloud storage login dialog.
Click OK to connect the cloud storage to MyQ. The Box.com connection status changes to Connected.