Personalization Settings
On this tab, you can set a custom message to be shown on the Web accounts of MyQ users, add links to your own custom help, and custom application logos to be used in MyQ, on MyQ terminals, and in MyQ Desktop Client.

If you want to change the MyQ web UI colors and fonts, you can do so by providing a theme file in the config.ini.
Dashboard custom message
Here you can enter a message to be displayed on the MyQ users web accounts. After you change the message, click Save at the bottom of the Personalization settings tab.
The %admin% parameter can be used to display the email address of the MyQ administrator within the message (the Administrator email set on the General settings tab).

Custom help
Here you can add a link to your own web based help that will be displayed as a gadget on the user's MyQ home page.
To add a custom help link, enter the title and the link of your custom help, and then click Save at the bottom of the tab.

Custom application logo
Here you can add your company's logo to be used in the MyQ system. The logo will appear on the upper right corner of the MyQ Web Interface, on MyQ credit vouchers, in MyQ Desktop Client, and on reports.
Supported picture formats are JPG/JPEG/PNG/BMP and the recommended size is 398px x 92px.
To import the logo, click +Add, Browse for the file and Open it, and then click Save at the bottom of the tab. A preview of the new logo is displayed on the tab.

Terminal personalization
Here you can add your company's logo to be used on all your MyQ embedded terminals.
Supported formats are JPG/JPEG/PNG/BMP and the recommended size is 340px x 92px.
You can also add a Theme to the logo. You need the MyQ Theme Editor app to create such a theme.
To import the logo, click +Add, Browse for the file and Open it, and then click Save at the bottom of the tab. A preview of the new logo is displayed on the tab.

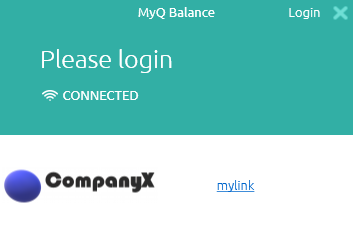
Custom link in the MyQ Desktop Client
Here you can add a link to your own web based help (weblink, network path or local path) that will be displayed in MyQ Desktop Client.

To add the custom help link, enter the title and the link of your custom help, and then click Save at the bottom of the tab.

.png)