Requirements
-
MyQ Epson Embedded terminal 10.1 is supported on MyQ Print server 10.1 and newer.
-
MyQ Epson Embedded terminal 10.1 patch 6+ is supported on MyQ Print server 10.1 patch 9+ or MyQ Print server 10.2 RC7+.
For information about communication protocols and ports, check the MyQ Print Server guide.
The correct time and date must be set on the printing device to avoid issues with the Scan to Me functionality.
Important note: There should be differences in counters between the device web UI and the MyQ reports because Epson devices omit accounting of blank pages, but MyQ is counting them.
Epson Open Platform needs to be enabled on the printing device's web UI before the installation.
To enable it:
-
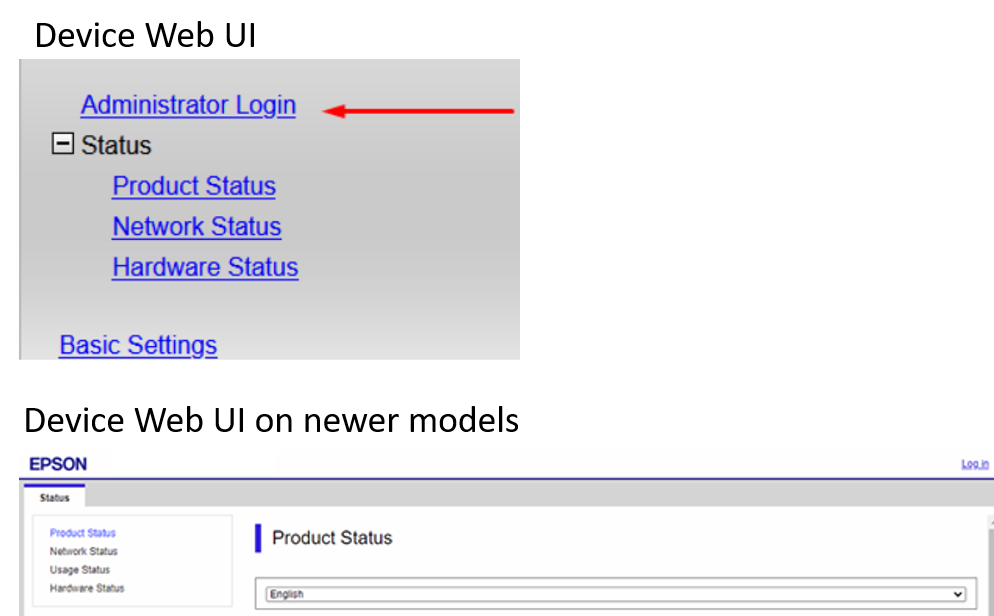
Go to the printer's web UI by accessing http://*IP address of the printer*/
-
Go to Administrator Login.
-
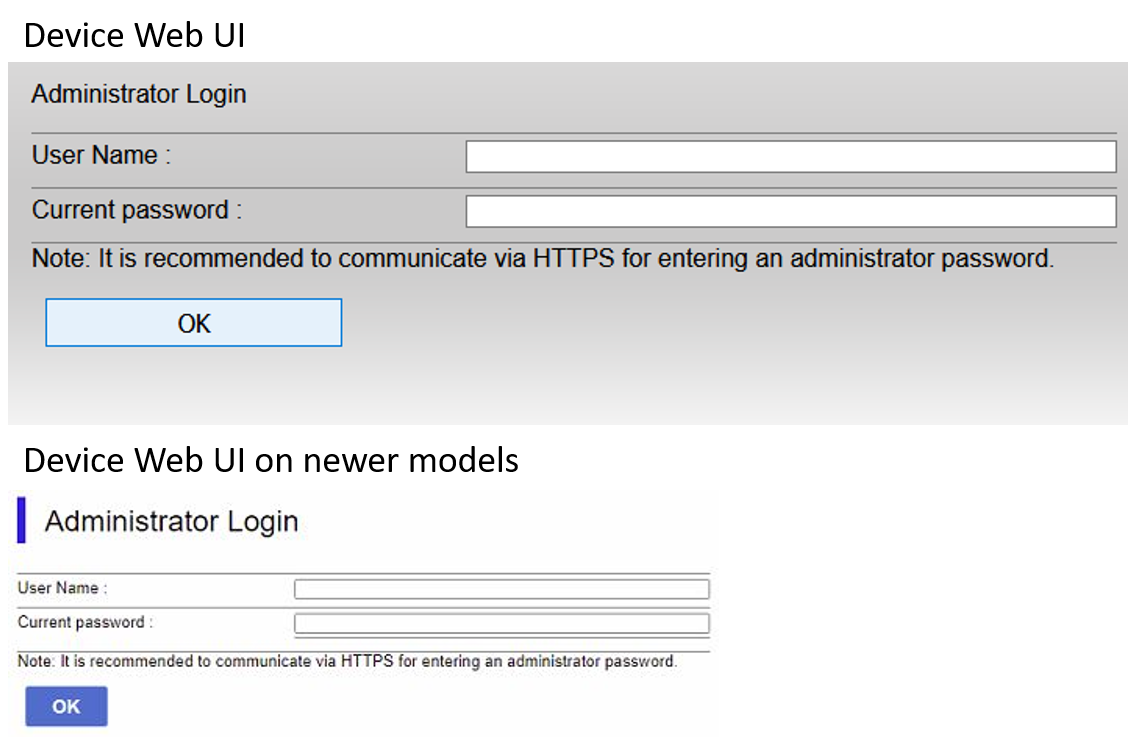
Provide the User Name (administrator by default) and Current password (the device's admin password) credentials and click OK. These credentials are mandatory and if they are not provided, the installation fails.
-
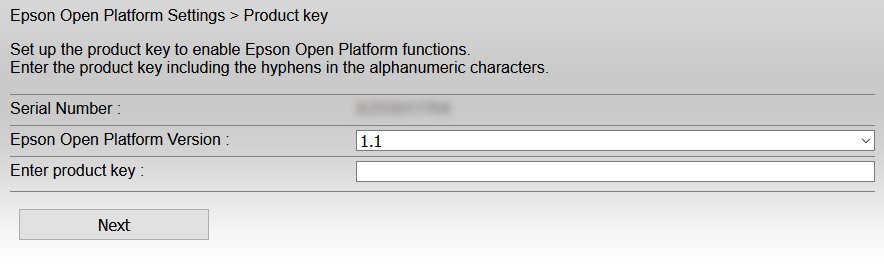
On the left-side menu, expand Epson Open Platform Settings and click Product key.
-
Select the Epson Open Platform Version (the latest one is preferred) and Enter product key. To obtain this product key, you need to register your printing device with Epson support.
-
Click Next, verify the information provided, and click OK (the network is restarted, and the printer is available again after a few minutes).
Installation of the SSL certificate
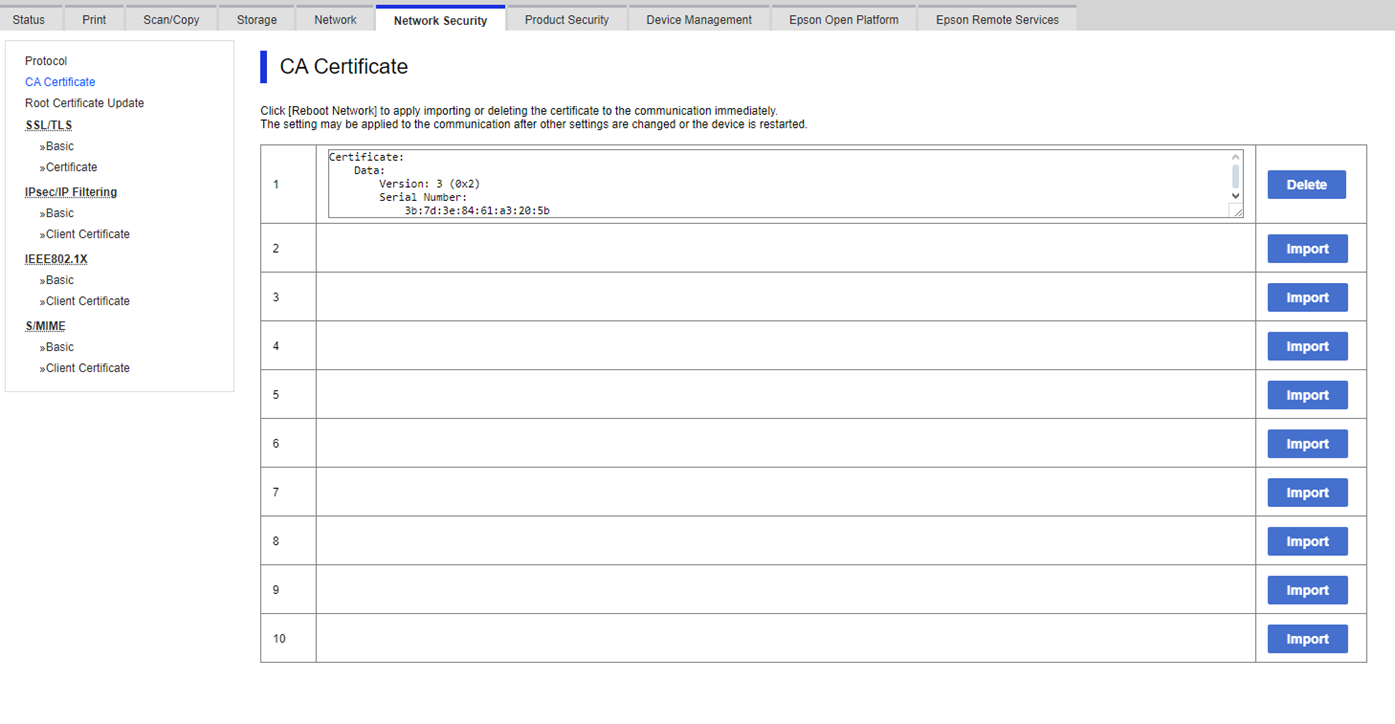
Starting with version 10.1, the CA certificate is installed automatically during remote setup when “Certificate authority mode” is set to “Built-in Certificate Authority” or “Company Certificate Authority”. In case “Certificate authority mode” is set to “Manual Certificate Management” the certificate has to be uploaded in the device’s Web UI. Go to the Network Security tab, in the CA Certificate section, and Import the certificate.
Some devices require the manual installation of the SSL certificate into the device’s web UI for using Easy Scan operations. The certificate can be uploaded in the device’s Web UI. Go to the Network Security tab, in the CA Certificate section, and Import the certificate.
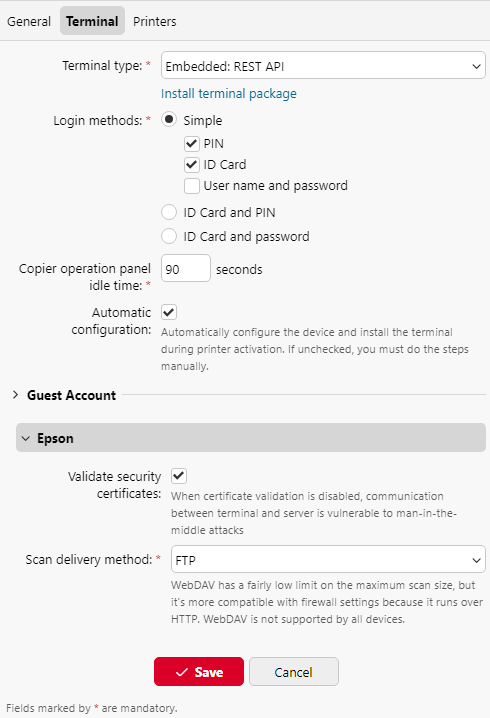
However, when “Validate Security Certificate” option is disabled in Configuration Profile, the printer doesn’t validate certificates at all and no CA certificate is necessary.
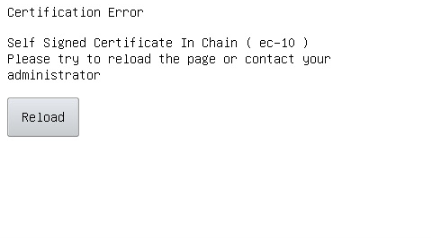
Note that when this flag is enabled but a valid CA certificate is not installed in the printer, the device will show the following white error screen:
When the flag is enabled and a valid CA certificate is installed, but IP address was used as MyQ server address in the Configuration Profile, the device will show the following white error screen:
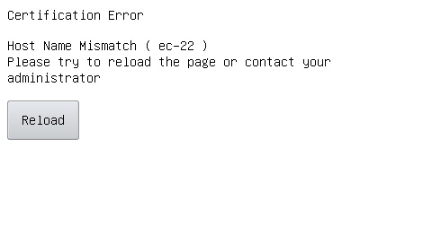
This is caused by the Epson browser being unable to validate certificate by SAN. There are a few options how to get around this:
-
Do not use IP address as MyQ server address in the Configurations Profile.
-
If you have to use IP address as MyQ server address, set the IP address as the hostname in Network Settings.
-
If you have to use IP address as MyQ server address and cannot change the hostname in Network Settings, disable Validate security certificates in the vendor specific settings (note that the connection is then vulnerable to MITM attacks).