Device Spooling
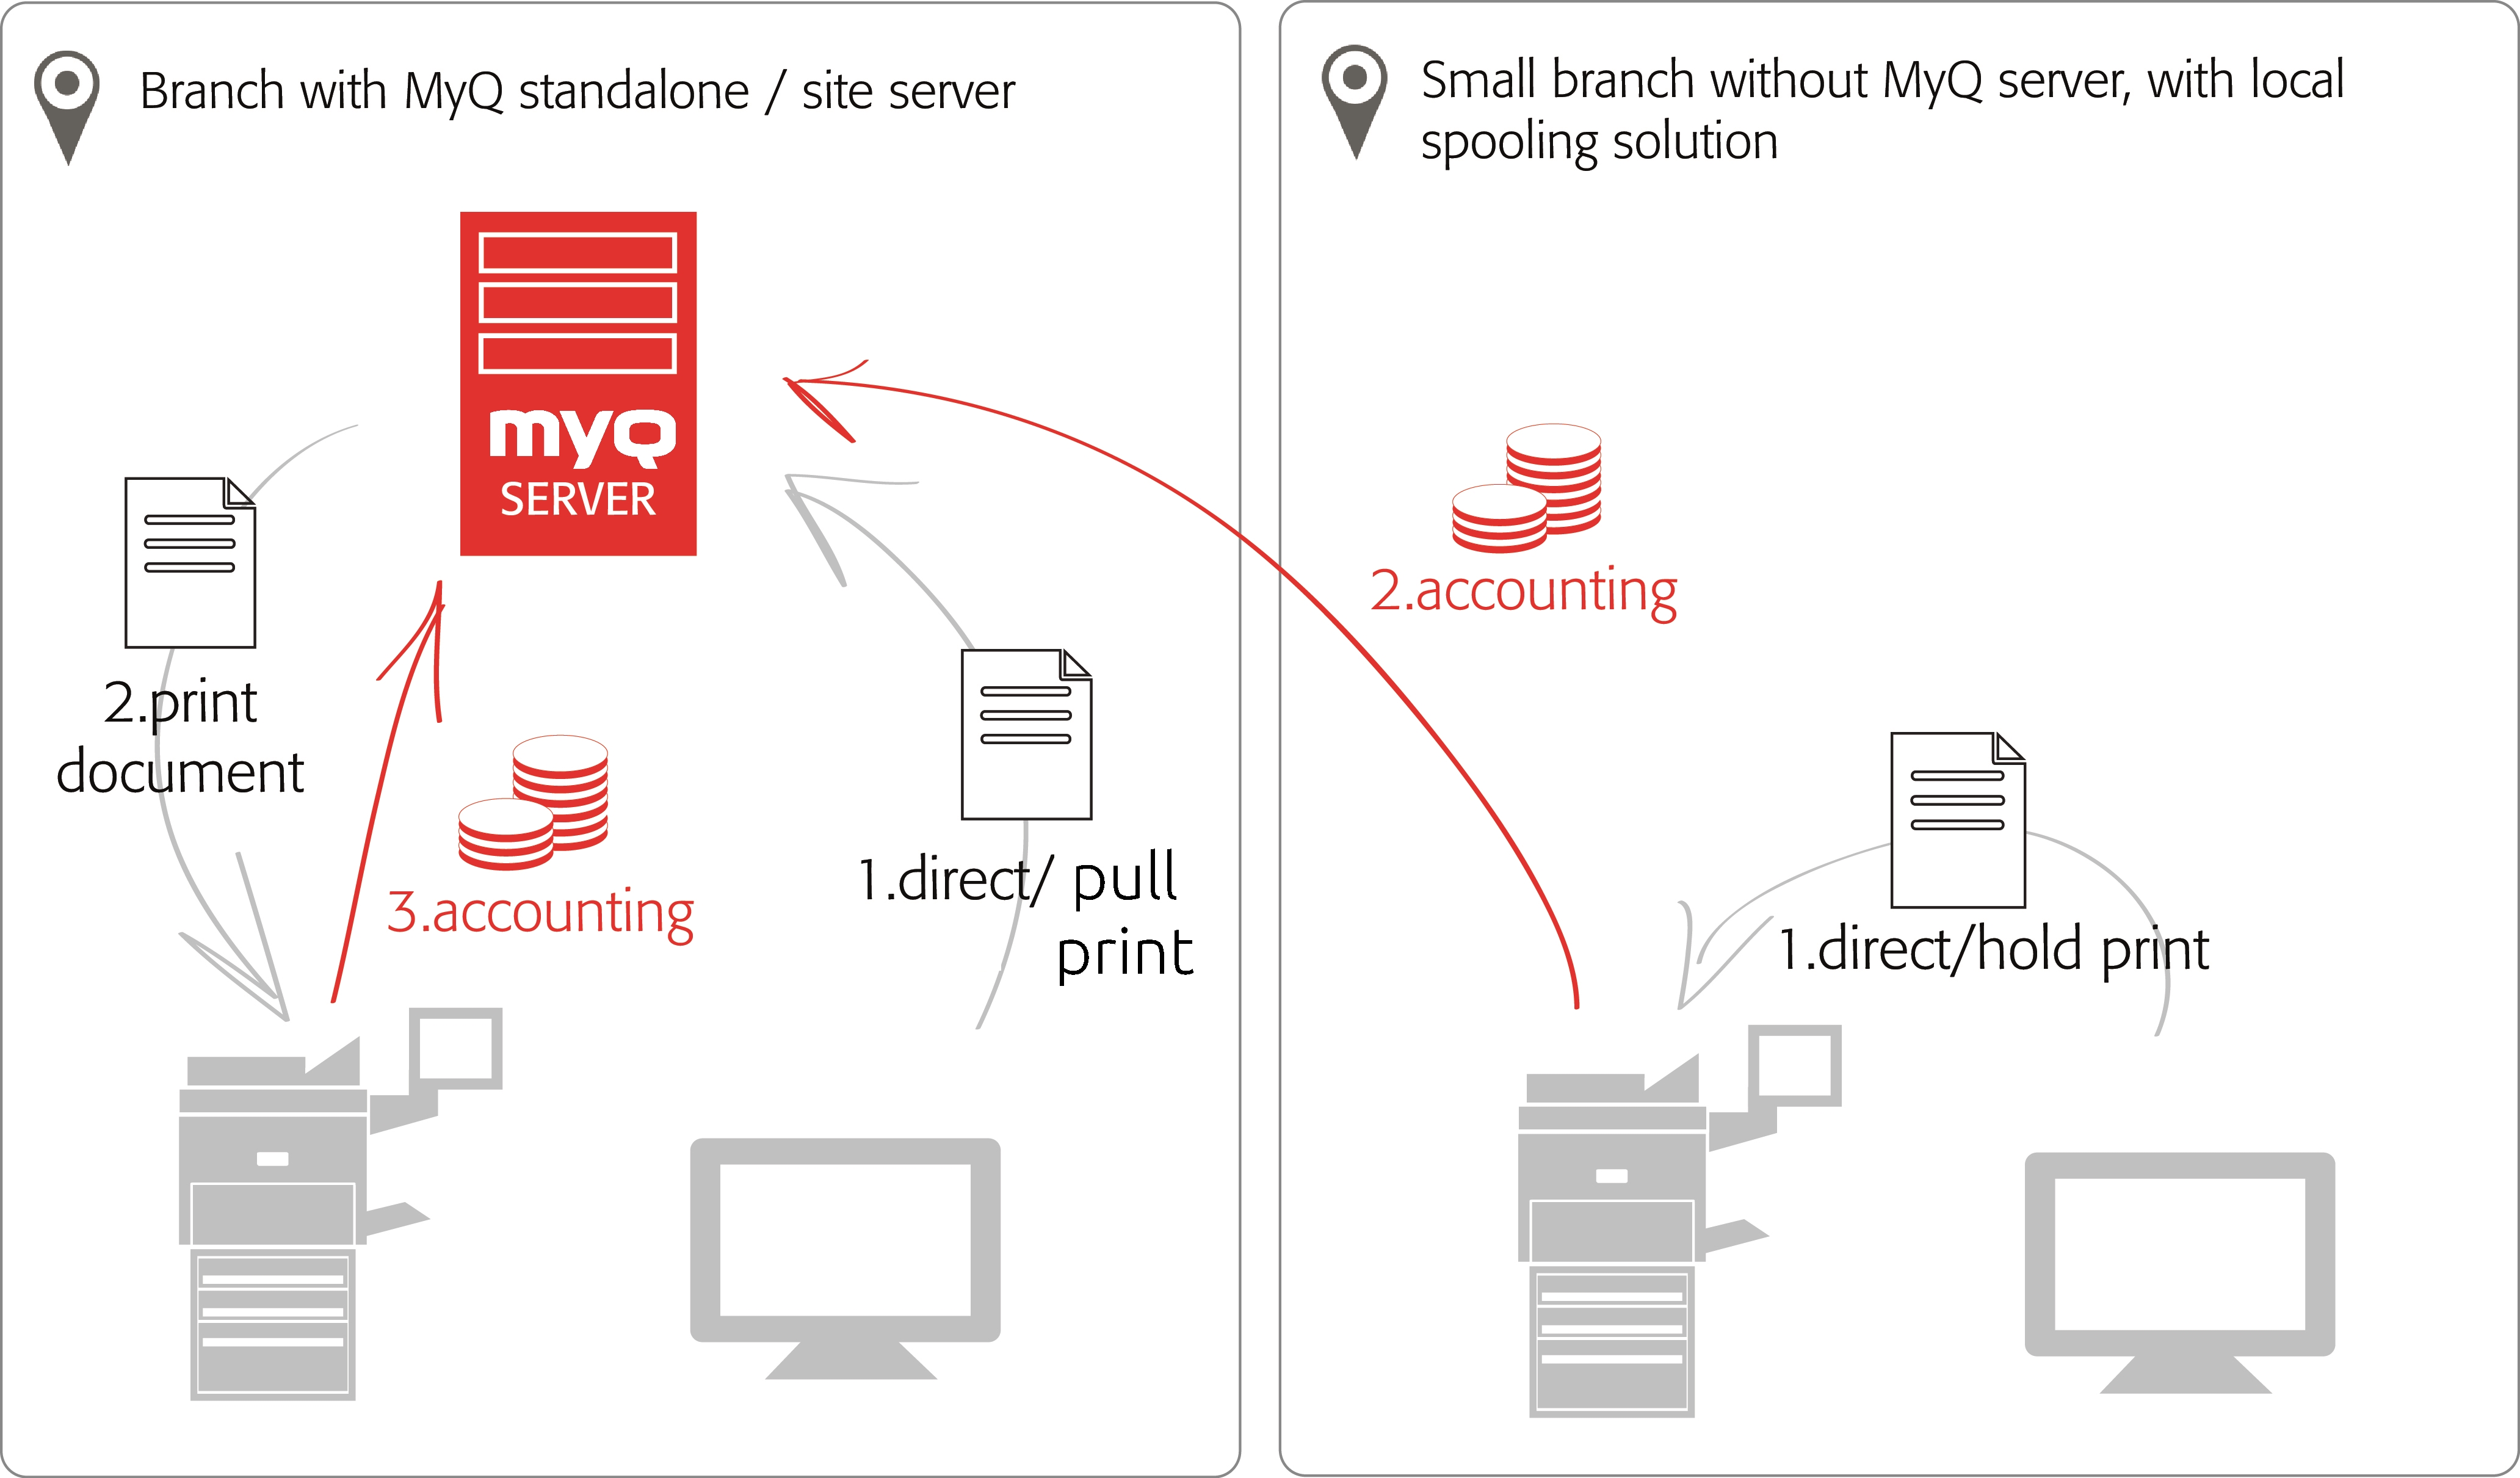
Under normal circumstances, print jobs are sent to the MyQ server where they are stored and wait for release. It means that every print job has to be sent from a user PC to the MyQ server and then from the MyQ server to a printing device. This is fine for networks with a good bandwidth connection, but it might not be an optimal solution for customers with many small branches and limited bandwidth to the MyQ Central server. In such cases, it is unproductive to send the job from the branch to MyQ server and back.
Device Spooling is a feature that solves this problem. With Device Spooling enabled, a print job is sent directly to the device and saved to its hard disk. It waits there to be released in the standard way.

Limitations
Project Accounting is not supported (print jobs have the Without Project option set)
Favorite jobs are not supported
Job Roaming is not supported
Print job archiving is not supported
Job preview is not supported
Setting up Device Spooling
To open the setup screen, go to MyQ, Settings, Printers & Terminals. Under Device Spooling, you can activate the feature and change its settings:

Enabled: Click to enable or disable the feature.
Delete ready jobs older than ___ hours: Hours to wait before the spooled jobs are deleted from the printing device's hard disk.
Pull Print: Select to activate pull print for Device Spooling. With the Pull Print extension activated, jobs sent to one printing device can be printed on any other printing device connected to the same local area network. If there are more mutually connected devices at the branch, the jobs spooled on the devices can be shared between them. In such cases, jobs sent to one device are displayed on the list of print jobs and can be printed on other devices. The pull print feature is limited to devices on the same subnet.
For the local pull print functionality, it's necessary to have the same time set on all of the participating devices. The easiest way to do this is to synchronize the devices with a time server, such as time.windows.com, time.nist.gov, etc. You can do this in the Date/Time settings on the device Web UI.
To submit the changes, click Save at the bottom of the tab. The Apply new settings dialog box appears. Keep the Reset all terminals option selected and click OK. The settings are then distributed to all connected terminals.
Print Drivers for Device Spooling
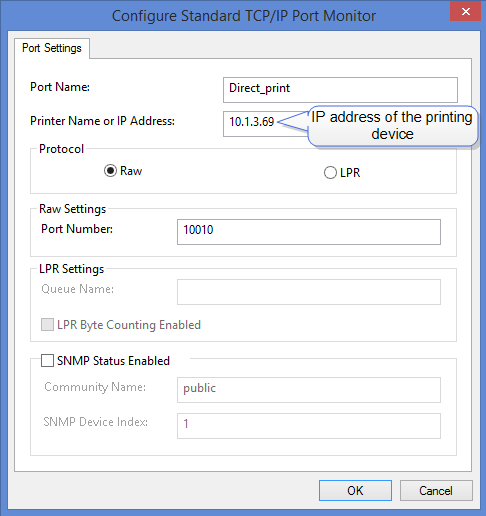
To enable users to send jobs directly to the printing device and use Device Spooling, you have to create a new print port and set a port protocol and port number. When configuring the port, use the Raw protocol and one of the four following ports:
10010: Port for direct print. The job is automatically printed after it is received by the printing device.
10011: Port for secured hold print. The job is spooled by the printer and waits there until the user logs in and prints it. It is not possible to print this job on any other than this particular printing device.
10012: Port for Device Spooling pull print. The job is spooled by the printing device. Once the user logs on any of the devices connected to the same subnet, information about this job is provided and the job is displayed in the list of the available jobs and can be printed.
10013: Port for Device Spooling delegated print. Works the same as the Device Spooling pull print, except that the job can be printed by delegates of the sending user.

IP Filters
To ensure proper functioning of the offline pull print feature, you have to turn off IP filters or set a new IP filter which includes all the IP addresses of the printing devices, where the pull print jobs can be stored.
Print Languages Supported by Device Spooling
The following print languages are supported by Device Spooling:
PCL XL
PCL5c
KPDL
PDF
.png)