
Troubleshooting
Depending on the device model, Accounting methods may not be correctly configured during the remote setup. In case of issues, check the below settings in the device Web UI:
For Xerox EIP 3.7:
In the device Web UI, go to Permissions > Accounting methods > Network.
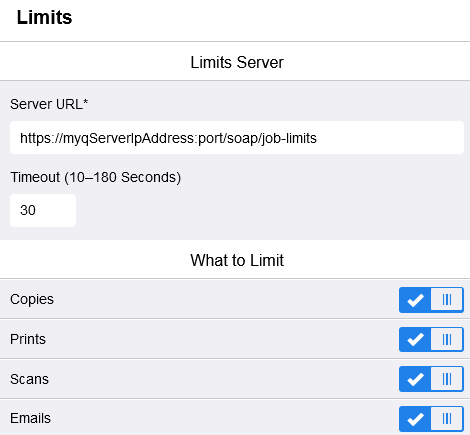
Under Limits, type the Server URL in the following format:
https://myqServerIpAddress:port/soap/job-limits
Replace myqServerIpAddress and port with the real values that correspond to the MyQ server IP address and the Terminal Package port.Under What to limit, make sure that Copies, Prints, Scans, and Emails are enabled. If not, enable them and click OK.
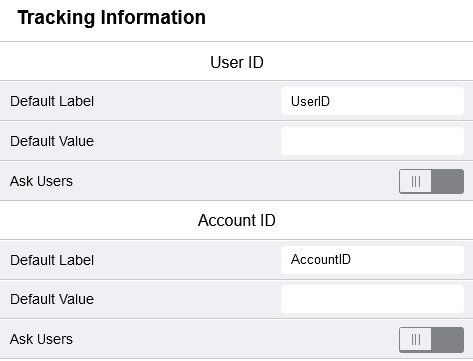
Under Tracking information, make sure that Ask User ID and Ask Account ID are disabled. If not, disable them and click OK.
For Xerox EIP 4.0:
In the device Web UI, go to Properties > Login/Permissions/Accounting > Accounting methods.
Make sure that the Method is set to Network Accounting. If not, change it and click Save.

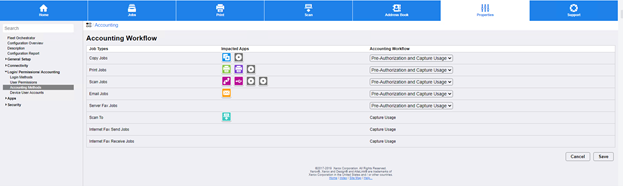
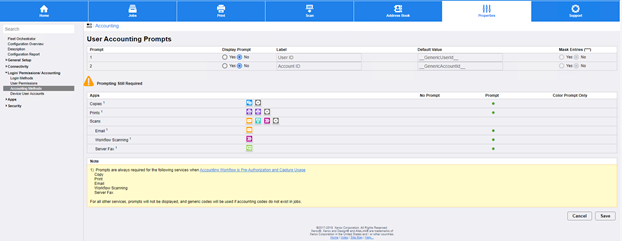
Under Accounting Workflow, make sure that Copy jobs, Print jobs, Scan jobs, and Email jobs are set to Pre-Authorization and Capture Usage. If not, change them and click Save.
Under Job Limits Server, type the Server URL in the following format:
https://myqServerIpAddress:port/soap/job-limits
Replace myqServerIpAddress and port with the real values that correspond to the MyQ server IP address and the Terminal Package port.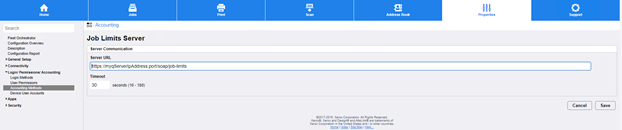
Under User Accounting Prompts, make sure that the Display Prompt options for User ID and Account ID are set to No. If not, change them and click Save.
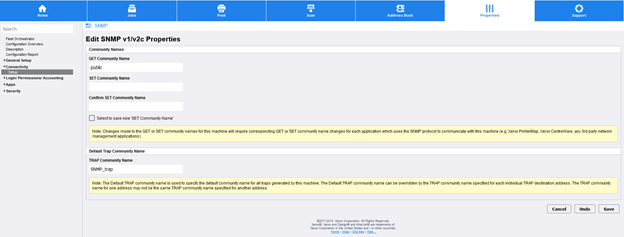
Go to Properties > Connectivity > Setup > SNMP > Edit SNMP v1/v2c Properties.
Under SET Community Name and Confirm SET Community Name, type private, and click Save.
Sometimes after a device factory reset, this setting is changed, the remote setup is failing, and the device configuration isn’t changed. After setting SNMP here, the remote setup should configure the device correctly.