
Using Scan to Me
To send the email to the desired destination, the scan needs to be directed to a specific receiver email address. There are two options to enable MyQ users to send the scans there: provide them with the respective receiver email address, or predefine these email addresses on the printing device's Web UI.
Email addresses for Scan to Me
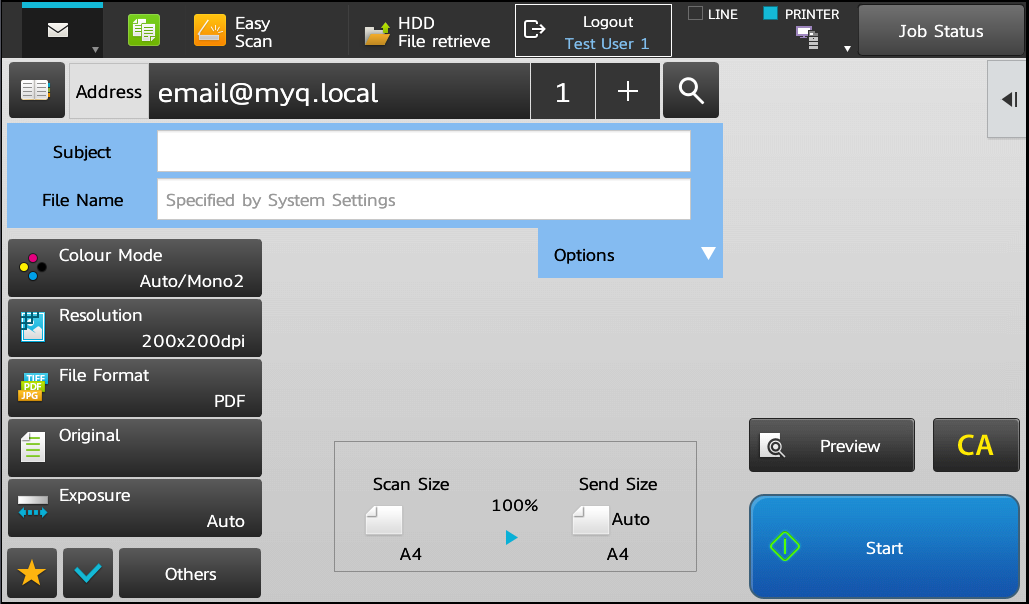
Sending scans to the user's primary email - The scanned document is sent to the user email set in the email text box on the user properties panel. The receiver email address has to be email@myq.local.
Sending scans to other emails - The scanned document is sent to all emails set in the User's scan storage text box (multiple emails are separated by commas) on the user properties panel. The receiver email address has to be folder@myq.local.
Storing scans to the user's scan folder - You have to create a shared folder and ensure that MyQ has access to this folder. After this, enter the folder's location to the User's scan storage text box. The scanned document is sent to MyQ, and then stored in the shared folder via the SMB protocol. The stored document file name consists of the user account name, the date, and the time when the scan was sent.
The receiver email address has to be folder@myq.local.
Predefined list of the MyQ destinations on the printing device
Default addresses for the e-mail destination (email@myq.local) and the folder destination (folder@myq.local) must be registered via the device's web UI in order to be accessible in the panel address book.
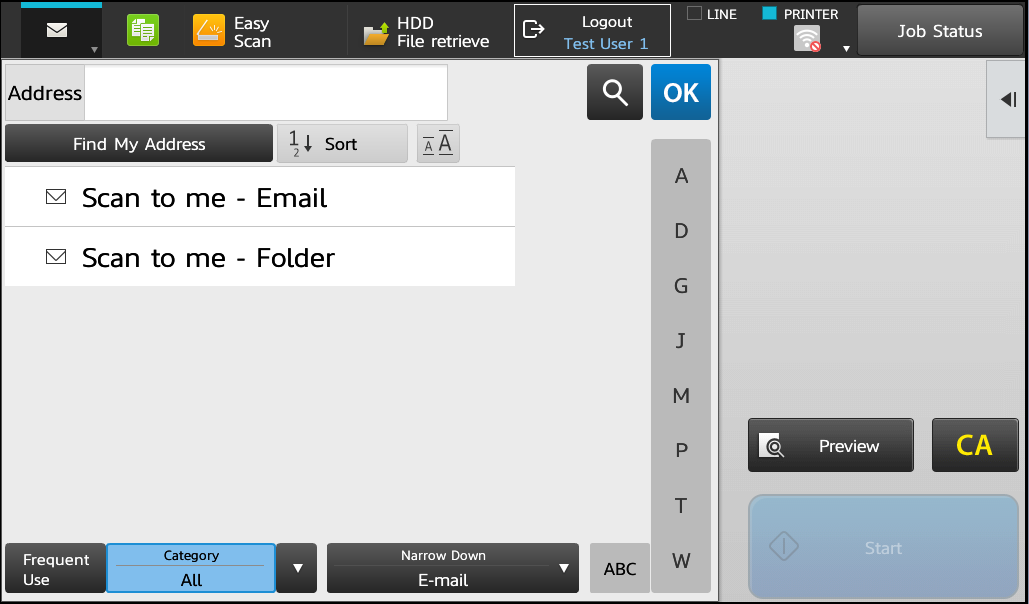
If the destination address is not present, the users can still type the address manually.
To register the default destination on the legacy interface:
Log on the printing device's Web User Interface as an administrator (http://*IP Address of the device*).
On the menu on the left side of the Web UI screen, click Address Book.
Click the Add(Y) button to register a new destination.
Enter a display name (E.g. Scan to me - Email) for the contact into the Address Name (Required) field. Enter email@myq.local into the E-mail Address (Required) field. In the Address Public Setting field select All.
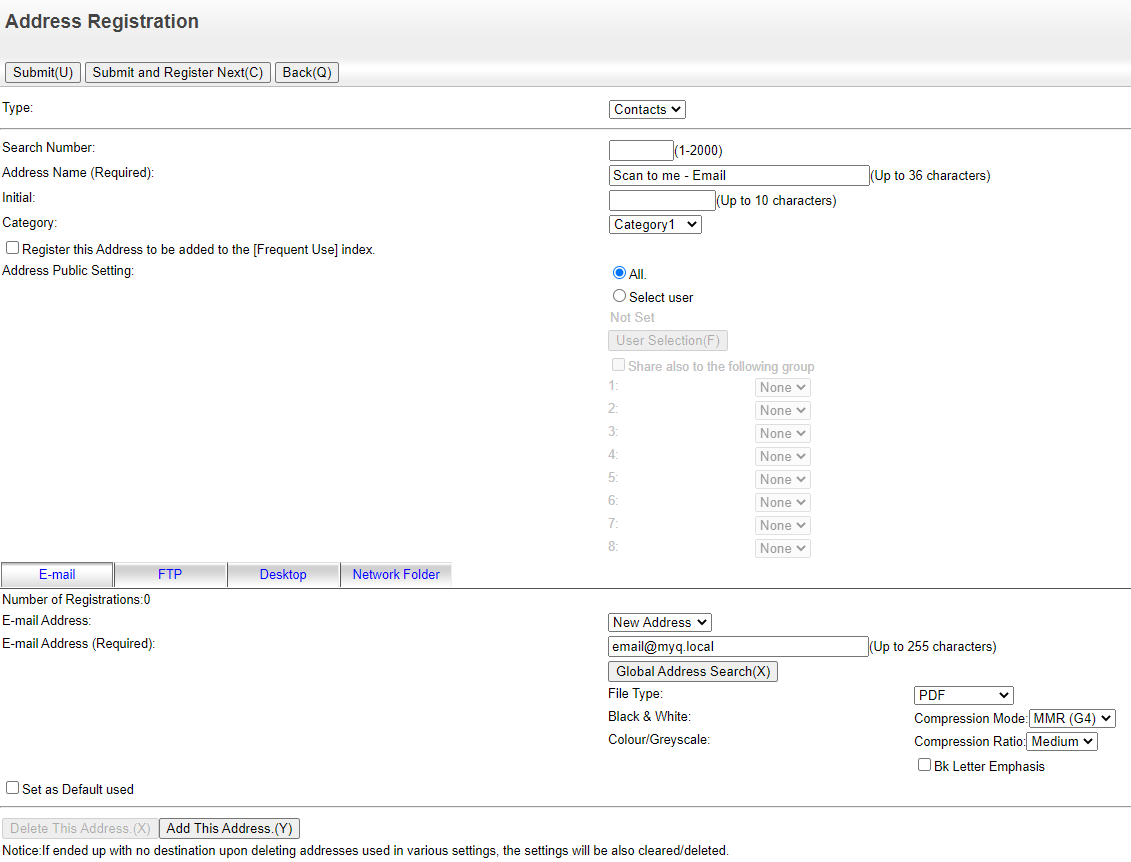
Click Submit and Register Next(C).
Enter a display name (E.g. Scan to me - Folder) for the contact into the Address Name (Required) field. Enter folder@myq.local into the E-mail Address (Required) field. In the Address Public Setting field select All.
Click the Submit(U) button.
Successfully created contacts will now appear in the Address Book.
If you have already registered those destinations in the Address Book in the past, make sure that the Email Address and the Address Public Setting options are correctly set.
To register the default destination on the modern interface:
Log on the printing device's Web User Interface as an administrator (http://*IP Address of the device*).
Click Address Book on the top menu.
Click the Add(Y) button to register a new destination.
Enter a display name (E.g. Scan to me - Email) for the contact into the Address Name (Required) field. Enter email@myq.local into the E-mail Address (Required) field. In the Address Public Setting field select All.
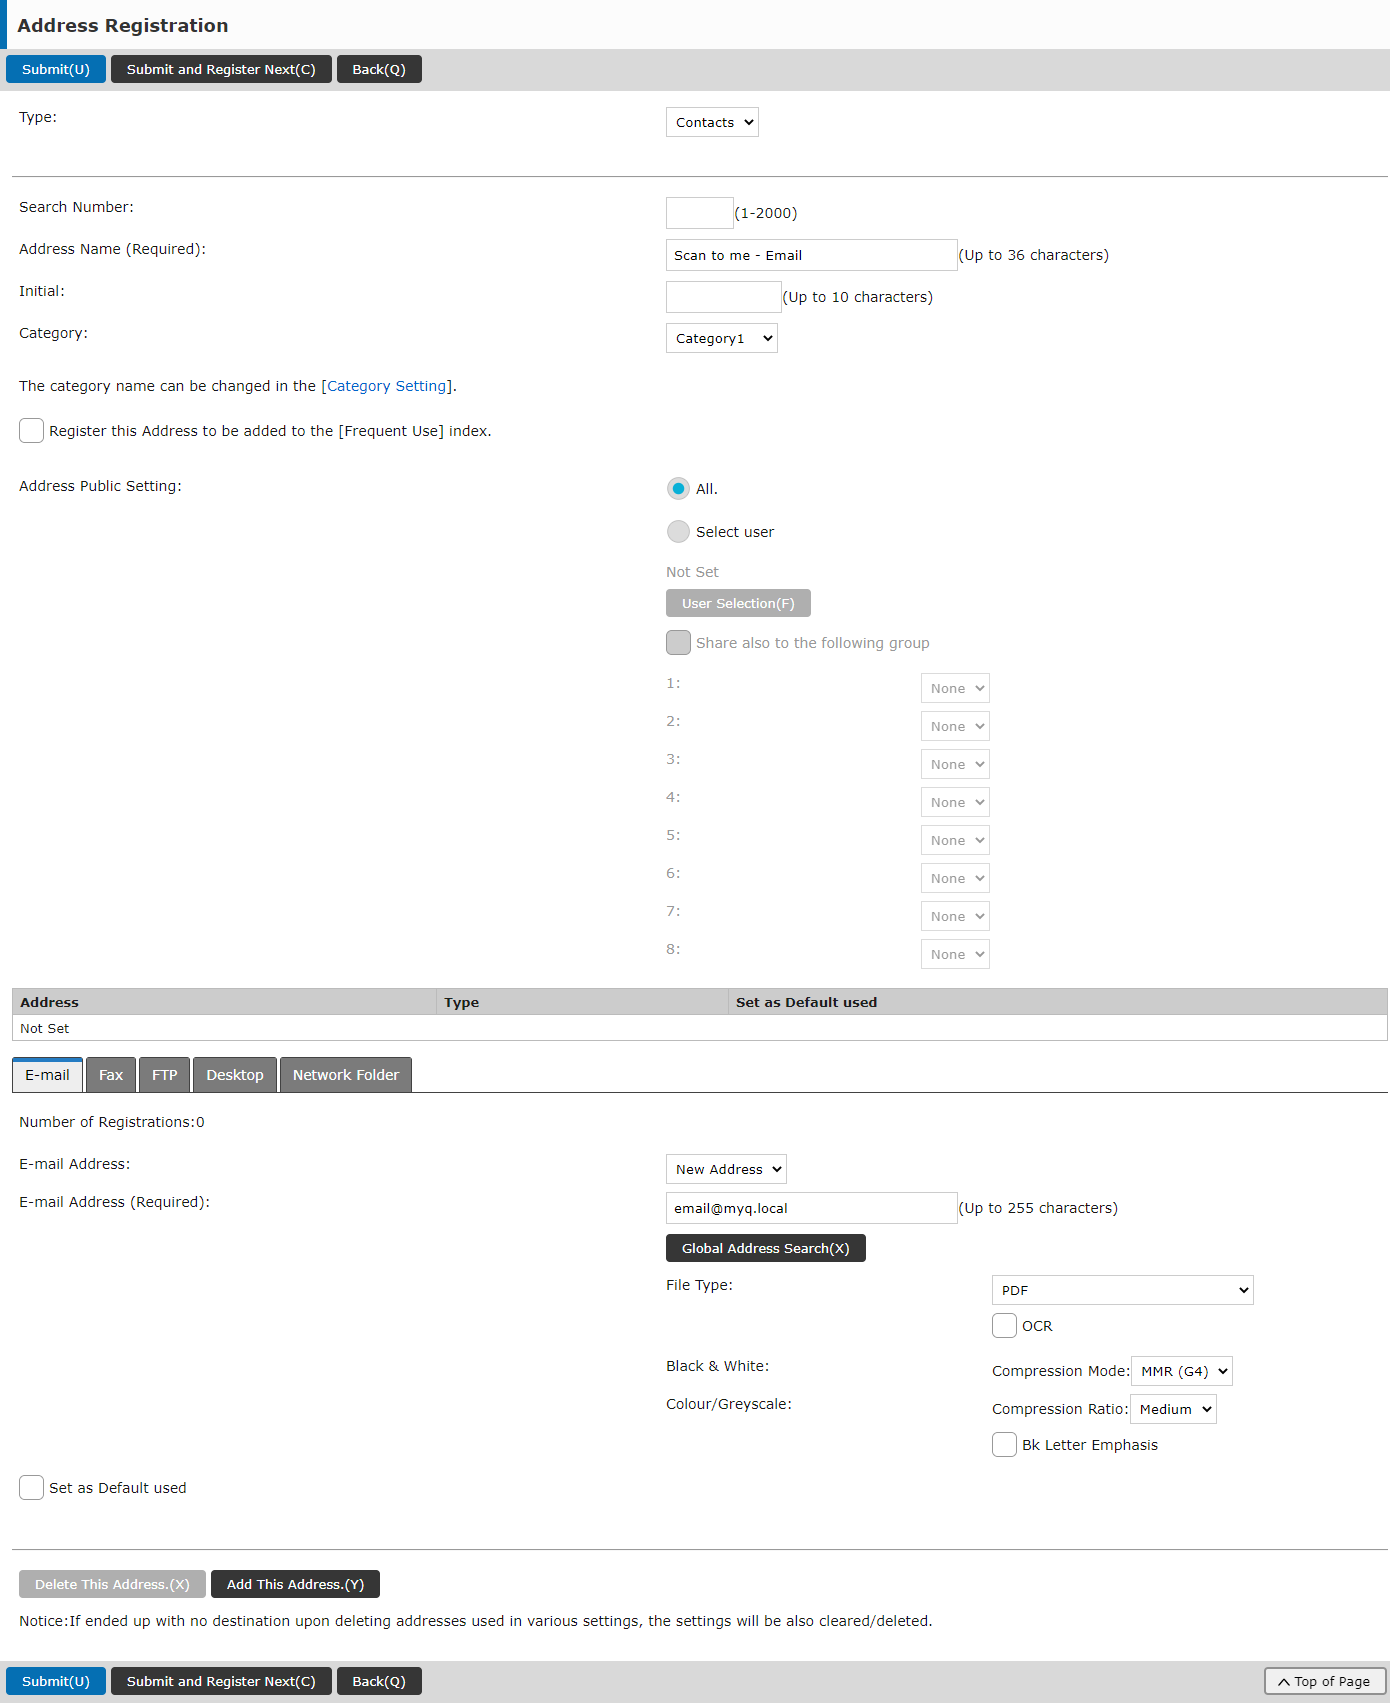
Click Submit and Register Next(C).
Enter a display name (E.g. Scan to me - Folder) for the contact into the Address Name (Required) field. Enter folder@myq.local into the E-mail Address (Required) field. In the Address Public Setting field select All.
Click the Submit(U) button.
Successfully created contacts will now appear in the Address Book.
If you have already registered those destinations in the Address Book in the past, make sure that the Email Address and the Address Public Setting options are correctly set.